
Richard Prendergast Raikes DSO, RN
| Born | 21 Jan 1912 | ||
| Died | 24 May 2005 | (93) |
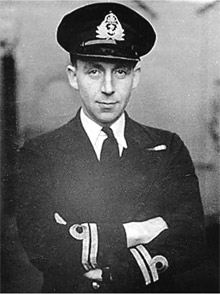 Lt. Richard Prendergast Raikes, RN in Nov 1942. Courtesy of the R. P. Raikes Collection | Ranks
Retired: 1946 Decorations
|
Warship Commands listed for Richard Prendergast Raikes, RN
| Ship | Rank | Type | From | To |
| HMS L 26 (N 26) | Lt. | Submarine | late 1940 | 21 Feb 1941 |
| HMS Tribune (N 76) | Lt. | Submarine | 23 Aug 1941 | 9 Oct 1941 |
| HMS Seawolf (N 47) | Lt. | Submarine | 9 Oct 1941 | Jul 1942 |
| HMS Tuna (N 94) | Lt. | Submarine | 24 Aug 1942 | 15 Mar 1943 |
Career information
We currently have no career / biographical information on this officer.
Events related to this officer
Submarine HMS L 26 (N 26)
10 Dec 1940 (position 0.00, 0.00)
HMS L 26 (Lt. J.B. de B. Kershaw, RN) departed Scapa Flow for Dundee. (1)
11 Dec 1940 (position 0.00, 0.00)
HMS L 26 (Lt. J.B. de B. Kershaw, RN) arrived at Dundee. (1)
26 Dec 1940
HMS L 26 shifted from Dundee to Rosyth where she was to participate in A/S exercises.
[As there are no logs available for this period, no further details can be given.] (2)
13 Feb 1941 (position 0.00, 0.00)
HMS L 26 (Lt. R.P. Raikes, RN) shifted from Rosyth to Dundee. En-route she was attacked by a German Ju-88 bomber which dropped four bombs but they fell wide and caused no damage. (3)
Submarine HMS Tribune (N 76)
26 Aug 1941
HMS Tribune (Lt. R.P. Raikes, RN) conducted exercises off Blyth with a training class of new submariners. (4)
27 Aug 1941
HMS Tribune (Lt. R.P. Raikes, RN) conducted exercises off Blyth with a training class of new submariners. (4)
28 Aug 1941
HMS Tribune (Lt. R.P. Raikes, RN) conducted exercises off Blyth with a training class of new submariners. (4)
29 Aug 1941
HMS Tribune (Lt. R.P. Raikes, RN) conducted exercises off Blyth with a training class of new submariners. (4)
4 Sep 1941
HMS Tribune (Lt. R.P. Raikes, RN) conducted exercises off Blyth with a training class of new submariners. (5)
5 Sep 1941
HMS Tribune (Lt. R.P. Raikes, RN) conducted exercises off Blyth with a training class of new submariners. (5)
9 Sep 1941
HMS Tribune (Lt. R.P. Raikes, RN) conducted exercises off Blyth with a training class of new submariners. (5)
10 Sep 1941
HMS Tribune (Lt. R.P. Raikes, RN) conducted exercises off Blyth with a training class of new submariners. (5)
11 Sep 1941
HMS Tribune (Lt. R.P. Raikes, RN) conducted exercises off Blyth with a training class of new submariners. (5)
16 Sep 1941
HMS Tribune (Lt. R.P. Raikes, RN) conducted exercises off Blyth with a training class of new submariners. (5)
19 Sep 1941
HMS Tribune (Lt. R.P. Raikes, RN) conducted exercises off Blyth with a training class of new submariners. (5)
24 Sep 1941
HMS Tribune (Lt. R.P. Raikes, RN) conducted exercises off Blyth with a training class of new submariners. (5)
1 Oct 1941
HMS Tribune (Lt. R.P. Raikes, RN) proceeded from Blyth to Wallsend. She is finally able to start her refit at the Swan Hunter shipyard. (6)
Submarine HMS Seawolf (N 47)
22 Oct 1941
HMS Seawolf (Lt. R.P. Raikes, RN) conducted exercises off Portsmouth. (7)
25 Oct 1941
HMS Seawolf (Lt. R.P. Raikes, RN) departed Portsmouth for Scapa Flow. She was escorted until Bishops Rock by HMS Kingston Jacinth (Skr. A.G. Day, RNR) when HMS Cutty Sark (Cdr.(retired) R.H. Mack, RN) took over the escort.
For the daily positions of HMS Seawolf during the passage from Portsmouth to Scapa Flow see the map below.
(7)
31 Oct 1941
HMS Seawolf (Lt. R.P. Raikes, RN) arrived at Scapa Flow. After taking on board provisions she departed later the same day for northern Russia.
For the daily positions of HMS Seawolf during this passage see the map below.
(7)
10 Nov 1941
HMS Seawolf (Lt. R.P. Raikes, RN) arrived at Polyarnoe, northern Russia. (8)
17 Nov 1941
HMS Seawolf (Lt. R.P. Raikes, RN) departed Polyarnoe for her 22th war patrol. She was ordered to patrol off northern Norway (Syltefjord).
For the daily and attack positions of HMS Seawolf during this patrol see the map below.
(9)
21 Nov 1941
HMS Seawolf (Lt. R.P. Raikes, RN) attacked an enemy convoy off the Syltefjord. Four torpedoes were fired but no hits were obtained.
The convoy attacked was made up of the Norwegian merchants (in German service) Trondhjemsfjord (6753 GRT, built 1922), Sandnaes (578 GRT, built 1914) and the German merchants Steinbek (2185 GRT, built 1936), Jersbek (2804 GRT, built 1938). They were escorted by the German minesweepers M 30, M 17 and the auxiliary patrol vessels Polarsonne, UJ 1708, UJ 1403.
(All times are zone -3) 0034 hours - Sighted a dim white light to the southward. This proved to be a convoy of three or four ships. Started attack. Enemy course was 090°, speed 10 knots.
0100 hours - Fired four torpedoes from 5000 to 6000 yards. No hits were obtained. Two of the torpedoes had a gyro failure and ran off to starboard. No explosions were heard. (9)
22 Nov 1941
HMS Seawolf (Lt. R.P. Raikes, RN) attacked an enemy convoy off the Syltefjord. It was thought a ship was hit and sunk but this was not the case.
The convoy attacked was made up of Asuncion (4456 GRT, built 1921), Graziella (2149 GRT, built 1917). They were escorted by Togo and Kiautschou.
(All times are zone -3) 0100 hours - Sighted a westbound convoy of four ships (possibly five). Seawolf was on the convoy's starbard beam. Gave chase at high speed and was probably seen as the convy was seen to scatter. The fourth ship was close inshore and was attacked with two torpedoes at 0137 hours. It was thought one of the torpedoes hit as it was thought that a large column of black smoke was seen to rise from it. The target was thought to be a tanker. Retired to seaward to reload. (9)
24 Nov 1941
HMS Seawolf (Lt. R.P. Raikes, RN) again attacked a German convoy off the Syltefjord. Five torpedoes were fired and a hit was claimed but this was not the case.
The convoy attacked was made up of the German merchant Asuncion (4456 GRT, built 1921) and the Norwegian merchant Graziella (2149 GRT, built 1917), the German trawler Kehdingen and the German tanker Eurostadt (1118 GRT, built 1923). They were escorted by the German minesweepers M 30, M 17 and the auxiliary patrol vessel Polarsonne
(All times are zone -3) 0004 hours - Sighted a white light up the Syltefjord.
0015 hours - Sighted a convoy of four ships all burning masthead lights. Started attack on the second ship.
0100 hours - Fired five torpedoes (four were intended) from a range of about 4000 yards. One of the torpedoes was seen to run on the surface to starboard. It is thought a hit was obtained but this was actually not the case. (9)
25 Nov 1941
HMS Seawolf (Lt. R.P. Raikes, RN) ended her 22th war patrol at Polyarnoe. (9)
3 Dec 1941
HMS Seawolf (Lt. R.P. Raikes, RN) conducted exercises off Polyarnoe. (10)
5 Dec 1941
HMS Seawolf (Lt. R.P. Raikes, RN) departed Polyarnoe for her 23th war patrol. She was ordered to patrol off northern Norway.
For the daily and attack positions of HMS Seawolf during this patrol see the map below.
(9)
9 Dec 1941
HMS Seawolf (Lt. R.P. Raikes, RN) attacked a German convoy with a total of six torpedoes off the Båtsfjord, Norway. No hits were obtained.
The convoy attacked was most likely the one made up of the German merchants Theresia L.M. Russ (1694 GRT, built 1927), Steinbek (2185 GRT, built 1936), and Magdalene Vinnen (4525 GRT, built 1922) and the survey vessel Coburg (344 GRT, built 1938). They were escorted by the patrol vessels Nordwind, Nordriff and Polarsonne. This convoy had left Kirkenes at 0630 hours that day and was heading towards Tromsö at a speed of 10 knots.
Later that same night the convoy was attacked again by a submarine and the Steinbek was sunk. The submarine that attacked the convoy was the German U-134. She attacked the convoy thinking it was Allied.
(All times are zone -3) 1944 hours - Sighted a darkened ship on the starboard bow which was thought to be a destroyer. Turned to attack then sighted four ships in line ahead. Enemy course and speed were 325° and 7 knots.
1948 hours - Fired three torpedoes at the second merchant ship. Range was 600 yards. No hits were obtained. Seawolf was heavily rolling in the heavy seas and it was thought this may have effected the torpedoes fired.
1958 hours - Fired three more torpedoes from 3000 yards. Target was again the second ship of the convoy. No hits were obtained. (9)
20 Dec 1941
HMS Seawolf (Lt. R.P. Raikes, RN) ended her 23th war patrol at Polyarnoe. (9)
5 Jan 1942
HMS Seawolf (Lt. R.P. Raikes, RN) departed Polyarnoe for her 24th war patrol. She was ordered to patrol off the Norwegian coast, Vestfjord area.
For the daily positions of HMS Seawolf during this patrol see the map below.
(9)
17 Jan 1942
HMS Seawolf (Lt. R.P. Raikes, RN) was ordered to patrol off Fro Havet, Norway. (9)
23 Jan 1942
HMS Seawolf (Lt. R.P. Raikes, RN) was ordered to leave her patrol area and proceed to Lerwick. (9)
26 Jan 1942
Due to heavy weather, HMS Seawolf (Lt. R.P. Raikes, RN), was ordered to shelter at Sullom Voe. (9)
27 Jan 1942
HMS Seawolf (Lt. R.P. Raikes, RN) ended her 24th war patrol at Lerwick having proceeded there from Sullom Voe escorted by HMS Bandit. (9)
29 Jan 1942
HMS Seawolf (Lt. R.P. Raikes, RN) departed Lerwick for Scapa Flow. She was escorted by HMS Cava (T/Lt. E.D.J. Cox, RNR). (11)
30 Jan 1942
HMS Seawolf (Lt. R.P. Raikes, RN) arrived at Scapa Flow. She departed for Holy Loch later the same day escorted by HMS White Bear (Cdr.(Retd.) C.C. Flemming, RN). (11)
1 Feb 1942
HMS Seawolf (Lt. R.P. Raikes, RN) arrived at Holy Loch. (12)
11 Feb 1942
HMS Seawolf (Lt. R.P. Raikes, RN) was docked at Rothesay. (12)
14 Feb 1942
HMS Seawolf (Lt. R.P. Raikes, RN) was undocked. After exercises she returned to Holy Loch. (12)
25 Feb 1942
HMS Seawolf (Lt. R.P. Raikes, RN) departed Holy Loch for Lerwick. She was escorted by HMS Peterhead (Lt. W.R. Tadman, RNR). (12)
27 Feb 1942
HMS Seawolf (Lt. R.P. Raikes, RN) arrived at Lerwick. (12)
1 Mar 1942
HMS Seawolf (Lt. R.P. Raikes, RN) departed Lerwick for her 25th war patrol. She was ordered to patrol off Fro Havet, Norway.
For the daily and attack positions during this patrol see the map below.
(9)
6 Mar 1942 (position 64.00, 9.30)
At 1740 hours, HMS Seawolf (Lt. R.P. Raikes, RN), sighted the German battleship Tirpitz along with her escorting destroyers Paul Jacobi, Friedrich Ihn, Hermann Schoemann and Z-25. The German ships had sailed from Trondheim, Norway with the intention to attack convoy PQ-12. An enemy report was sent at 1801 hours. (9)
18 Mar 1942 (position 63.01, 3.24)
HMS Seawolf (Lt. R.P. Raikes, RN) attacked the German submarine U-586 with six torpedoes in the Norwegian Sea in position 63°01'N, 03°24'E. No hits were obtained.
(All times are zone -1) 1301 hours - Sighted a U-boat on the surface. Enemy course 272°, speed 10 knots. Started attack.
1325 hours - Fired six torpedoes from a range of 6300 yards. 7min 21sec after firing a very heavy explosion was heard. Smoke was seen on the bearing of the target that had disappeared. It is thought the enemy was sunk. (9)
19 Mar 1942
HMS Seawolf (Lt. R.P. Raikes, RN) ended her 25th war patrol at Lerwick. (9)
2 Apr 1942
HMS Seawolf (Lt. R.P. Raikes, RN) departed Lerwick for her 26th war patrol. She was ordered to patrol off Fro Havet, Norway.
For the daily positions of HMS Seawolf during this patrol see the map below.
(9)
22 Apr 1942
HMS Seawolf (Lt. R.P. Raikes, RN) ended her 26th war patrol at Lerwick. She departed for Holy Loch later the same day escorted by HMS White Bear (Cdr. (retired) C.C. Flemming, RN). (9)
24 Apr 1942
HMS Seawolf (Lt. R.P. Raikes, RN) arrived at Holy Loch. (13)
2 May 1942
HMS Seawolf (Lt. R.P. Raikes, RN) was docked at Kames Bay. (14)
3 May 1942
HMS Seawolf (Lt. R.P. Raikes, RN) was undocked. (14)
13 May 1942
HMS Seawolf (Lt. R.P. Raikes, RN) departed Holy Loch for Lerwick. She made the passage together with HMS Trident (Lt. A.R. Hezlet, DSC, RN). They were escorted by HMS White Bear (Cdr.(Retd.) C.C. Flemming, RN). (14)
15 May 1942
HMS Seawolf (Lt. R.P. Raikes, RN) arrived at Lerwick. After a few hours she departed for her 27th war patrol. She was to proceed to Seidesfjord, Iceland from where she was to join convoy PQ 16 during passage to northern Russia.
For the daily positions of HMS Seawolf during this patrol see the map below.
(9)
20 May 1942
HMS Seawolf (Lt. R.P. Raikes, RN) arrived at Seidesfjord. (9)
22 May 1942
HMS Seawolf (Lt. R.P. Raikes, RN) departed from Seidesfjord, Iceland to join convoy PQ 16 at sea. (9)
23 May 1942
At 0454 hours HMS Seawolf (Lt. R.P. Raikes, RN) joins convoy PQ 16 in position 66°52'N, 15°00'W. (9)
30 May 1942
HMS Seawolf (Lt. R.P. Raikes, RN) ended her 27th war patrol at Polyarnoe, northern Russia. (9)
13 Jun 1942
HMS Seawolf (Lt. R.P. Raikes, RN) departed Polyarnoe for her 28th war patrol. She was to perform a short anti-U-boat patrol to the north-east of Murmansk.
For the daily positions of HMS Seawolf during this patrol see the map below.
(9)
20 Jun 1942
HMS Seawolf (Lt. R.P. Raikes, RN) ended her 28th war patrol at Polyarnoe. (9)
26 Jun 1942
HMS Seawolf (Lt. R.P. Raikes, RN) departed Polyarnoe for her 29th war patrol. She was ordered to provide cover for convoy's QP 13 and PQ 17 and return to the U.K. afterwards.
[As there is are no logs available for July 1942 onwards and the patrol report does not give positions no map for this patrol can be displayed.] (9)
7 Jul 1942
HMS Seawolf (Lt. R.P. Raikes, RN) was ordered to proceed to Lerwick. (9)
13 Jul 1942
HMS Seawolf (Lt. R.P. Raikes, RN) ended her 29th war patrol at Lerwick. (9)
15 Jul 1942
HMS Seawolf (Lt. R.P. Raikes, RN) departed Lerwick for Holy Loch. She was escorted by HMS Cutty Sark (Cdr.(retired) R.H. Mack, RN). (15)
17 Jul 1942
HMS Seawolf (Lt. R.P. Raikes, RN) arrived at Holy Loch. (15)
Submarine HMS Tuna (N 94)
6 Sep 1942
With her refit completed, HMS Tuna (Lt. R.P. Raikes, RN), shifted from the Tyne to Blyth. (16)
14 Sep 1942
With her refit completed, HMS Tuna (Lt. R.P. Raikes, RN), departed from Blyth for Holy Loch to start the work-up period for her 2nd commission. She made the passage together with HMS Sealion (Lt. D. Lambert, DSC, RN). They were escorted by HMS ML 300 (T/Lt. F.C.R. Piesse, RNVR) until 0725/15 when HMS Loch Monteith (T/Lt. K.W. Richardson, RNR) took over the escort. (16)
19 Sep 1942
HMS Tuna (Lt. R.P. Raikes, RN) arrived at Holy Loch to begin a work-up period on the Scottish west coast. (16)
21 Sep 1942 (position 0.00, 0.00)
HMS Tuna (Lt. R.P. Raikes, RN) conducted exercises in the Clyde area. (16)
22 Sep 1942 (position 0.00, 0.00)
HMS Tuna (Lt. R.P. Raikes, RN) conducted exercises in the Clyde area. (16)
24 Sep 1942
HMS Tuna (Lt. R.P. Raikes, RN) conducted S.T.U. trials in the Clyde area. Upon completion of these trials HMS Tuna proceeded to Campbeltown. (16)
25 Sep 1942 (position 0.00, 0.00)
HMS Tuna (Lt. R.P. Raikes, RN) conducted exercises off Campbeltown. Upon completion of these exercises HMS Tuna proceeded to Holy Loch. (16)
27 Sep 1942 (position 0.00, 0.00)
HMS Tuna (Lt. R.P. Raikes, RN) shifted from Holy Loch to Arrochar. (16)
28 Sep 1942 (position 0.00, 0.00)
HMS Tuna (Lt. R.P. Raikes, RN) conducted torpedo discharge trials off Arrochar. (16)
30 Sep 1942 (position 0.00, 0.00)
HMS Tuna (Lt. R.P. Raikes, RN) conducted torpedo discharge trials off Arrochar. (16)
2 Oct 1942 (position 0.00, 0.00)
HMS Tuna (Lt. R.P. Raikes, RN) conducted torpedo discharge trials off Arrochar. (17)
3 Oct 1942 (position 0.00, 0.00)
HMS Tuna (Lt. R.P. Raikes, RN) conducted torpedo discharge trials off Arrochar. (17)
5 Oct 1942 (position 0.00, 0.00)
HMS Tuna (Lt. R.P. Raikes, RN) conducted torpedo discharge trials off Arrochar. (17)
6 Oct 1942 (position 0.00, 0.00)
HMS Tuna (Lt. R.P. Raikes, RN) shifted from Arrochar to Holy Loch. (17)
8 Oct 1942 (position 0.00, 0.00)
HMS Tuna (Lt. R.P. Raikes, RN) conducted exercises in the Clyde area. (17)
9 Oct 1942 (position 0.00, 0.00)
HMS Tuna (Lt. R.P. Raikes, RN) conducted exercises in the Clyde area. Upon completion of these exercises HMS Tuna proceeded to Rothesay where she was immediately docked in AFD 7. (17)
10 Oct 1942 (position 0.00, 0.00)
HMS Tuna (Lt. R.P. Raikes, RN) is undocked at Rothesay following which she immediately proceeded to Holy Loch. (17)
14 Oct 1942 (position 0.00, 0.00)
HMS Tuna (Lt. R.P. Raikes, RN) conducted exercises in the Clyde area. (17)
16 Oct 1942 (position 0.00, 0.00)
HMS Tuna (Lt. R.P. Raikes, RN) conducted attack exercises in the Clyde area with HMS Z 5 (T/A/Lt.Cdr. S.T. Wenlock, RNR) serving as target. (17)
18 Oct 1942 (position 0.00, 0.00)
HMS Tuna (Lt. R.P. Raikes, RN) conducted noise trials at Loch Goil. (17)
23 Oct 1942
HMS Tuna (Lt. R.P. Raikes, RN) departed from Holy Loch for her 15th war patrol. She is ordered to patrol off the Norwegian Coast (to intercept the German heavy cruiser Admiral Scheer that is on passage from Northern Norway to Germany) and in the Norwegian Sea (to give cover for the passage of 36 merchant ships to and from Murmansk).
During the passage to Lerwick she was escorted by HMS La Capricieuse (Lt.Cdr. G.W. Dobson, RNR). HMS H 32 (Lt. C. Gordon, RN) was also in company, she was on passage to Scapa Flow.
For the daily and attack positions of HMS Tuna during this patrol see the map below.
(18)
25 Oct 1942
HMS Tuna (Lt. R.P. Raikes, RN) makes a short call at Lerwick before proceeding on patrol. (18)
6 Nov 1942 (position 76.08, 14.05)
HMS Tuna (Lt. R.P. Raikes, RN) fires two salvoes of three torpedoes each against German U-boat U-625 in position 76°08'N, 14°05'E. Both salvoes missed their target.
(All times are zone -1)
0154 hours - Sighted a German U-boat bearing 120°. Turned towards and started attack.
0204 hours - Fired three torpedoes but the enemy was seen to increase speed so at ......
0206 hours - Fired three more torpedoes but now the enemy changed course so all torpedoes fired missed their target.
Dived so not giving the enemy the opportunity for a counter attack.
Note: the attacks were not noted by the Germans. (18)
16 Nov 1942
HMS Tuna (Lt. R.P. Raikes, RN) ended her 15th war patrol at Lerwick. (18)
17 Nov 1942
HMS Tuna (Lt. R.P. Raikes, RN) departed from Lerwick for Holy Loch. (19)
19 Nov 1942
HMS Tuna (Lt. R.P. Raikes, RN) arrived at Holy Loch. (19)
22 Nov 1942 (position 0.00, 0.00)
HMS Tuna (Lt. R.P. Raikes, RN) shifted from Holy Loch to Rothesay where she was immediately docked in AFD 7. (19)
24 Nov 1942 (position 0.00, 0.00)
HMS Tuna (Lt. R.P. Raikes, RN) is undocked at Rothesay and immediately proceeded to Holy Loch. (19)
26 Nov 1942 (position 0.00, 0.00)
HMS Tuna (Lt. R.P. Raikes, RN) conducted noise trials at Loch Goil. (19)
30 Nov 1942
For the daily positions of HMS Tuna during her 16th war patrol see the map below.
(18)
30 Nov 1942
HMS Tuna (Lt. R.P. Raikes, RN) departed from Holy Loch for her 16th war patrol. She is to perform a special operation in the Bay of Biscay. Before she departed from for patrol exercises were carried out in Inchmarnock Water.
During the passage south through the Irish Sea she was escorted by HMS White Bear (Cdr. (Retd.) C.C. Flemming, RN). (18)
7 Dec 1942
During the evening of 7 December 1942 HMS Tuna (Lt. R.P. Raikes, RN) delivered the "Cockleshell Heroes" to the mouth of the Gironde for their daring raid on Bordeaux, France in which 6 German ships were mined. The raid was called Operation Frankton, and only two of the 12 men returned. (18)
13 Dec 1942
HMS Tuna (Lt. R.P. Raikes, RN) ended her 16th war patrol at Plymouth. At the Devonport Dockyard she is to be fitted with RDF (radar). (18)
26 Jan 1943
HMS Tuna (Lt. R.P. Raikes, RN) conducted RDF trials of Plymouth. (20)
27 Jan 1943
HMS Tuna (Lt. R.P. Raikes, RN) departed Plymouth for Holy Loch. She was escorted by HMS Cutty Sark (Cdr.(Retd.) R.H. Mack, RN). (20)
29 Jan 1943
HMS Tuna (Lt. R.P. Raikes, RN) arrived at Holy Loch. (20)
30 Jan 1943 (position 0.00, 0.00)
HMS Tuna (Lt. R.P. Raikes, RN) conducted exercises in the Clyde area. (20)
31 Jan 1943 (position 0.00, 0.00)
HMS Tuna (Lt. R.P. Raikes, RN) conducted exercises in the Clyde area. (20)
5 Feb 1943 (position 0.00, 0.00)
HMS Tuna (Lt. R.P. Raikes, RN) conducted exercises in the Clyde area. (21)
7 Feb 1943 (position 0.00, 0.00)
HMS Tuna (Lt. R.P. Raikes, RN) conducted exercises in the Clyde area. Upon completion of these exercises HMS Tuna proceeded to Campbeltown. (21)
8 Feb 1943 (position 0.00, 0.00)
HMS Tuna (Lt. R.P. Raikes, RN) participated in A/S exercises off Campbeltown. (21)
9 Feb 1943 (position 0.00, 0.00)
HMS Tuna (Lt. R.P. Raikes, RN) participated in A/S exercises off Campbeltown. Upon completion of these exercises HMS Tuna proceeded to Holy Loch. (21)
14 Feb 1943 (position 0.00, 0.00)
HMS Tuna (Lt. R.P. Raikes, RN) is docked in a floating dock at Gareloch. (21)
16 Feb 1943 (position 0.00, 0.00)
HMS Tuna (Lt. R.P. Raikes, RN) is undocked and immediately proceeded to Holy Loch. (21)
21 Feb 1943 (position 0.00, 0.00)
HMS Tuna (Lt. R.P. Raikes, RN) conducted speed trials on the measured mile in Loch Long. (21)
22 Feb 1943 (position 0.00, 0.00)
HMS Tuna (Lt. R.P. Raikes, RN) conducted exercises in the Clyde area. (21)
25 Feb 1943
HMS Tuna (Lt. R.P. Raikes, RN) departed from Holy Loch for her 17th war patrol. She was ordered to patrol off the Norwegian Coast.
During the passage to Lerwick she was escorted by HMS Scalby Wyke (Skr. A. Mackay, RNR).
For the daily positions of HMS Tuna during this patrol see the map below.
(18)
27 Feb 1943
HMS Tuna (Lt. R.P. Raikes, RN) arrived at Lerwick. (18)
28 Feb 1943
After making good a small defect, HMS Tuna (Lt. R.P. Raikes, RN), departed Lerwick for her patrol area. (18)
11 Mar 1943
HMS Tuna (Lt. R.P. Raikes, RN) ended her 17th war patrol at Lerwick. (18)
12 Mar 1943
HMS Tuna (Lt. R.P. Raikes, RN) departed from Lerwick bound for Holy Loch. She made the passage together with HMS Simoom (Lt. C.H. Rankin, RN) and HMS Sportsman (Lt. R. Gatehouse, DSC, RN). They were escorted by HNoMS King Haakon VII. (22)
14 Mar 1943
HMS Tuna (Lt. R.P. Raikes, RN) arrived at Holy Loch. (23)
Sources
- ADM 199/373
- ADM 199/2560
- ADM 199/400
- ADM 173/17068
- ADM 173/17069
- ADM 173/17070
- ADM 173/16975
- ADM 173/16976
- ADM 199/1836
- ADM 173/16977
- ADM 173/17561
- ADM 173/17562
- ADM 173/17564
- ADM 173/17565
- ADM 199/424
- ADM 173/17675
- ADM 173/17676
- ADM 199/1844
- ADM 173/17677
- ADM 173/18304
- ADM 173/18305
- ADM 199/627
- ADM 173/18307
ADM numbers indicate documents at the British National Archives at Kew, London.
You can help improve officers Richard Prendergast Raikes's page
Click here to Submit events/comments/updates for this officer.
Please use this if you spot mistakes or want to improve his page.