
Allied Warships
HMS Queen Elizabeth (00)
Battleship of the Queen Elizabeth class

HMS Queen Elizabeth as seen during the Second World War.
| Navy | The Royal Navy |
| Type | Battleship |
| Class | Queen Elizabeth |
| Pennant | 00 |
| Built by | Portsmouth Dockyard (Portsmouth, U.K.) |
| Ordered | Jun 1912 |
| Laid down | 21 Oct 1912 |
| Launched | 16 Oct 1913 |
| Commissioned | 22 Dec 1914 |
| End service | 10 Aug 1945 |
| History | Rebuilt twice between Wars. In the second rebuild both HMS Queen Elizabeth and HMS Valiant remained almost identical sister ships, the difference being HMS Queen Elizabeth had a tripod mainmast, HMS Valiant a pole mainmast. The changes included improvements to the main guns, allowing 30 degree elevation increasing their range to 32,000 yards. All the secondary armament was replaced with 20 4.5 inch AA gun mounts (10 x 2) (as installed on the Illustious-Class aircraft carriers). 32 2 pdr pom pom guns (4 x 8) were fitted arround the funnel, 16 0.5" (4x4) machine guns were fitted, two on B and 2 on X turret roofs, but these were quickly removed. New aircraft arrangements were made to accommodate 3 aircraft with an athwartships catapult. Throughout the war changes were being made to the anti-aircraft weapons as the threat increased. Her final 20 mm Oerlikons anti-aircraft fit was 52 (26 x 2), the quad machine-guns having been removed. Four HA/LA DCT (High Angle/Low Angle Director Control Tower) were fitted two above and forward of the bridge and two aft. Their heights had to be staggered because of their close proximity. Following the start of the war a Type 273 SR(Surface Radar) on the foremast, a Type SR (Surface Radar) 284 radar on the LA DCT (Low Angle Director Control Tower) and a Type HA (High Angle) 285 on each of the HA DCT's, a Type 291 AW (Air Warning) on the mastheads and an IFF interrogator. Decommissioned to reserve on 10 August 1945. Sold on 19 March 1948 to Arnott Young, arrived at Dalmuir for scrapping on 7 July 1948. |
Commands listed for HMS Queen Elizabeth (00)
Please note that we're still working on this section
and that we only list Commanding Officers for the duration of the Second World War.
| Commander | From | To | |
| 1 | Cdr. Renfrew Gotto, RN | 6 Jun 1940 | 31 Oct 1940 |
| 2 | Capt. Claud Barrington Barry, DSO, RN | 31 Oct 1940 | 3 Apr 1942 |
| 3 | A/Capt. Renfrew Gotto, DSO, RN | 3 Apr 1942 | 5 Dec 1942 |
| 4 | Cdr. Reginald Cecil Haskett-Smith, DSO, RN | 5 Dec 1942 | 16 Jun 1943 |
| 5 | Capt. Horace Geoffrey Norman, RN | 16 Jun 1943 | 1 Apr 1945 |
| 6 | Capt. Robert Meyrick Ellis, DSO, RN | 1 Apr 1945 | 13 Feb 1946 |
You can help improve our commands section
Click here to Submit events/comments/updates for this vessel.
Please use this if you spot mistakes or want to improve this ships page.
Notable events involving Queen Elizabeth include:
The page of HMS Queen Elizabeth was last updated in June 2022.
11 Dec 1940
HMS Queen Elizabeth (Capt. C.B. Barry, DSO, RN) was temporarily commissioned with a steaming party. (1)
12 Dec 1940
After a delay of 24 hours due to a reported enemy submarine the British battleship HMS Queen Elizabeth (Capt. C.B. Barry, DSO, RN) departed Portsmouth for Rosyth where she was to complete her reconstruction.
She was escorted by the destroyers HMS Kashmir (Cdr. H.A. King, RN), HMS Kipling (Cdr. A. St. Clair-Ford, RN), HMS Jupiter (Lt.Cdr. N.V.J.T. Thew, RN) and HMS Punjabi (Cdr. J.T. Lean, DSO, RN) and the escort destroyers HMS Cattistock (Lt.Cdr R.A. Ewing, RN), HMS Cleveland (Lt.Cdr. W.S. Clouston, RN), HMS Fernie (Lt.Cdr. R.McC.P. Jonas, RN) and HMS Holderness (Lt.Cdr. D.E. Holland-Martin, DSC, RN).
Around 1600A/13 the original escort was relieved by the destroyer HMS Brilliant (Lt.Cdr. F.C. Brodrick, RN) and the escort destroyers HMS Exmoor (Lt.Cdr. R.T. Lampard, RN), HMS Pytchley (Lt.Cdr. H. Unwin, DSC, RN) and HMS Southdown (Cdr. E.R. Condor, DSO, DSC, RN).
At 1630A/14 the light cruiser HMS Nigeria (Capt. J.G.L. Dundas, RN) and the AA cruiser HMS Curacoa (Capt. C.C. Hughes-Hallett, RN) joined the escort coming from Scapa Flow.
The battleship and her escort arrived at Rosyth around 1330A/15. HMS Nigeria had parted company around 1115A/15 and arrived back at Scapa Flow later the same day.
24 Dec 1940
HMS Queen Elizabeth (Capt. C.B. Barry, DSO, RN) is docked in No.2 Dock at the Rosyth Dockyard. (1)
31 Jan 1941
HMS Queen Elizabeth (Capt. C.B. Barry, DSO, RN) is undocked. (2)
18 Feb 1941
HMS Queen Elizabeth (Capt. C.B. Barry, DSO, RN) conducted D/G trials in the Firth of Forth. (3)
20 Feb 1941
With her reconstruction completed, HMS Queen Elizabeth (Capt. C.B. Barry, DSO, RN), departed Rosyth around 1505A/20 for Scapa Flow where she is to work-up.
She is escorted by the light cruiser HMS Dido (Capt. H.W.U. McCall, RN) and the destroyers HMS Somali (Lt.Cdr. T.H.B. Shaw, DSC, RN), HMS Bedouin (Cdr. J.A. McCoy, DSO, RN) and HMAS Napier (Capt. S.H.T. Arliss, RN).
They arrived at Scapa Flow around 0840A/21.
HMS Queen Elizabeth then conducted D/G trials at Scapa Flow. (4)
24 Feb 1941
HMS Queen Elizabeth (Capt. C.B. Barry, DSO, RN) conducted catapult and steering trials at Scapa Flow. Aslo D/F calibration trials were carried out. (3)
25 Feb 1941
HMS Queen Elizabeth (Capt. C.B. Barry, DSO, RN) conducted full power and gunnery trials off Scapa Flow. She was escorted by the destroyers HMAS Napier (Capt. S.H.T. Arliss, RN), HMAS Nizam (Lt.Cdr. M.J. Clark, RAN), HMS Bedouin (Cdr. J.A. McCoy, DSO, RN) and HMS Matabele (Cdr. R.St.V. Sherbrooke, DSO, RN). The battleship returned to Scapa Flow with some turbine defects. (5)
12 Mar 1941
With her turbine repairs completed, HMS Queen Elizabeth (Capt. C.B. Barry, DSO, RN), conducted some trials and gunnery exercises at Scapa Flow. (6)
15 Mar 1941
At Scapa Flow, HMS Queen Elizabeth (Capt. C.B. Barry, DSO, RN), conducted a submarine spotting exercises during which HMS L 23 (Lt. L.F.L. Hill, RNR) acted as target. On completion of the exercises gunnery exercises were carried out. (6)
18 Mar 1941
HMS Queen Elizabeth (Capt. C.B. Barry, DSO, RN) conducted trials and exercises off Scapa Flow.
She returned to Scapa Flow early the following day.
[No info currently available to us on her destroyer escort.] (6)
19 Mar 1941
The battleship HMS Queen Elizabeth (Capt. C.B. Barry, DSO, RN) escorted by the destoyers HMS Inglefield (Capt. P. Todd, DSO, RN), HMS Arrow (Cdr. R.E. Hyde-Smith, RN), HMS Echo (Lt.Cdr. C.H.deB. Newby, RN), HMS Eclipse (Lt.Cdr. I.T. Clark, RN), HMS Electra (Cdr. C.W. May, RN) and HMS Eskimo (Lt.Cdr. E.G. Le Geyt, RN) departed Scapa Flow at 0515/19. At 0630 hours they were joined at sea by the battlecruiser HMS Hood (Capt. R. Kerr, CBE, RN, flying the flag of Vice-Admiral W.J. Whitworth, CB, DSO, RN) which had departed Rosyth the previous afternoon. The destroyer HMAS Nestor (Cdr. G.S. Stewart, RAN) and the escort destroyers HMS Eridge (Lt.Cdr. W.F.N. Gregory-Smith, RN) and HMS Whaddon (Lt.Cdr. P.G. Merriman, RN), which had been escorting HMS Hood then proceeded to Scapa Flow.
The ships then proceeded to the area to the south of Iceland where they were to join the battleship HMS Nelson and her escorting destroyers which is already patrolling there to intercept the German battlecruisers Scharnhorst and Gneisenau if they were trying to return to Germany.
23 Mar 1941
Battleship HMS Nelson (Capt. G.J.A. Miles, RN, flying the flag of A/Adm. J.C. Tovey, KCB, DSO, RN) and her escorting destroyers; HMS Active (Lt.Cdr. M.W. Tomkinson, RN), HMS Boadicea (A/Cdr. E.C.L. Turner, RN) and HMS Escapade (Lt.Cdr. E.N.V. Currey, DSC, RN) arrived at Scapa Flow around 0030A/23.
Battlecruiser HMS Hood (Capt. R. Kerr, CBE, RN, flying the flag of Vice-Admiral W.J. Whitworth, CB, DSO, RN), battleship HMS Queen Elizabeth (Capt. C.B. Barry, DSO, RN) and their escorting destoyers; HMS Inglefield (Capt. P. Todd, DSO, RN), HMS Echo (Lt.Cdr. C.H.deB. Newby, RN), HMS Electra (Cdr. C.W. May, RN) and HMS Eskimo (Lt.Cdr. E.G. Le Geyt, RN) arrived at Scapa Flow around 0700A/23.
Destroyers HMS Arrow (Cdr. R.E. Hyde-Smith, RN) and HMS Eclipse (Lt.Cdr. I.T. Clark, RN), which had been detached by the Hood force, first had to proceed to Lough Foyle to refuel, after which they departed that place for Scapa Flow arriving around 1145A/23 and 1900A/23, respectively.
24 Mar 1941
The Commander-in-Chief of the Home Fleet, A/Adm. J.C. Tovey, KCB, DSO, RN, transferred his flag from HMS Nelson (Capt. G.J.A. Miles, RN) to HMS Queen Elizabeth (Capt. C.B. Barry, DSO, RN). (7)
28 Mar 1941
In the morning, HMS Queen Elizabeth (Capt. C.B. Barry, DSO, RN, flying the flag of A/Adm. J.C. Tovey, KCB, DSO, RN), conducted gunnery and aircraft launching and recovering exercises at Scapa Flow. These were followed by more gunnery exercises off Scapa Flow in the afternoon. [No info available on any escorting destroyers.] (6)
1 Apr 1941
The Commander-in-Chief of the Home Fleet, A/Adm. J.C. Tovey, KCB, DSO, RN, transferred his flag from HMS Queen Elizabeth (Capt. C.B. Barry, DSO, RN) to HMS King George V (Capt. W.R. Patterson, CVO, RN). (8)
2 Apr 1941
Around 1645A/2, the battleship HMS Queen Elizabeth (Capt. C.B. Barry, DSO, RN) departed Scapa Flow for Halifax, Nova Scotia. She is escorted by the destroyers HMS Inglefield (Capt. P. Todd, DSO, RN), HMS Eclipse (Lt.Cdr. I.T. Clark, RN) and HMS Eskimo (Lt.Cdr. E.G. Le Geyt, RN).
At 0400A/5, the destroyers parted company. HMS Inglefield and HMS Eclipse set course for Reykjavik, Iceland while HMS Eskimo set course to return to Scapa Flow.
At 2215A/5, HMS Queen Elizabeth altered course to the south-east having been ordered by the Admiralty to proceed to position 46°00'N, 21°30'W. The following day this position is adjusted to 46°00'N, 21°00'W where HMS Queen Elizabeth was to make rendezvous at 0800A/8 with the battlecruiser HMS Repulse (Capt. W.G. Tennant, CB, MVO, RN) and her escorting destroyers, HMS Highlander (Cdr. S. Boucher, RN), HMS Fortune (Lt.Cdr. E.N. Sinclair, RN) and HMS Fury (Lt.Cdr. T.C. Robinson, RN). (9)
4 Apr 1941
The battlecruiser HMS Repulse (Capt. W.G. Tennant, CB, MVO, RN), aircraft carrier HMS Argus (Capt. T.O. Bulteel, RN), and troopship Narkunda (British, 16632 GRT, built 1920) departed Gibraltar to proceed to the U.K. They were escorted by the destroyers HMS Highlander (Cdr. S. Boucher, RN), HMS Fury (Lt.Cdr. T.C. Robinson, RN) and HMS Velox (Lt.Cdr. E.G. Roper, DSC, RN).
Aircraft carrier HMS Furious (Capt. A.G. Talbot, DSO, RN) departed later with ' Force H ' to swap some aircraft at sea with HMS Ark Royal (Capt. L.E.H. Maund, RN). After doing so she split off from ' Force H ' escorted by destroyers HMS Faulknor (Capt. A.F. de Salis, RN) and HMS Fortune (Lt.Cdr. E.N. Sinclair, RN), and joined at sea around 0700A/5. HMS Faulknor then set course to return to Gibraltar.
At 1100A/7, in position 41°00'N, 22°30'W the heavy cruiser HMS London (Capt. R.M. Servaes, CBE, RN) joined after which HMS Repulse, HMS Highlander, HMS Fortune and HMS Fury were detached with orders to proceed to position 46°00'N, 21°00'W to make rendezvous with the battleship HMS Queen Elizabeth (Capt. C.B. Barry, DSO, RN). HMS Velox was ordered to return to Gibraltar.
Around 0800N/8, HMS Repulse, HMS Highlander, HMS Fortune and HMS Fury made rendez-vous with HMS Queen Elizabeth.
Around 2000N/8, HMS Repulse, HMS Highlander, HMS Fortune and HMS Fury set course to return to Gibraltar.
Around 1430A/12 HMS Repulse, HMS Highlander and HMS Fortune arrived at Gibraltar. HMS Fury had been detached around 2230A/11.
10 Apr 1941
Around 2200A/10, HMS Queen Elizabeth (Capt. C.B. Barry, DSO, RN) departed her patrol area to proceed to Gibraltar.
Around 1000A/13, she was joined by the destroyers HMS Boreas (Lt.Cdr. D.H. Maitland-Makgill Crichton, DSC, RN) and HMS Velox (Lt.Cdr. E.G. Roper, DSC, RN).
Around 1400A/13, the destroyer HMS Fury (Lt.Cdr. T.C. Robinson, RN) also joined.
HMS Queen Elizabeth, HMS Fury, HMS Boreas and HMS Velox arrived at Gibraltar around 1000A/14. (10)
15 Apr 1941
Around 2215A/15, the battleship HMS Queen Elizabeth (Capt. C.B. Barry, DSO, RN) departed Gibraltar for Freetown. She is escorted by the destroyers HMS Fury (Lt.Cdr. T.C. Robinson, RN), HMS Velox (Lt.Cdr. E.G. Roper, DSC, RN) and HMS Wrestler (Lt. E.L. Jones, DSC, RN).
Around 1000A/17, HMS Wrestler was detached for an RD/F exercise with HMS Queen Elizabeth. On completion of the exercise, HMS Wrestler set course to return to Gibraltar.
Around 1500A/17, HMS Velox parted company to return to Gibraltar.
Around 1930A/17, HMS Fury parted company to return to Gibraltar.
Around 0830Z/19, the destroyers HMS Foxhound (Cdr. G.H. Peters, DSC, RN) and HMS Duncan (Lt.Cdr. A.N. Rowell, RN) joined coming from Freetown.
Around 0800N/21, HMS Queen Elizabeth, HMS Foxhound and HMS Duncan arrived at Freetown. HMS Queen Elizabeth then commenced cleaning her boilers. (11)
25 Apr 1941
Around 0700N/25, the battleship HMS Queen Elizabeth (Capt. C.B. Barry, DSO, RN) departed Freetown for Gibraltar. She was escorted by the destroyers HMS Foxhound (Cdr. G.H. Peters, DSC, RN) and HMS Duncan (Lt.Cdr. A.N. Rowell, RN).
At 0900Z/27, HMS Foxhound and HMS Duncan parted company to proceed to Bathurst.
Around 1345A/29, the destroyers HMS Fearless (Cdr. A.F. Pugsley, RN), HMS Fury (Lt.Cdr. T.C. Robinson, RN) and HMS Wrestler (Lt. E.L. Jones, DSC, RN) joined coming from Gibraltar which they had departed on the 28th.
Around 0800A/30, HMS Queen Elizabeth, HMS Fearless, HMS Fury and HMS Wrestler arrived at Gibraltar. (11)
5 May 1941
Operation Tiger, supply convoy from Gibraltar to Alexandria and reinforcements for the Mediterranean Fleet and Operation MD 4, supply convoy from Alexandria to Malta and taking up the reinforcements for the Mediterranean Fleet.
Timespan: 5 to 12 May 1941.
5 May 1941.
Western Mediterranean.
Part of Convoy WS 8A was approaching Gibraltar from the west. This part of convoy WS 8A was to proceed to Malta during operation ‘Tiger’.
It was made up of five transports; Clan Campbell (7255 GRT, built 1937), Clan Chattan (7262 GRT, built 1937), Clan Lamont (7250 GRT, built 1939), Empire Song (9228 GRT, built 1940) and New Zealand Star (10740 GRT, built 1935). During the passage from the U.K. it had been escorted by the battlecruiser HMS Repulse (Capt. W.G. Tennant, CB, MVO, RN), light cruiser HMS Naiad (Capt. M.H.A. Kelsey, DSC, RN, flying the flag of Rear-Admiral E.L.S. King, CB, MVO, RN) and the destroyers HMS Harvester (Lt.Cdr. M. Thornton, DSC, RN), HMS Havelock (Cdr. E.H. Thomas, DSC, RN) and HMS Hesperus (Lt.Cdr. A.A. Tait, RN) (with the additional local escorts when still close to the U.K.)
Around 0700A/5, HMS Repulse, HMS Harvester, HMS Havelock and HMS Hesperus were relieved from the escort by the battleship HMS Queen Elizabeth (Capt. C.B. Barry, DSO, RN) and the destroyers HMS Fearless (Cdr. A.F. Pugsley, RN) , HMS Foresight (Cdr. J.S.C. Salter, RN) , HMS Fortune (Lt.Cdr. E.N. Sinclair, RN) and HMS Velox (Lt.Cdr. E.G. Roper, DSC, RN). The Repulse and the three H-class destroyers then proceeded to Gibraltar to refuel where they arrived shortly before 1800 hours. It had originally been intended to include Repulse in the upcoming operation but she was left at Gibraltar due to her inadequate anti-aircraft armament.
HMS Naiad had already arrived at Gibraltar around 0900/4, having been relieved shortly after noon on the 2nd of May by HMS Mauritius (Capt. W.D. Stephens, RN). Around the same time HMS Naiad arrived at Gibraltar the cruiser HMS Fiji (Capt. P.B.R.W. William-Powlett, RN) arrived, she had been part of the escort of convoy SL 72.
Around 0930A/5, the battlecruiser HMS Renown (Capt. R.R. McGrigor, RN, flying the flag of Vice-Admiral J.F. Somerville, KCB, DSO, RN), aircraft carrier HMS Ark Royal (Capt. L.E.H. Maund, RN), light cruisers HMS Sheffield (Capt. C.A.A. Larcom, RN), HMS Fiji and the destroyers HMS Kashmir (Cdr. H.A. King, RN), HMS Kipling (Cdr. A. St. Clair-Ford, RN) and HMS Wrestler (Lt. E.L. Jones, DSC, RN). Kashmir and Kipling had departed a little earlier and carried out an A/S sweep in Gibraltar Bay first.
For the upcoming operation two groups were formed; The cover force which was formed on Renown was group I, the close escort, which was to remain with the transports was group II. When they arrived near the convoy at 1800A/5, group I was formed and was made up of Renown, Queen Elizabeth, Ark Royal, Sheffield, Fiji, Kashmir and Kipling. Group II remained with the convoy and was (for the moment) made up of Fearless, Foresight, Fortune, Velox and Wrestler. Group II and the convoy proceeded towards the Straits of Gibraltar at 13 knots while Group I proceeded to the south until 2130 hours when course was changed to 074°. At 1930 hours, Group I, had been joined by HMS Naiad. This cruiser had sailed from Gibraltar at 1300 hours.
Eastern Mediterranean.
Convoy MW 7B departed Alexandria for Malta this day. It was made up of the Norwegian tankers Hoegh Hood (9351 GRT, built 1936) and Svenor (7616 GRT, built 1931). These tankers were able to proceed at 10 knots. Escort was provided by the AA-cruisers HMS Carlisle (Capt. T.C. Hampton, RN), HMS Coventry (Capt. D. Gilmour, RN), destroyers HMS Defender (Lt.Cdr. G.L. Farnfield, RN), HMS HMS Greyhound (Cdr. W.A. Marshall-A’Deane, DSO, DSC, RN) and HMS Hasty (Lt.Cdr. L.R.K. Tyrwhitt, DSC, RN). Also part of the escort of this convoy was the corvette HMS Gloxinia (Lt.Cdr. A.J.C. Pomeroy, RNVR) which was to serve as minesweeper at Malta and the whaler HMS Swona which was to be outfitted as minesweeper (LL-sweep) at the Malta Dockyard.
6 May 1941.
Western Mediterranean.
The convoy with Group II passed through the Straits of Gibraltar between 0130 and 0330 hours followed by Group I between 0300 and 0430 hours. Although the moon did not set until 0314 hours the sky was completely overcast and visibility was low.
At 0330 hours, HMS Faulknor (Capt. A.F. de Salis, RN), HMS Forester (Lt.Cdr. E.B. Tancock, DSC and Bar, RN), HMS Fury (Lt.Cdr. T.C. Robinson, RN), HMS Harvester, HMS Havelock and HMS Hesperus departed Gibraltar followed at 0420 hours by HMS Gloucester (Capt. H.A. Rowley, RN) which had completed her repairs and undocking shortly before.
By 0550 hours, Group I was about 32 miles to the east of Gibraltar with the convoy and Group II 10 miles to the north. At this time Faulknor, Forester and Fury joined Group I. At 0615 hours Queen Elizabeth with Kashmir and Kelvin was detached to join Group II, followed thirty minutes later by Naiad.
At 0625 hours, Gloucester joined Group I and speed was then increased to 24 knots to draw well ahead of the convoy. During the day Group I steered 060°. Group II was steering parallel to the Spanish coast at 13 knots. Velox and Wrestler were detached from Group II to arrive at Gibraltar after dark to avoid being sighted returning from the East.
At 1740 hours Renown, in position 37°05’N, 00°21’W sighted a French merchant ship most likely en-route to Oran. On sighting the British ships she immediately steered clear to the westward. Shorty afterwards Group I reduced speed to 17 knots as to not get too far ahead of Group II and the convoy.
By midnight Group I was about 150 nautical miles east-north-east of Group II.
Eastern Mediterranean.
The Mediterranean Fleet departed Alexandria in the forenoon, it was made up of the battleships HMS Warspite (Capt. D.B. Fisher, CBE, RN, flying the flag of Admiral Sir A.B. Cunningham, GCB, DSO and 2 Bars, RN), HMS Barham (Capt. G.C. Cooke, RN), HMS Valiant (Capt. C.E. Morgan, DSO, RN), aircraft carrier HMS Formidable (Capt. A.W.la T. Bisset, RN), light cruisers HMS Orion (Capt. G.R.B. Back, RN, flying the flag of Vice-Admiral H.D. Pridham-Whippell, CB, CVO, RN), HMS Ajax (Capt. E.D.B. McCarthy, RN), HMAS Perth (Capt. P.W. Bowyer-Smith, RN), destroyers (D.14) HMS Jervis (Capt. P.J. Mack, DSO, RN), HMS Jaguar (Lt.Cdr. J.F.W. Hine, RN), HMS Juno (Cdr. St. J.R.J. Tyrwhitt, RN), HMS Kandahar (Cdr. W.G.A. Robson, DSO, RN), HMS Kimberley (Lt.Cdr. J.S.M. Richardson, DSO, RN), HMS Kingston (Lt.Cdr. P. Somerville, DSO, DSC, RN), (D.7) HMAS Napier (Capt. S.H.T. Arliss, RN), HMAS Nizam (Lt.Cdr. M.J. Clark, RAN), HMS Imperial (Lt.Cdr. C.A.de W. Kitcat, RN), HMS Havock (Lt. G.R.G. Watkins, RN), HMS Hotspur (Lt.Cdr. C.P.F. Brown, DSC, RN) and HMS Griffin (Lt.Cdr. J. Lee-Barber, DSO, RN). The fast minesweeper HMS Abdiel (Capt. E. Pleydell-Bouverie, MVO, RN) and the naval transport HMS Breconshire (9776 GRT, built 1939) also sailed with the Fleet. HMS Abdiel was to lay a minefield off Lampedusa. HMS Breconshire had on board oil and petrol for Malta as well as oil to supply this to destroyers at sea. Abdiel took station in the destroyer screen while Breconshire took station in the battleship line. After sailing the fleet proceeded to the northwest. No aircraft were flown off by HMS Formidable due to a dust storm and very limited visibility.
After the Fleet sailed, convoy MW 7A departed Alexandria. It was made up of four transport vessels; Amerika (10218 GRT, built 1930), Settler (6202 GRT, built 1939), Talabot (6798 GRT, built 1936) and Thermopylae (6655 GRT, built 1930). These were able to proceed at 14 knots. Escort was provided by the light cruisers HMS Dido (Capt. H.W.U. McCall, RN), HMS Phoebe (Capt. G. Grantham, RN), AA-cruiser HMS Calcutta (Capt. D.M. Lees, DSO, RN) and the destroyers (D.2) HMS Ilex (Capt. H.St.L. Nicholson, DSO and Bar, RN), HMS Isis (Cdr. C.S.B. Swinley, DSC, RN), HMS Hereward (Lt. W.J. Munn, RN) and HMS Hero (Cdr. H.W. Biggs, DSO, RN).
One of the destroyers from the escort of convoy MW 7B, HMS Defender, that had sailed on the 5th had to return to Alexandria due to condenser problems.
7 May 1941.
Western Mediterranean.
At 0400 hours, Group II, which was approximately 30 nautical miles east of Cape Palos, altered course to the south for about two hours before turning eastwards for the run to Malta.
Group I meanwhile had altered course to the northward at 0130 hours to pass between Ibiza and Majorca in order to carry out a diversion to the north of the Baleares during the day should this appear desirable.
By 0715 hours there was no indication that Group I had been sighted, and as visibility varied from poor to moderate, course was altered to pass again between Ibiza and Majorca to reach a position well ahead of Group II so as to divert any attention of any enemy aircraft from Group II and the convoy.
At 1000 hours, when 33 nautical miles south-west of Malta, Group I encountered a small Spanish fishing vessel which was seen to proceed towards Palma de Majorca.
At noon, Group I altered course to 140°. At 1630 hours course was altered to 100° to keep about 40 nautical miles to the eastward of Group II. Group I streamed paravanes at 1800 hours.
At 1945 hours, two Sunderland flying boats flying east passed north of the force and did not identify themselves till challenged. At the same time smoke was sighted astern and shortly afterwards a fighter aircraft reported that it was the convoy at a distance of 26 nautical miles.
At 2100 hours, Group I altered course to the north-east until dark in order to mislead any hostile aircraft. The sky had been overcast all day but towards the evening the visibility improved considerably and the convoy was clearly visible to the southwestward making a great deal of smoke.
At 2225 hours, RD/F in Fiji detected a group of aircraft bearing 170°, range 30 miles. The bearing changed to 154° and the range opened to 40 miles until the echo faded at 2230 hours. Group I altered course to 080° at 2300 hours.
Eastern Mediterranean.
All forces continued on their way during the day without incident. Destroyers were being fuelled from Breconshire one at a time.
The submarine HMS Triumph reported three transports proceeding towards Benghazi. Accordingly HMS Ajax, HMS Havock, HMS Hotspur and HMS Imperial were detached to attack Benghazi during the night of 7/8 May.
The Vice-Admiral Malta reported that the harbour had been mined and that the destroyers based at Malta were therefore unable to leave the harbour and participate in the convoy operations.
8 May 1941.
Western Mediterranean.
Soon after midnight Group I had to alter course to avoid being sighted by a lighted merchant ship steering a course of 110°.
At 0535 hours, HMS Ark Royal launched three reconnaissance A.S.V. aircraft in position 38°06’N, 06°26’E to search to the eastward south of Sardinia. At 0700 hours a fourth aircraft was flown off to search to the west of Sardinia. These aircraft returned at 0800 hours and had nothing to report. They had covered 140 miles to the eastward and 50 miles to the westward. Group I then proceeded to join the convoy. The first fighter patrol was flown off by Ark Royal at 0830 hours.
By 1000 hours, Group I had joined the convoy, which was proceeding on a course of 085° at 14 knots. This was the Clan Campbell’s best speed. Renown and Ark Royal took station on the starboard side of the convoy in order to facilitate flying operations and at the same time provide AA protection for the convoy. Queen Elizabeth took station astern of Ark Royal to provide AA protection for this vulnerable ship. Gloucester and Fiji formed on the transport ships.
At 1115 hours an enemy signal was intercepted that our forces had been sighted at 0800 hours. Naiad detected an enemy aircraft approaching at 1133 hours and three minutes later a large float-plane emerged from the clouds ahead of the convoy. Naiad opened fire and the aircraft retreated into the clouds. Fighters were sent in pursuit but failed to intercept. At noon a full and accurate report was made by this float-plane on the composition of our forces.
The sky cleared to some extent at noon, it had been overcast all morning. Visibility continued to improve all day although considerable cloud prevailed until the evening.
At 1345 hours, eight aircraft were seen approaching very low, fine on the starboard bow. These were engaged as they approached, but the AA fire appeared to be not very well directed. Torpedoes were dropped from outside the destroyer screen, which was roughly 3000 yards ahead of the convoy and extended to starboard to cover Renown, Ark Royal and Queen Elizabeth. The four Fulmar fighters on patrol at this time were engaging CR. 42 fighters that had accompanied these torpedo aircraft.
Torpedoes were evidently aimed at Renown and Ark Royal but by very skilful handling by the Commanding Officers of these two ships all tracks were combed or avoided. Two torpedoes passed close to Renown. A third which was being successfully combed made a sudden alteration of 60° towards Renown and a hit forward seemed inevitable when the torpedo reached the end of it’s run and sank. Two torpedoes passed to port and two to starboard of Ark Royal.
Of the eight aircraft which attacked one was brought down during the approach, probably by AA fire from the destroyers. Two others were seen to fall from the sky during their retirement. The destroyers were disappointingly slow in opening fire on the approaching torpedo-bombers and a full barrage never developed. During the action between the Fulmar’s and the CR. 42’s one Fulmar was brought down and the crew of two was lost.
At 1400 hours a few bomb splashes were observed on the horizon to the northwestward.
At 1525 hours, two sections of Fulmar’s attacked and shot down in flames an S.79 shadower. On returning from this attack one Fulmar had to make a forced landing on the water about 9 nautical miles from the fleet. HMS Foresight closed the position and was able to pick up the crew of two. At this time the fleet was about 28 nautical miles north of Galita Island.
At 1600 hours, as the wind had backed from south of east to north of east. The starboard column; Renown, Ark Royal and Queen Elizabeth, was moved over to the port quarter of the convoy and the destroyer screen was readjusted accordingly. This allowed freedom of manoeuvre for flying operations and enabled the column to increase speed and snake the line whenever a bombing attack developed, in order to hamper the bombers and at the same time remain in a position to afford full AA support of the convoy.
The first high level bombing attack of the day developed at 1622 hours when three S.79’s approached from astern at about 5000 feet, i.e. just under the cloud level. One, diverted by AA fire, jettisoned his bombs and subsequently crashed astern of the Fleet. The other two dropped twelve bombs close ahead of Ark Royal and escaped into the clouds. It is probable that both of these were hit by the concentrated AA fire with which they were met. About 10 minutes later a single aircraft approached from astern and encountering heavy AA fire turned across the stern of the Fleet, dropping its bombs well clear.
At 1710 hours, another S.79 shadower was shot down in flames on the port quarter of the Fleet by a Fulmar fighter. Twenty minutes later five S.79’s attacked the fleet from south to north. Two broke formation under gunfire and the remainder delivered a poor attack, bombs falling near the destroyer screen. A similar attack by three S.79’s took place at 1800 hours, when bombs were again dropped near the destroyer screen.
The provision a adequate fighter protection for the Fleet was a difficult problem with the small numbers of fighters available. Aircraft returned to the carrier at various times with damage and failure of undercarriage, and every opportunity was taken, whenever the RD/F screen cleared to land on, refuel and rearm the Fulmars, sometimes singly and sometimes two or three at a time. There were occasions when no more then two fighters were in the air, but whenever an attack appeared to be impending every fighter that could be made serviceable was sent up.
At 1910 hours enemy aircraft were detected at a range of 70 miles approaching from Sicily. At this time only seven Fulmars remained serviceable of which only three were in the air. The other four were immediately flown off. The total number of hostile aircraft is uncertain, but the Fulmars sighted three separate formations of sixteen Ju.87’s, twelve Ju.87’s and six Me.110’s. One formation was seen from Renown for a short time at 1933 hours in a patch of clear sky. RD/F indicated several formations circling to the northwest of the Fleet for nearly one hour and several bomb splashes were seen well away to the northward and northwestward. During this period Fulmars intercepted the enemy and, although greatly outnumbered, fought several vigorous and gallant actions, resulting in the certain destruction of one Ju.87 and damage to several others, including at least one Me.110. These attacks disorganised the enemy and forced them to the northward with the result that they probably missed sighting the Fleet. They then entered thick cloud and it is possible that the groups became separated and all cohesion in the attack disappeared. Whatever the reason RD/F showed these groups retiring to the northward and no attack on the Fleet developed.
The Fleet reached the entrance to the Skerki Channel at 2015 hours. ‘Force B’ then turned westwards. It was made up of Renown, Ark Royal, Sheffield, Harvester, Havelock and Hesperus. Queen Elizabeth was ordered to join ‘Force F’.
The turn to the west was just being completed when ‘Force B’ was attacked at 2030 hours by three torpedo-bombers which came from right ahead. The destroyers were still manoeuvering to take up their screening positions and did not sight the enemy aircraft in time to put up a barrage of AA fire. This attack was pressed home by the enemy with great determination. All three aircraft were heavily engaged and two were seen to be hit. Renown combed the torpedo tracks, two passing close down the port side and one down the starboard side.
During this attack No. P (port) 3, 4.5” gun turret in Renown malfunctioned and fired two round into the back of No. P 2 gun turret. This resulted in five ratings killed, five seriously wounded of which one later died and one officer and twenty-five ratings wounded.
Speed was increased to 24 knots at 2038 hours and a westerly course was maintained throughout the night.
As a result of the day’s air attacks, seven enemy aircraft were destroyed, two probably destroyed and at least three, probably more, damaged. Of the seven destroyed AA fire accounted for four and feighters for three. No hits, either by bomb or torpedo were obtained on our ships, nor were there any casualties besides than caused by the accident in Renown. Two Fulmars were lost, the crew of one of them was saved.
Meanwhile the convoy continued eastwards escorted now by HMS Queen Elizabeth, HMS Naiad, HMS Gloucester, HMS Fiji, HMS Faulknor, HMS Fearless, HMS Foresight, HMS Forester, HMS Fortune, HMS Fury, HMS Kashmir and HMS Kipling.
Eastern Mediterranean.
Visibility was still poor with patches of heavy rain. This helped the Fleet and convoy from being detected by the enemy and attacked by aircraft. On the other hand it resulted in the loss of two Albacore aircraft. One Fulmar was lost in combat with enemy aircraft.
HMS Ajax, HMS Havock, HMS Hotspur and HMS Imperial rejoined the Fleet at 1700 hours. Their attack on Benghazi had been successful although there was little shipping in the harbour two transports were intercepted after the bombardment. The largest blew up, and the other was ran aground and was left on fire after several explosions. These were the Italian Tenace (1142 GRT, built 1881) and Capitano A. Cecchi (2321 GRT, built 1933).
The Fleet remained with convoy MW 7A during the day and at dark moved to the southward. HMS Dido, HMS Phoebe, HMS Calcutta, HMS Carlisle and HMS Coventry were detached from their convoy’s to join the Tiger convoy coming from Gibraltar.
Both MW convoy’s made direct for Malta escorted by HMS Hotspur, HMS Havock and HMS Imperial. All other destroyers had been oiled from Breconshire during the past two days.
9 May 1941.
Western Mediterranean.
Further torpedo-bomber attacks were expected and a screen made up of Sheffield and the three destroyers was stationed ahead, astern and on either beam of Renown and Ark Royal at 5000 yards. The night was however uneventful and at 0800 hours speed was reduced to 20 knots and screening diagram no.4 was resumed by the escorts.
A shadower was detected, bearing 115°, range 12 nautical miles at 1027 hours. Two fighters were flown off but failed to intercept the enemy. An enemy sighting report was intercepted in Renown.
At 1100 hours a merchant vessel was sighted in position 37°54’N, 03°30’E about 8 nautical miles to the northward. At the same time Ark Royal reported that a periscope had been sighted about 4000 yards away. No further action was taken as detaching a single destroyer to search for the submarine was thought to be of little use and it was not thought wise to detach more then one destroyer as there were only three present.
At 1300 hours course was altered to 145° and speed reduced to 16 knots to conserve fuel in the destroyers.
At 1700 hours five search aircraft were flown off from position 37°27’N, 01°29’E to search between bearings 045° and 340° from Oran and south of parallel 38°45’N. Nothingwas sighted except for a merchant vessel. A Fulmar was also flown off to carry out a reconnaissance of Oran. This aircraft took photographs and reported the battlecruiser Dunkerque in her usual position at Mers-el-Kebir surrounded by nets, with lighters alongside and a pontoon gangway to the shore. One large and two small destroyers were sighted inside Oran harbour and probably six or seven submarines.
The six destroyers from the 8th Destroyer Flotilla which had taken part in getting the ‘Tiger’ convoy to as far as Malta sailed from there at 2000B/9 for their return passage to Gibraltar. HMS Foresight however had to return to Malta with an engine problem.
At 2200 hours ‘Force B’ altered course to the eastward as to be in a position to support the destroyers during their passage west at daylight the next day when they were passing south of Sardinia.
The Tiger convoy and it’s escort.
Shortly after midnight the transport Empire Song was mined and damaged. Initially she was able to remain with the convoy but around 0140 hours she was slowly sinking having also been on fire. The destroyers HMS Foresight and HMS Fortune were detached to stand by her. In the end Empire Song blew up during which Foresight was damaged.
The transport New Zealand Star was also damaged but she was able to remain with the convoy as her speed was not affected.
The convoy was attacked by torpedo-bombers early in the night but no damage was done by them. One torpedo passed very close to HMS Queen Elizabeth.
Around 0700 hours the Tiger convoy was joined by HMS Dido and HMS Phoebe. An hour later HMS Calcutta, HMS Carlisle and HMS Coventry also joined.
At 1515 hours the Tiger convoy made rendez-vous with the Mediterreanean Fleet about 50 nautical miles south of Malta.
Eastern Mediterranean.
Convoy’s MW 7A and MW 7B both arrived safely at Malta. Both were swept in by HMS Gloxinia who succeeded in exploding a number of mines. The 5th Destroyer Flotilla was then also able to leave the harbour and they joined the Mediterranean Fleet; these were HMS Kelly (Capt. L.F.A.V.N. Mountbatten, GCVO, DSO, RN), HMS Kelvin (Cdr. J.H. Allison, DSO, RN) , HMS Jackal (Lt.Cdr. R.McC.P. Jonas, DSC, RN) and HMS Janus (Cdr. J.A.W. Tothill, RN)
Also Breconshire arrived at Malta where she fuelled HMS Hotspur, HMS Havock and HMS Imperial.
As said above, at 1515 hours the Tiger convoy made rendez-vous with the Mediterreanean Fleet about 50 nautical miles south of Malta. HMS Queen Elizabeth then joined the battleship column. The Fleet then turned eastward but remained near the convoy for the remainder of the day. During the night he Fleet covered the convoy from a position to the north-eastward of it.
10 May 1941.
Western Mediterranean.
At 0700 hours, when in position 37°35’N, 03°02’E, course was altered to the westward at 15 knots. This being the most comfortable speed for the destroyers in the rising westerly gale.
At 1000 hours, the Capt. (D) 8th Destroyer Flotilla, reported he was in position 37°18’N, 08°45’E steering 275° at 28 knots. He also reported hat his ships were being shadowed by enemy aircraft. The enemy aircraft report was intercepted at 1025 hours. Course was then altered by ‘Force B’ to the eastward to reduce the distance between the two forces.
At 1100 hours, the Capt. (D) 8th Destroyer Flotilla, reported he was in position 37°22’N, 07°54’E, still steering 275° at 28 knots. The destroyers were still being shadowed.
At noon ‘Force B’ altered course to the westward. The wind was by then force 8 with a rising sea. Ten minutes later the enemy aircraft was again heard to report the position of the 8th Destroyer Flotilla and it’s course and speed.
At 1300 hours, the Capt. (D) 8th Destroyer Flotilla, reported he was in position 37°25’N, 07°01’E, steering 270° at 28 knots and that his ships were still being shadowed. At this time ‘Force B’ was 134 nautical miles to the westward and they could only maintain 13 knots in the sea without suffering damage. In view of the weather conditions and the fact that HMS Ark Royal had now only four serviceable fighters available it was not possible to afford the 8th Destroyer Flotilla any fighter protection without hazarding Ark Royal unduly. It was hoped that if an attack would develop the destroyers were able to avoid damage by high speed manoeuvring.
At 1430 hours a signal was received that the 8th Destroyer Flotilla was being bombed in position 37°25’N, 06°18’E and that HMS Fortune had been hit and her speed had been reduced to 8 knots. ‘Force B’ immediately altered course to the eastward and ran before the sea at 24 knots the maximum safe speed for the destroyers in the prevailing weather conditions.
An unidentified aircraft that had been detected by RD/F overtook the force at 1530 hours and was fired at by HMS Sheffield. The aircraft retired to the northward before resuming it’s easterly course. A reconnaissance of three aircraft was flown off at 1600 hours to cover the area to the northward and eastward of the 8th Destroyer Flotilla to maximum depth, in case enemy surface units were out in pursuit. These aircraft reported having sighted nothing on their return.
At 1750 hours a signal was received that the 8th Destroyer Flotilla had been subjected to another bombing attack but that no damage had been done. ‘Force B’ continued eastwards to provide close support in case of more air attacks.
At 1820 hours rendes-vous was made with the 8th Destroyer Flotilla and all ships proceeded westwards steering 280° at 12 knots. This was the best course and speed HMS Fortune could maintain. By this time this destroyer was down by the stern with seas breaking continually over her quarterdeck.
Five search aircraft were flown off by Ark Royal to search to maximum depth between 025° and 090°. Nothing was sighted except for one enemy aircraft. By 2030 hours all aircraft had returned.
As a speed of 12 knots subjected Fortune’s bulkhead to undue strain, HMS Fury was ordered to escort Fortune and proceed at 8 knots for the night. The remainder of the force zig-zagged, clear of these two destroyers, at higher speed.
It became also clear that Fortune had not received a direct hit but that five near misses had bent one shaft and caused flooding in several compartments aft, and minor flooding in the engine room.
Eastern Mediterranean.
The Battlefleet remained near the convoy for the entire day. Visibility improved throughout the day although conditions were still difficult for the enemy to attack from the air. One Ju.88 aircraft was shot down and another one was damaged. One Fulmar was lost when taking off from Formidable.
No enemy air attacks developed until dark when a number of aircraft, probably torpedo bombers, endeavoured to attack the convoy and battlefleet. A very heavy blind barrage of AA fire however kept them off and no torpedoes were seen.
At 1700 hours, Capt. D.5 in HMS Kelly was detached with the ships of the 5th Destroyer Flotilla (besides Kelly these were Kashmir, Kelvin, Kipling and Jackal) to bombard Benghazi before returning to Malta. The bombardment was carried out successfully. Following the bombardment they were dive bombed by German aircraft and all but Kipling were near missed. The Flotilla reached Malta p.m. on the 11th.
11 May 1941.
Western Mediterranean.
At 0532 hours, Vice-Admiral Somerville sent a signal to the Vice-Admiral commanding the North Atlantic station at Gibraltar reporting the position, course and speed of his forces. He also requested a tug to be sent for the assistance of HMS Fortune.
The wind eased considerably during the morning and at daylight Fortune and Fury were sighted about 4 nautical miles in advance of the Fleet and making good about 10 knots.
A reconnaissance of six aircraft were flown off at 0700 hours. These searched for a depth of about 140 miles between 030° and 085°. Visibility was reported as being 10 to 20 miles. Also a search was conducted for a depth of about 100 miles between 085° and 110° with a visibility of 3 to 5 miles. Only a few French merchant vessels were sighted.
Nothing happened during the day.
At 1700 hours a reconnaissance was flown of from position 36°54’N, 01°11’E to a depth of 180 nautical miles between north and east and to a depth of 90 nautical miles between north and 290°. The visibility was reported as being 10 to 15 nautical miles. Nothing was sighted.
The Fleet turned to the eastward for an hour before dark to take up a position well astern of Fortune and Fury during the night.
Eastern Mediterranean.
The Tiger convoy and the Fleet continued eastwards. Enemy aircraft were in the vicinity all day but no attacks developed. One Ju.88 was shot down and another one was damaged, one Fulmar was lost. At dark the cruisers were detached to proceed to Alexandria and the Fleet went on ahead of the convoy.
12 May 1941.
Western Mediterranean.
Just before daylight contact was made by the Fleet with Fortune and Fury. At dawn the tug HMS St. Day and four ML’s arrived from Gibraltar.
HMS Sheffield, HMS Harvester, HMS Hesperus and the four ML’s then remained with HMS Fortune and HMS Fury. Fortune was now able to make 12 knots.
HMS Renown and HMS Ark Royal, screened by HMS Faulknor, HMS Fearless, HMS Forester, HMS Foresight and HMS Havelock, then proceeded ahead to conduct flying exercises east of Gibraltar before entering harbour.
A reconnaissance was flown off at 0800 hours to search to the east but nothing was sighted. On their return these aircraft made a practice attack on Renown and Ark Royal. More exercises were carried out during the day.
The Fleet arrived at Gibraltar at 1800 hours. Renown berthed in no.1 dock to enable her damaged 4.5” gun turret to be hoised out.
HMS Sheffield entered harbour at 2030 hours followed shortly afterwards by the damaged Fortune and her escorts.
Eastern Mediterranean.
The bulk of the Fleet arrived at Alexandria around 1000 hours. The convoy arrived later, around 1300 hours. Some ships had been detached from the fleet to arrive early, fuel and then depart again for escort duties. (12)
12 May 1941
Vice-Admiral H.D. Pridham-Whippell, CB, CVO, RN, struck his flag in HMS Orion (Capt. G.R.B. Back, RN) and hoisted it in HMS Queen Elizabeth (Capt. C.B. Barry, DSO, RN).
Rear-Admiral H.B. Rawlings, OBE, RN, then hoisted his flag in HMS Orion. (13)
14 May 1941
At 2000C/14, the battleships HMS Queen Elizabeth (Capt. C.B. Barry, DSO, RN, flying the flag of Vice-Admiral H.D. Pridham-Whippell, CB, CVO, RN), HMS Barham (Capt. G.C. Cooke, RN), light cruisers HMS Naiad (Capt. M.H.A. Kelsey, DSC, RN, flying the flag of Rear-Admiral E.L.S. King, CB, MVO, RN), HMS Phoebe (Capt. G. Grantham, RN), destroyers HMS Jervis (Capt. P.J. Mack, DSO, RN), HMS Jaguar (Lt.Cdr. J.F.W. Hine, RN), HMAS Nizam (Lt.Cdr. M.J. Clark, RAN), HMS Imperial (Lt.Cdr. C.A.de W. Kitcat, RN), HMS Hasty (Lt.Cdr. L.R.K. Tyrwhitt, DSC, RN), HMS Greyhound (Cdr. W.A. Marshall-A’Deane, DSO, DSC, RN) and HMS Defender (Lt.Cdr. G.L. Farnfield, RN) departed Alexandria to operate to the west of Crete as an enemy invasion was feared. They were to act as a cover force for light forces transporting troops and conducting operations in the Aegean.
HMS Phoebe developed cracks in her hull plating and was forced to return to Alexandria at 2135C/15. She arrived at Alexandria around 0645C/16. She was replaced by HMAS Perth (Capt. P.W. Bowyer-Smith, RN) which had departed Alexandria around 0600C/15.
The main body of this force returned to Alexandria on the 20th. A few modifications had been made to the destroyer force though.
The cruisers HMS Naiad, HMAS Perth and the destroyers HMS Greyhound and HMS Hasty had split off from the force on the 17th and were back in Alexandria on the 18th. (14)
20 May 1941
Battle for Crete.
Timespan: 20 May to 1 June 1941.
Opening of the German airborn attack on Crete, 20 May 1941.
At 0915 hours, 20 May 1941, just three weeks after the British withdrawal from Greece, the German attack on Crete commenced. This took the form of intense bombing of Maleme airfield and Suda Bay areas, closely followed by the landing of troops by parachute, gliders and troop carrying aircraft. The enemy’s main objective appeared to be Maleme airfield but in the afternoon similar attacks developed at Heraklion and Retimo.
Fierce hand to hand fighting took place throughout the day on the Maleme airfield. At nightfall the situation appeared to be in hand, though about 1200 of the 3000 enemy who had landed by air appeared to be unaccounted for.
The naval situation at dawn, 20 May 1941.
The position of British (Allied) naval forces at sea at daylight on the 20th of May was as follows;
Force A 1 was about 100 nautical miles to the west of Crete. It was made up of the following warships; battleships HMS Warspite (Capt. D.B. Fisher, CBE, RN, flying the flag of Rear-Admiral H.B. Rawlings, OBE, RN), HMS Valiant (Capt. C.E. Morgan, DSO, RN), light cruiser HMS Ajax (Capt. E.D.B. McCarthy, RN), destroyers HMAS Napier (Capt. S.H.T. Arliss, RN), HMS Kimberley (Lt.Cdr. J.S.M. Richardson, DSO, RN), HMS Janus (Cdr. J.A.W. Tothill, RN), HMS Imperial (Lt.Cdr. C.A.de W. Kitcat, RN), HMS Isis (Cdr. C.S.B. Swinley, DSC, RN), HMS Hereward (Lt. W.J. Munn, RN), HMS Hero (Cdr. H.W. Biggs, DSO, RN), HMS Hotspur (Lt.Cdr. C.P.F. Brown, DSC, RN), HMS Griffin (Lt.Cdr. J. Lee-Barber, DSO, RN) and HMS Decoy (Cdr. E.G. McGregor, DSO, RN).
Force B was enroute from Alexandria to join force A 1 and consisted of the light cruisers HMS Gloucester (Capt. H.A. Rowley, RN also in command of this force as senior Captain) and HMS Fiji (Capt. P.B.R.W. William-Powlett, RN).
Force C was to the south of the Kaso Strait and was made up of the light cruisers HMS Naiad (Capt. M.H.A. Kelsey, DSC, RN, flying the flag of Rear-Admiral E.L.S. King, CB, MVO, RN), HMAS Perth (Capt. P.W. Bowyer-Smith, RN), destroyers HMS Kandahar (Cdr. W.G.A. Robson, DSO, RN), HMS Kingston (Lt.Cdr. P. Somerville, DSO, DSC, RN), HMS Juno (St.J.R.J. Tyrwhitt, RN) and HMS Nubian (Cdr. R.W. Ravenhill, RN).
Force D had reached the Antikithera Channel during the night and was now steering to join Force A 1. Force D was made up of the light cruisers HMS Orion (Capt. G.R.B. Back, RN, flying the flag of the Rear-Admiral (D) [D = Destroyers] I.G. Glennie, RN) and HMS Dido (Capt. H.W.U. McCall, RN).
The Commander-in-Chief’s intentions, 20-21 May 1941.
On learning that the attack on Crete had started, the Commander-in-Chief, Mediterranean at once ordered the forces at sea to move up towards the island but to keep out of sight of land. In the course of the forenoon he signalled his intentions for the night.
Force B was ordered to pass close to Cape Matapan at 0400/21 and then rendezvous with Force A 1 about 50 miles west of Crete at 0700/21.
Force D, augmented by HMS Ajax and the destroyers HMS Isis HMS Imperial, HMS ar and HMS Kimberley was to pass through the Antikithera Channel to sweep the area Cape Malea (36°26’N, 23°12’E), Hydra (37°21’N, 23°35’E), Phalconera (36°50’N, 23°54’E) and to be off Canea at 0700/21.
Force C was to pass through the Kaso Strait and sweep round Stampalia (75 miles north of Kaso) arriving off Heraklion at 0700/21.
Later in the day air reconnaissance reported caiques in the Aegean, and these two sweeps were cancelled as it was feared that they might miss south-bound convoys in the darkness. Instead forces C and D were ordered to establish patrols to the east and west of Longitude 25°E respectively. A new force of destroyers (Force E) made up of HMS Jervis (Capt. P.J. Mack, DSO, RN), HMS Ilex (Capt. H.St.L. Nicolson, DSO and Bar, RN) and HMAS Nizam (Lt.Cdr. M.J. Clark, RAN) was to bombard the Italian airfield at Scarpanto (50 miles to the east of Crete), withdrawing to the southward before daylight.
Night operations, 20-21 May 1941.
Scarpanto airfield was bombarded at 0245/21. The result could not be observed, but intelligence reports later indicated that two Do.17 aircraft were damaged. After examining Pegadia Bay (six miles to the northward of the airfield on the east coast of Scarpanto), and finding it empty, Force E retired to the southward.
The other operations ordered by the Commander-in-Chief were duly carried out but no convoys were sighted. Force C was attacked by torpedo-carrying aircraft with approaching the Kaso Strait at 2040/20. All torpedoes could be avoided. An hour later six MAS boats were encountered. Juno, Kandahar and Naiad engaged them and they retired after four of them had been damaged.
Naval situation at dawn, 21 May 1941.
At daylight, 21 May, Force A 1 (Warspite, Valiant, HMAS Napier, HMS Hereward, HMS Hero, HMS Hotspur, HMS Griffin and HMS Decoy) was 60 miles west of the Antikithera Channel, steering to the south-east to meet Force D (HMS Orion, HMS Ajax, HMS Dido, HMS Isis, HMS Imperial, HMS Janus and HMS Kimberley), which sighted nothing during the night and was now to the northward of Canea Bay and withdrawing towards the Antikithera Channel.
Force B (HMS Gloucester and HMS Fiji) was closing Force A 1 after an uneventful sweep between Cape Matapan and Cape Elophonesi (the south-west point of Crete).
The minelayer HMS Abdiel (Capt. E. Peydell-Bouverie, MVO, RN) was returning to Alexandria after laying mines off Cephalonia.
At the eastern end of Crete Force C (HMS Naiad, HMAS Perth, HMS Kandahar, HMS Kingston, HMS Juno and HMS Nubian) was joined at 0600 hours by the AA cruiser HMS Calcutta (Capt. D.M. Lees, DSO, RN). This force was now retiring from the Aegean through the Kaso Strait.
Force E (HMS Jervis, HMS Ilex and HMAS Nizam) was to the southward of Scarpanto and operating under the orders of Rear-Admiral King (Force C) as was the AA cruiser HMS Carlisle (Capt. T.C. Hampton, RN) which was on passage from Alexandria.
Operations during 21 May 1941. Loss of HMS Juno.
During 21 May, Force A 1, B and D remained to the south-west of Kithera. Every opportunity, between air attacks, being taken to refuel destroyers from the battleships. Force C cruiser to the southward of the Kaso Strait where HMS Carlisle joined him in the afternoon. Force E was recalled to Alexandria.
Throughout the day various forces were subjected to heavy air attacks. Force C in particular suffered attacks from daylight onwards, and after withdrawing through the Kaso Strait, was bombed continuously from 0950 to 1350 hours.
At 1249 hours, HMS Juno was hit and sank in two minutes. Six officers and ninety-one ratings were rescued by Kandahar, Kingston and Nubian. During the attacks one enemy aircraft was shot down and two, maybe more, were damaged.
To the west of Crete Force D was located at daylight and heavily bombed while withdrawing towards Force A 1. HMS Orion and HMS Ajax both suffered damage from near misses.
Force A 1 was attacked once during the forenoon and for two and a half hours during the afternoon. This later bombing was shared by Forces B and D which were then in company. Two enemy aircraft were probably shot down.
No seaborne landing has as yet taken place but during the afternoon air reconnaissance reported groups of small craft, escorted by destroyers, moving towards Crete from Milos (80 miles north of Retimo). Forces B, C and D were therefore ordered into the Aegean to prevent landings during the night. If there were no developments Forces C and D, in the eastern and western areas respectively, were to commence working northwards on a wide zigzag at 0530/22, to locate convoys.
Force A followed Force D well into the Antikithera Channel as AA support, turning to the westward at sunset to patrol for the night in the supporting area. As the two forces parted company a sharp attack by four Ju.88’s was made on Force D which shot down three of them.
Force D breaks up a troop convoy, night of 21/22 May 1941.
At 2330/21 when some 18 miles north of Canea, Rear-Admiral Glennie with Force D which now consisted of HMS Dido, HMS Orion, HMS Ajax, HMS Janus, HMS Kimberley, HMS Hasty (Lt.Cdr. L.R.K. Tyrwhitt, DSC, RN) and HMS Hereward, encountered an enemy convoy composed mainly of caiques escorted by a torpedo boat. The caiques which were crowded with German troops were engaged for two and a half hours. In all, at least a dozen caiques, two or three steamers and a steam yacht were sunk or left burning. It was estimated that about 4000 German troops were accounted for [an over-estimate, the real number was about 800 of which some were rescued later]. In addition the Italian torpedo-boat Lupo, after firing torpedoes at the cruisers, was damaged by a broadside from HMS Ajax.
After taking a further sweep to the east and north, Rear-Admiral Glennie decided that, in view of serious shortage of AA ammunition (AA ammunition remaining; Orion 38%, Ajax 42%, Dido 30%) and the scale of air attack to be anticipated the next day, he was not justified in keeping his force in the Aegean to carry out the intended sweep to the northward at daylight. He accordingly turned to the westward at 0330/22. His ships which had become considerably scattered during the action were given a rendezvous some 30 miles west of Crete. This decision, together with the result of his attack on the convoy, he reported to the Commander-in-Chief who ordered Force D to return to Alexandria with all dispatch.
Meanwhile Force B (Gloucester, Fiji, HMS Greyhound (Cdr. W.A. Marshall-A’Deane, DSO, DSC, RN) and Griffin) had been ordered by the Commander-in-Chief to leave their patrol off Cape Matapan and to proceed with dispatch to Heraklion where part of the town and harbour were reported to be in enemy hands. These orders reached Capt. Rowley in the Gloucester too late to be carried out, but the force entered the Aegean and at daylight was about 25 miles north of Canea. Nothing was sighted, and they retired to the westward towards Force A 1. Force B was attacked almost continuously by dive bombers for an hour and a half from 0630/22 onwards but escaped with slight damage only to each cruiser. They joined Force A 1 at 0830/22.
Naval situation at dawn, 22 May 1941.
At daylight on 22 May 1941, the position of the naval forces at sea was as follows. Rear-Admiral Rawlings with Force A 1 (HMS Warspite, HMS Valiant. HMAS Napier, HMS Imperial, HMS Isis, HMS Hero, HMS Hotspur and HMS Decoy) was about 45 miles south-west of Kithera, steering to the north-westward and shortly to be joined by the forces D and B from the Aegean.
The 5th Destroyer Flottilla had meanwhile (21 May) sailed from Malta the previous evening and was on passage to join Rear-Admiral Rawlings around 1000/22. This Flotilla was made up of five destroyers; HMS Kelly (Capt. L.F.A.V.N. Mountbatten, DSO, RN), HMS Kashmir (Cdr. H.A. King, RN), HMS Kelvin (Cdr. J.H. Alliston, RN), HMS Kipling (Cdr. A. St.Clair-Ford, RN) and HMS Jackal (Lt.Cdr. R.McC.P. Jonas, DSC, RN).
HMAS Stuart (Capt. H.M.L. Waller, DSO, RAN), HMAS Vendetta (Lt.Cdr. R. Rhoades, RAN) and HMAS Voyager (Cdr. J.C. Morrow, DSO, RAN) from the 10th Destroyer Flotilla as well as HMS Jervis, HMS Ilex and HMAS Nizam from the 14th Destroyer Flotilla were on passage from Alexandria to join Rear-Admiral Rawlings (Force A 1) and Rear-Admiral King (Force C) respectively.
Force C (HMS Naiad, HMAS Perth, HMS Calcutta, HMS Carlisle, HMS Kandahar, HMS Kingston and HMS Nubian) was off Heraklion about to sweep to the north-westward in search of enemy troop convoys.
The 22nd of May was to prove an expensive day for the British naval forces costing them two cruisers and a destroyer sunk, and leading directly to the situation which occasioned the loss of a further two destroyers the next morning. Also two battleships and two cruisers were damaged.
On the other hand the enemy was prevented from making a seaborne landing, and that so effectively as to deter him from any further attempts to do so, until the fall of Crete had been decided by his airborne troops.
Force C’s encounter with an enemy troop convoy, AM 22nd May.
Rear-Admiral King’s Force C had spent the night of 21/22 May patrolling of Heraklion. Nothing was sighted and at dawn the force formed up to carry out the sweep to the northward as ordered by the Commander-in-Chief. Air attacks on Force C commenced at 0700/22 and were continued without intermission. At 0830 hours a single caique carrying German troops was sighted. This caique was sunk by HMAS Perth, and as she was being heavily attacks by enemy aircraft, HMS Naiad turned back to support her. A small merchant vessel, reported by HMS Calcutta at 0909 hours was dealt with by the destroyers.
At 1000/22 Force C was 25 miles south of Milo (90 miles north of Retimo), HMAS Perth had rejoined the rest of the force but HMS Naiad was being heavily attacked and was still some way astern. Ten minutes later an enemy torpedo-boat (the Italian Saggitario) with four or five small sailing vessels was sighted to the northward. The destroyers gave chase, while the Perth and Naiad engaged the torpedo boat, causing her to retire behind smoke. HMS Kingston then engaged another destroyer, who was laying a smoke screen, at 7000 yards range, claiming two hits. She also reported a large number of caiques behind the smoke.
Force C was running short of AA ammunition. Air attacks were incessant and the force had to be kept together for mutual support. Its speed was limited as HMS Carlisle was unable to do more than 21 knots due to a bomb hit by enemy aircraft. During the same attack HMAS Perth had been near-missed but her speed was not effected.
For these reasons, Rear-Admiral King considered that he would jeopadise his whole force if he proceeded any further to the northward. He therefore decided to withdraw to the westward and ordered his destroyers to abandon the chase. A signal from the Commander-in-Chief (timed 0941 hour), which showed that this convoy was of considerable size, was not seen by him until 1100 hours. The brief action did, however, cause the enemy to turn back, and the troops, if they ever reached Crete at all, were not in time to influence the battle.
During its withdrawal to the westward, Force C, was continuously bombed for three and a half hours. HMS Naiad due to avoiding action had been unable to overtake the remainder of the force had two 5.25” turrets out of action. Several compartments were flooded by near misses, and at 1125 hours, her speed being reduced to 16-19 knots, the remainder of the force was ordered back to her support. Over a period of two hours, 181 bombs had been counted as being aimed at HMS Naiad.
HMS Carlisle was hit, and although not seriously damaged her Commanding Officer was killed. Torpedo bombers attacked the force at 1258 and 1315 hours but all torpedoes were avoided. At 1321 hours Force C sighted Force A 1 coming up the Kithera Channel from the westward.
The junction of Force A 1 with Force C, 22 May 1941.
On learning that Rear-Admiral King would be withdrawing through the Kithera Channel, Rear-Admiral Rawlings had decided that he would meet him in that neighbourhood. Accordingly, after being joined by Forces B and D he spent the forenoon patrolling between 20 and 30 miles west of the channel. The ammunition situation was causing anxiety, and rigid economy was ordered.
At 1225 hours, Rear-Admiral Rawlings heard from Rear-Admiral King that HMS Naiad was badly damaged and in need of support. He immediately decided to enter the Aegean and steered for the Kithera Channel at 23 knots. AA shell bursts from Force C were sighted at 1312 hours and a few minutes afterwards a large caique was seen between Pori and Antikithera Islands, to the south of the channel. HMS Greyhound was ordered to sink it.
At 1332 hours, just as forces A 1/B/D and C were meeting HMS Warspite was attacked by three Me 109’s equipped with bombs. A bomb hit and wrecked the starboard 4” and 6” batteries and damaged number three boiler room fan intakes, thereby reducing the ship’s speed. Both forces then withdrew to the south-westward, air attacks continuing intermittently for most of the afternoon.
The loss of HMS Greyhound, HMS Gloucester, HMS Fiji, 22 May 1941.
HMS Greyhound meanwhile, after sinking the caique, was returning to her place in Force A 1’s screen when at 1351 hours she was struck by two bombs and sank stern first 15 minutes later. HMS Kandahar and HMS Kingston were detached from Force C to pick up survivors and shortly after 1400 hours, Rear-Admiral King (who was the senior officer of all the forces present) ordered HMS Gloucester and HMS Fiji to give them AA support and to stand by the sinking Greyhound. These rescuing ships, and the men swimming in the water were subjected to almost continuous bombing and machine gun attacks. HMS Kingston was damaged by three near misses.
At 1413 hours, Rear-Admiral King asked Rear-Admiral Rawlings for close support as Force C by that time had practically no AA ammunition left. Force A 1 closed at the Warspite’s best speed (18 knots), and Rear-Admiral Rawlings, who was feeling uneasy about the orders given to Gloucester and Fiji informed Rear-Admiral King about the depleted state of their AA ammunition stocks of which the latter was not aware. At 1457 hours, Rear-Admiral King therefore ordered the rescuing ships to withdraw at their discretion, leaving boats and rafts if air attack prevented the rescue of survivors from Greyhound.
At 1530 hours, HMS Gloucester and HMS Fiji were coming up astern of HMS Warspite at high speed, engaging enemy aircraft. At 1550 hours, HMS Gloucester was hit by several bombs and came to a full stop. She was badly on fire and her upper deck was a shambles. In view of the intensity of the air attacks the Captain of HMS Fiji reluctantly decided that he could offer no assistance to her. All available boats and floats were dropped and the Fiji proceeded to the southward with Kandahar and Kingston still being hotly attacked by enemy aircraft.
At 1710 hours, HMS Fiji reported that she was in position 24 miles, 305°, Cape Elophonesi (the south-west point of Crete), steering 175° at 27 knots, a position 30 miles due east of Forces A 1 and C which were steering 215°.
At 1845 hours, after having survived about 20 bombing attacks by aircraft formations during the last four hours she fell victim to a single Me. 109. The machine flew out of the clouds in a shallow dive and dropped its bomb very close to the port side amidships. The ship took up a heavy list, but was able to steam at 17 knots until half an hour later when another single machine dropped three bombs which hit above ‘A’ boiler room. The list increased and at 2015 hours she rolled right over and sank in position 34°45’N, 23°12’E. She had expended all her 4” ammunition except for six star shell.
HMS Kandahar and HMS Kingston dropped boats and floats and then withdrew to the southward to avoid almost certain damage from air attacks if they had stayed in the area. They returned after dark and were able to rescue 523 officers and men. It was during this rescue work that Cdr. W.R. Marshall-A’Deane the Commanding Officer of HMS Greyhound, who had been picked up by HMS Kandahar earlier in the day when his own ship was sunk, jumped overboard to help a men in distress. He was lost out of sight in the darkness and was never seen again.
HMS Kandahar and HMS Kingston had been subjected to 22 air attacks between 1445 and 1920 hours and were now running short of fuel. At 2245 hours they left the scene of the loss of HMS Fiji and shaped course to rendezvous with Rear-Admiral King’s forces to the southward of Crete.
Night operations, 22-23 May 1941
Meanwhile, Rear-Admiral King, with Forces C and A 1 had been steering to the south-westward. Spasmodic air attacks continued till dusk. At 1645 hours HMS Valiant was hit by two medium bombs but no serious damage was done to her. Course was altered to the southward at 1800 hours and to the eastward at 2100 hours
Captain Lord Louis Mountbatten with his five destroyers; HMS Kelly, HMS Kashmir, HMS Kelvin, HMS Kipling and HMS Jackal had been delayed on his passage from Malta by a promising A/S hunt and only effected his junction with Force A 1 at 1600/22. At 2030 hours Kelly, Kashmir and Kipling were detached to search for survivors from Fiji and half an hour later Kelvin and Jackal were also detached to try to search for survivors from Gloucester. Subsequently these searches for survivors were cancelled and the destroyers were ordered to patrol inside Kisamo and Canea Bays.
On arrival at the Antikithera Channel HMS Kipling developed a steering defect and was detached to join Force A 1. Later on as the defect was remedied, her Commanding Officer decided to remain to the south-west of Crete where he anticipated he was able to make rendezvous with the other destroyer on their return. To this fortunate decision Capt. D.5 and over 250 of his officers and men in all probability were to owe their lives.
Continuing into Canea Bay Kelly and Kashmir fell in with a troop carrying caique, which they damaged badly with gunfire. They then carried out a short bombardment at Maleme and, whilst withdrawing, they engaged and set on fire another caique.
The Naval Officer in Command Suda had meanwhile reported some lights in Canea Bay. These lights the Kelvin and Jackal, who were operating in Kissamo Bay, were ordered to investigate, and finding them to be shore lights, proceeded independently for Alexandria informing the Commander-in-Chief of this intention at 0300/23.
Towards the eastern end of Crete, Force E, consisting of HMS Jervis, HMAS Nizam, HMS Ilex and HMS Havock (Lt. G.R.G. Watkins, RN) maintained a patrol off Heraklion without incident. They set course to return to Alexandria in the morning. On the way there were bombed for five hours, Ilex and Havock being damaged by near misses.
During the night HMS Decoy and HMS Hero embarked the Greek King, members of the government and other prominent Greeks at Agriarumeli on the south coast of Crete after which the two destroyers sailed to join Rear-Admiral King forces to the southward.
In the meantime Forces C and A 1 were some 75 miles to the southward of Crete steering 110°. At 0100/23 ‘Force C’ parted company and proceeded for Alexandria. Some hours previously Rear-Admiral Rawlings had signalled to the Commander-in-Chief that a rallying point further to the east would be better than one to the southwest of Kithera. If this was approved it was suggested that the 5th Destroyer Flotilla should make it’s withdrawal from Canea Bay to the eastward and that the Commander-in-Chief should issue orders accordingly, to all forces. Force A 1 therefore continued steering 110° until 0400/23, when, no reply having been received from the Commander-in-Chief, course was altered to the south-westward. Rear-Admiral Rawlings was about to signal a rendezvous to the southwest of Cape Elophonesi when a message was received ordering the withdrawal of all force to Alexandria. He accordingly set course for Alexandria at 15 knots, informing scattered units of his position, course and speed at 0530/23.
The Commander-in-Chief orders withdrawal to Alexandria, 23 May 1941.
At 2230/22, the Commander-in-Chief had received a ‘Most Immediate’ message from Rear-Admiral Rawlings reporting the loss of HMS Gloucester and HMS Fiji, and giving details of the ammunition situation. Owning to an error at Alexandria this signal made it appear that the battleships of Force A 1 had no pompon ammunition left. Therefore at 0408/23 orders were given to all forces to retire to the eastward.
In actual fact, the battleships had plenty of ammunition. Had the Commander-in-Chief been aware of this, they would not have been ordered to Alexandria, and would have been available as a support and rallying point for the 5th Destroyer Flotilla in the morning of the 23rd.
Naval situation at dawn, 23 May 1941.
Dawn on 23 May 1941 found the naval forces in the waters around Crete considerably scattered. To the eastward Capt. Mack with Force E was north of Crete, returning to Alexandria through the Kaso Strait.
Rear-Admiral Glennie in HMS Dido was just arriving at Alexandria with HMS Orion and HMS Ajax some distance astern of him.
The transport HMS Glenroy (Capt.(Retd.) J.F. Paget, RN), with reinforcements on board and escorted by HMS Coventry (A/Capt. W.P. Carne, RN), HMS Auckland (A/Capt. E.G. Hewitt, RN) and HMS Flamingo (Cdr. R.J.O. Otway-Ruthven, RN) had left Alexandria the previous afternoon and was 130 miles out making for Tymbaki.on the south coast of Crete.
Forces A 1 and C were about 25 miles apart to the south of Crete and were returning to Alexandria. The destroyers HMS Kandahar and HMS Kingston, with survivors from HMS Fiji on board were about to join Force C. The destroyers HMS Decoy and HMS Hero, with the King of Greece on board, were to the northward of Force A 1 which they joined at 0745/23.
Further to the west, a bit to the south of Gavdos Island, was Capt. Waller in HMAS Stuart, HMAS Vendetta and HMAS Voyager, who had been ordered around 2330C/22, by Rear-Admiral Rawlings to search for survivors from HMS Fiji. The Australian destroyers searched until around 0600C/23 and joined Force A 1 around 1000C/23. Also in that area were the destroyers HMS Jaguar (Lt.Cdr. J.F.W. Hine, RN) and HMS Defender (Lt.Cdr. G.L. Farnfield, RN) which had left Alexandria the day before with munitions for the army.
HMS Kelvin and HMS Jackal were to the south-west of Crete and returning to Alexandria where they arrived on May, 24th. HMS Kipling was also in that vicinity and was hoping to join HMS Kelly and HMS Kashmir, who had cleared Canea Bay and were retiring close to the west coast of Crete.
Loss off HMS Kelly and HMS Kashmir, 23 May 1941.
Captain Lord Louis Mountbatten had been withdrawing at full speed since dawn. At 0755 hours, after surviving two air attacks without suffering damage, he was about 13 nautical miles to the southward of Gavdos Island when his ships were attacked by a force of 24 Ju.87 dive bombers. The Kashmir was hit and sunk in 2 minutes. A large bomb struck the Kelly while she was doing 30 knots under full starboard rudder. She turned turtle to port with considerable way on, and after floating upside down for about half an hour, finally sank. In accordance with earlier practice the dive bombers then machine-gunned the survivors in the water, killing and wounding several.
The attack was witnessed by HMS Kipling, who was some 7 to 8 miles to the southward. She immediately closed and succeeded in picking up 281 officers and men from the water including the Commanding Officers of both destroyers. She left the scene of the sinking for Alexandria at 1100/23. She was considerably hampered in this rescue work by six high level bombing attacks and it was subsequently estimated that between 0820 and 1300 hours no less then 40 aircraft attacked her, dropping 83 bombs, though she emerged from the ordeal unscathed.
Return of the British naval forces to Alexandria, 23 May 1941.
In the meantime Force C had been joined by HMS Kandahar and HMS Kingston with survivors from HMS Fiji on board at 0630/23. Both destroyers were very low on fuel. Force A 1 was only 25 miles to the north-west. Force C then closed Force A 1 and both destroyers were able to fuel from the battleships. Shortly after 0800 hours, a signal was received from HMS Kipling reporting the loss of HMS Kelly and HMS Kashmir. Rear-Admiral King reluctantly decided that he could sent no help from Forces A 1 and C.
HMS Decoy and HMS Hero, with the Greek Royal party on board, had joined Force A 1 about the same time, and in course of the forenoon all the scattered destroyer joined up except for HMS Kipling. Later in the day HMS Jaguar and HMS Defender were detached to land ammunition at Suda Bay. The remained of the force proceeded to Alexandria where they arrived in the early hours of the 24th.
The fighting in Crete, 21 -24 May 1941.
On shore, meanwhile, the situation deteriorated. During the 21st although Maleme airfield remained no-man’s land under fire from Italian guns manned by New Zealand gunners, enemy troop carriers landed there regardless of losses. Parachute reinforcements also arrived, and the Germans concentrated between Aliakanou and Canea, and immediately west of Meleme. The savage air bombardment of the British positions continued.
Early on the 22nd, a British counter attack reached Maleme airfield, but heavy dive bombing, and machine gun fire from air and ground rendered further progress impossible. Fighting continued throughout the day, but enemy troop carriers with reinforcements were arriving at a rate of more than 20 each hour, and the withdrawal of British troops to a new line further east was commenced.
The steady flow of German reinforcements, and very heavy air attacks on the British troops continued throughout the 23rd. On this day, the five Motor Torpedo Boats of the 10th M.T.B. Flotilla in Suda Bay (MTB 67, MTB 213, MTB 214, MTB 216 and MTB 217) were all sunk by air attacks. During their operations off the Cretan coast and in harbour they accounted for two aircraft shot down for sure and another two probably shot down.
By the 24th the AA defences of Suda had been seriously reduced and losses to small craft in port were heavy. Severe bombing of Canea compelled the withdrawal of the Army Headquarters to the Naval Headquarters at Suda.
At Heraklion, in the meantime, the Germans had been unable to make much headway. Successful counter attacks were carried out by British troops, in conjunction with Greek and Cretan forces on the 21st, and the situation remained will in hand the next day. 20 to 30 German troop carrying aircraft were destroyed by AA fire. On the 23rd an ultimatum from the Germans calling for the surrender of Heraklion was rejected by the British and Greek commanders, though by this time the Greeks were running short of ammunition.
Reinforcements and supplies to the Army in Crete.
Throughout the Battle of Crete, frequent attempts were made to throw reinforcements and supplies into the island, with varying success.
All disembarkation had to planned to take place at night, owning to the German command of the air. Attempts were made to use HMS Glenroy and merchant vessels for this purpose, but it was found in practice that only warships were able to get through.
On the night of the 23rd – 24th of May, HMS Jaguar and HMS Defender landed stores and ammunition at Suda between midnight and 0200 hours. They returned to Alexandria with officers and men not required in Crete as well as some wounded.
HMS Glenroy embarked 900 men from the Queens Royal Regiment, H.Q. staff of the 16th Infantry Brigade and 18 vehicles at Alexandria. She then sailed for Tymbaki on the afternoon of the 22nd escorted by HMS Coventry, HMS Auckland and HMS Flamingo. These ships were recalled at 1127/23 due to the heavy air attacks sustained by the Fleet.
The following day, HMS Isis, HMS Hero and HMAS Nizam sailed from Alexandria with the Headquarters and two battalions of special service troops, known as ‘Layforce’. These were to be landed on the south-west coast of Crete at Selinos Kastelli. The weather conditions however did not permitted a landing and it had to be cancelled.
During the night of 24 – 25 May, the fast minelayer HMS Abdiel landed about 200 personnel of ‘Layforce’ and about 80 tons of stores at Suda. She returned with about 50 wounded and 4 Greek Cabinet Ministers. A dive bombing attack by 4 Ju.88’s at 1300/25 was successfully avoided.
On arrival at Alexandria in the evening of the 25th, HMS Abdiel embarked Brigadier Laycock with 400 men and 100 tons of stores. She left again early on the 26th accompanied by HMS Hero and HMAS Nizam. These ships landed about 750 troops and stores at Suda during the night of 26 – 27 May. These were the last reinforcements landed in Crete.
About 930 men no longer required there were then embarked and taken back to Alexandria in HMS Abdiel. Air attacks commenced at daylight, just north-west of the Kaso Strait, and continued intermittently till 1130/27. No damage was sustained except by HMS Hero whose speed was reduced to 28 knots by a near miss at 0700 hours.
Meanwhile the Glenroy with a battalion of the Queen’s Regiment on board, had sailed from Alexandria for Tymbaki during the evening of the 25th. She was being escorted by HMS Coventry, HMAS Stuart and HMS Jaguar. The force was subjected to bombing attacks by enemy reconnaissance aircraft during the forenoon. At 1820/26 there were heavy dive bombing attacks. Glenroy was slightly damaged sustained some casualties owing to near misses and machine gun attacks. Three of her landing craft were holed and a large dump of cased petrol on the upper deck caught fire, which necessitated steering down wind until the fire was put out. With 800 troops on board and with a large cargo of petrol it was a nasty situation. By 1950 hours the fire was under control and course was resumed to the northward. A final attack by torpedo bombers at 2050 hours caused no further damage. The torpedoes were being successfully evaded. The Glenroy was now about three hours behind schedule and wither landing craft capacity down by about a third and the weather forecast in mind it was decided to cancel the operation and the force was ordered to return to Alexandria.
One other attempt was made to transport some supplies to Crete. Convoy AN 31 of three Greek merchant ships escorted by HMS Auckland left Alexandria at 0500/26. One of the merchant vessels soon had to turn back due to engine trouble. The convoy escort was later reinforced by HMS Calcutta and HMS Defender. Early the next forenoon it was realised that under the existing conditions they would not have a chance of reaching the island and they too were recalled. Shortly after turning back the convoy was attacked by about 9 Ju.88’s but no damage was sustained. One of the attacking aircraft was seen to be hit by AA fire.
Naval situation at dawn, 24 May 1941.
At daylight on the 24th, the only naval forces at sea were HMS Jaguar and HMS Defender, which were about to pass through the Kaso Strait on passage from Suda Bay to Alexandria and HMS Abdiel which had left Alexandria during the night and was on passage to Suda Bay with more stores for the Army.
HMS Kipling with the survivors from HMS Kelly and HMS Kashmir on board was about 70 miles from Alexandria, practically out of fuel. HMS Protector (Cdr. R.J. Gardner, RN) had been sent out to meet her.
It was on this day that the Commander-in-Chief, well aware under which strain his ships were working, signalled to his Fleet. ‘The Army is just holding its own against constant reinforcement of airborne enemy troops. We must NOT let them down. At whatever cost to ourselves, we must land reinforcements for them and keep the enemy from using the sea. There are indications that the enemy resources are stretched to the limit. We can and must outlast them. STICK IT OUT.’
The Commander-in-Chief’s appreciation, 24 May 1941.
Four days had now elapsed since the opening of the attack on Crete and in reply to a request from the Chiefs-of-Staff for an appreciation, the Commander-in-Chief, Mediterranean, informed them that the scale of air attack now made it no longer possible for the Navy to operate in the Aegean or vicinity of Crete by day. The Navy could not guarantee to prevent seaborne landings without suffering losses which, added to those already sustained, would very seriously prejudice our command of the Eastern Mediterranean.
The Chiefs-of-Staff replied that the Fleet and Royal Air Force were to accept whatever risk was entailed in preventing any considerable enemy reinforcement from reaching Crete. If enemy convoys were reported north of Crete, the Fleet would have to operate in that area by day, although considerable losses might be expected. Experience would show for how long this situation could be maintained.
To this the Commander-in-Chief replied on the 26th that the determining factor in operating in the Aegean was not the fear of sustaining losses but the need to avoid crippling the Fleet. He added that the enemy, so far, had apparently not succeeded in landing any appreciable reinforcements by sea.
As how long the situation could be maintained, he pointed out that in three days two cruisers and four destroyers had been sunk, one battleship had been put out of action for several months, and two cruisers and four destroyers had been considerably damaged. He also referred to the strain both to personnel and machinery in the light craft, who had been operating to the limits of their endurance since February.
Captain McCarthy’s Force , 24-26 May 1941.
There had been indications that a landing might take place in the east of Crete at Sitia on the night of 24-25 May. To deal with this threat a Force consisting of the cruisers HMS Ajax (Senior Officer), HMS Dido, destroyers HMS Hotspur, HMS Imperial and HMS Kimberley left Alexandria at 0800/24 and passing through the Kaso Strait swept the north coast of Crete during the night. Nothing was sighted and the Force withdrew to the southward of Kaso before daylight. Here they remained during the 25th, repeating the sweep north of Crete the next night. Again nothing was sighted.
F.A.A. attack on Scarpanto airfield, 26 May 1941 (Operation MAQ 3).
It was known that Scarpanto airfield was being extensively used by the enemy in his operations against Crete, and it was therefore decided to attack it with Fleet Air Arm aircraft from HMS Formidable (Capt. A.W.la T. Bisset, RN, flying the flag of A/Rear-Admiral D.W. Boyd, CBE, DSC, RN), who had now built up her fighter strength to 12 Fulmars.
Vice-Admiral Pridham-Whippel left Alexandria on the 25th with Force A which was made up of the battleships HMS Queen Elizabeth (Capt. C.B. Barry, DSO, RN, flying the flag of Vice-Admiral H.D. Pridham-Whippell, CB, CVO, RN), HMS Barham (Capt. G.C. Cooke, RN), aircraft carrier HMS Formidable and the destroyers HMS Jervis, HMS Janus, HMS Kandahar, HMS Nubian, HMS Hasty, HMS Hereward, HMAS Voyager and HMAS Vendetta.
At 0330/26 this Force was about 100 miles to the south-south-west of Scarpanto. Four Albacores and later five Fulmars were flown off from HMS Formidable to attack the airfield. The Albacores achieved complete surprise. They destroyed two enemy aircraft and damaged several others while the Fulmars damaged a number of Cr.42’s and Ju.87’s. All aircraft had returned to Formidable by 0700 hours. By now the Force headed by HMS Ajax had also joined coming from the Kaso Strait. ‘Force A’ now set course to the southward.
Operations of ‘Force A’, HMS Formidable and HMS Nubian damaged, 26 May 1941.
During the forenoon of the 26th May, enemy aircraft were continually being detected. The eight remaining serviceable aircraft, four of which were fighters, made 24 flights, during which there were 20 combats. Two enemy aircraft were shot down and two more were probably destroyed. One Fulmar was lost.
At 1320 hours, when about 150 miles south of the Kaso Strait ‘Force A’ was attacked by about 20 dive bombers which approached from the African coast. HMS Formidable was hit twice, her starboard side was blown out between numbers 17 and 24 bulkheads and ‘X’ turret and cable and accelerator gear were put out of action.
During the same attack, HMS Nubian, was hit right aft and had her stern blown off. She was still able to steam 20 knots. She was then detached to Alexandria with HMS Jackal where she arrived under her own steam that night.
Force A than shaped course to the eastward and after dark HMS Formidable escorted by HMS Hereward, HMAS Vendetta and HMAS Voyager parted company and set course for Alexandria where they arrived around 0715C/27. The remainder of the Force operated to the north-eastward of Alexandria during the night.
Naval situation at dawn, 27 May 1941.
At daylight, 27 May 1941, ‘Force A’, now consisted of the battleships HMS Queen Elizabeth, HMS Barham and escorted by the destroyers HMS Jervis, HMS Janus, HMS Kandahar, HMS Kelvin, HMAS Napier and HMS Hasty were about 250 nautical miles south-east of Kaso, steering to the north-westward. In the Kaso Strait HMS Abdiel, HMS Hero and HMAS Nizam were returning from Suda Bay.
Some 90 nautical miles to the north-west of Force A, HMS Glenroy and her escorting destroyers; HMAS Stuart and HMS Jaguar were steering for Alexandria after their abortive attempt to land troops and supplies at Tymbaki. About half way between these two forces was convoy AN 31 heading for Crete. This convoy was recalled soon afterwards.
Operations of ‘Force A’, HMS Barham damaged, 27 May 1941.
Vice-Admiral Pridham-Whippel with Force A had been steering since daylight for the Kaso Strait to cover the withdrawal of HMS Abdiel, HMS Hero and HMAS Nizam. At 0859 hours, 15 Ju.88’s and He.111’s attacked from the direction of the sun. HMS Barham was hit on ‘Y’ turret and two of her bulges were flooded by near misses. A fire was started, which necessitated steering down wind to the south until it was extinguished two hours later. Two enemy aircraft were shot down and one was seen to be damaged.
At 1230 hours, on receipt of instructions from the Commander-in-Chief, Force A shaped course for Alexandria, arriving there at 1900 hours that evening.
The collapse in the Suda-Maleme area, 26 May 1941.
While these operation had been in progress at sea, the battle on shore had continued with unabated bitterness. Sunday, May 25th, the sixth day of the enemy attack was critical for the Australian and New Zealand troops in the Maleme area. After continuous bombing of their positions all day, a strong enemy attack took Galatos. British light tanks and New Zealand troops retook it at the point of the bayonet. This was described by General Fryberg as ‘one of the great efforts in the defence of Crete’. The position could not be held, however, and with Maleme no longer under fire, enemy troop carriers poured in reinforcements. Late that night the new line formed in the Maleme-Canea sector was broken by the Germans, after several attacks had been repulsed.
The next day (May 26th) further attacks compelled the tired New Zealand and Australian troops to withdraw still further towards Suda. They had fought for six days without respite; more then 20 fiece bayonet counter attacks had been carried out, and throughout the whole period they had been subjected to air attacks on unprecedented scale. That night the line collapsed and the retreat commenced.
So suddenly did the collapse come at the last, that there had been no time to organise the retirement and though the infantry which withdrew from the front line did so in good order, the movements of the rest of the force were uncontrolled, and much congestion on the route resulted.
The withdrawal, which was directed towards Sphakia continued during the 27th. By this time a rearguard had been organised which was able to cover the retirement of the bulk of the remainder to Sphakia.
Meanwhile in the Heraklion sector the British troops were holding out. On the 26th, the Argyll and Sutherland Highlanders, and two of the ‘I’ tanks landed at Tymbaki on the 19th, succeeded in breaking through from the south and joining them. With the Suda-Maleme area in the hands of the enemy, however, the position of the troops at Heraklion was clearly untenable and it appeared to be only a matter of time before the enemy would launch a major attack on them.
The work of the Royal Air Force.
Throughout the battle, the Royal Air Force, working from Egypt, did all that was possible to afford relief to our troop in Crete; but the distance was too great to maintain a scale of attack on the Germans that could affect the issue.
Enemy positions and aircraft were attacked at Maleme by Blenheims and Marylands (of the S.A.A.F.) at intervals on the 23rd, 25th, 26th and 27th of May. In these raids at least 40 enemy aircraft of various types were destroyed and many others damaged. Nine Ju.52’s carrying troops were destroyed by Hurricanes on the 23rd and 26th. Wellingtons bombed Maleme on the nights of the 23rd, 25th, 26th, 27th and 29th. They also attacked Scarpanto on the nights of the 25th, 27th, 28th and 29th and Heraklion on the 30th at 31st of May and 1st of June.
All these attacks caused fires and explosions but the extent of the damage is not known. During the battle the R.A.F. lost 38 aircraft, 33 of them in the air.
The decision to evacuate Crete, 27 May 1941.
Messages received from the G.O.C. Troops in Crete and the N.O.I.C. Suda Bay made it clear that our line defending Suda had collapsed with great suddenness.
In a message times 0824/27, General Wavell informed the Prime Minister that he feared we must recognise that Crete was no longer tenable, and that, so far as possible, the troops must be withdrawn. In reply to this message, the Chiefs-of-Staff ordered Crete to be evacuated forthwith.
Evacuation from Sphakia, 1st night, 28-29 May 1941.
At 0600/28, less then 24 hours after the decision to evacuate Crete had been taken, Force B, consisting of the light cruisers HMS Orion, HMS Ajax, HMS Dido and the destroyers HMS Decoy, HMS Hereward, HMS Hotspur, HMS Imperial, HMS Jackal and HMS Kimberley departed Alexandria to evacuate the Heraklion garrison. Rear-Admiral Rawlings, flying his flag in Orion was given charge of this operation.
Two hours later, Force C, under Capt. Arliss, left Alexandria for Sphakia. It was made up of HMAS Napier, HMAS Nizam, HMS Kandahar and HMS Kelvin. Force C had an uneventful passage and commenced embarkation at 0030/29. The operation was completed by 0300/29 by which time the four destroyers had taken on board nearly 700 troops and had landed badly needed rations for 15000.
On the return passage, the force was attacked by four Ju.88’s at about 0900 hours, HMAS Nizam suffered minor damage from a near miss. Fighter protection had been arranged from 0545 hours and at 0940 hours a crashed enemy aircraft was sighted, probably shot down by our fighters. Force C arrived at Alexandria at 1700/29 without much enemy interference.
Evacuation of the Heraklion garrison, 1st night, 28-29 May 1941.
Rear-Admiral Rawlings, meanwhile, had been having a much more different experience. At 1700/28 Force B was about 90 miles from Scarpanto and from then until dark was subjected to a series of air attacks. High level, dive bombing and torpedo.
At 1920 hours, HMS Imperial was near missed but appeared to be undamaged and 50 minutes later a near miss caused slight damage and some casualties in HMS Ajax which was then detached to Alexandria.
On arrival of the force at Heraklion at 2330/28 the destroyers immediately entered harbour, embarked troops from the jetties and ferried them to the cruisers outside. By 0245/29 the ferrying was complete and a quarter of an hour later HMS Kimberley and HMS Imperial had embarked the rearguard.
At 032 hours the force proceeded to sea at 29 knots with the whole of the Heraklion garrison on board, some 4000 troops. All went well until 0345 hours when HMS Imperial’s steering gear failed and she nearly collided with HMS Orion and HMS Dido. Her rudder was jammed and repairs could not be made. Delaying the force would mean more air attacks and it was vital to be as far away as possible from the enemy airfields before daylight. It was therefore decided to take off the troops from HMS Imperial and then sink her. At 0445 hours this was successfully done by HMS Hotspur which had now 900 troops on board. By now Force B was about 1,5 hours late and it was only at sunrise that they arrived off the Kaso Strait. The German air force was already waiting.
Air attacks commenced at 0600 hours and continued at intervals to 1500 hours when the force was within 100 miles from Alexandria.
At 0625 hours, HMS Hereward was hit by a bomb which forced her to reduce speed and fall away from her position in the screen. The force was then in the middle of the Kaso Strait and once more Rear-Admiral Rawlings had to decide whether to endanger his whole force and the troops on board for the sake of a single ship, or to leave her for a certain destruction. HMS Hereward was last seen making slowly towards Crete which was only five miles distant with her guns engaging enemy aircraft.
Twenty minutes later HMS Decoy suffered damage to her machinery as the result of a near miss and the speed of the force had to be reduced to 25 knots. A further reduction to 21 knots was needed after HMS Orion had been near-missed at 0730 hours.
With 4000 troops on board, the speed reduced to 21 knots, and no fighter support, things were beginning to look ugly. The Commander-in-Chief realised from Rear-Admiral Rawlings signals that our fighters had not appeared and every endeavour was made to rectify this but the fighters only appeared at noon.
By this time Force B had suffered badly. Shortly after 0730 hours Capt. Back, the Flag captain of HMS Orion was wounded and died two hours later. His place was taken by Cdr. Wynne.
At 0815 hours, HMS Dido was hit on ‘B’ turret and the Orion on ‘A’ turret at 0900 hours, both by bombs from Ju.87 dive bombers. In each case the turrets were put out of action.
At 1045 hours, HMS Orion was again attacked by Ju.87’s and a bomb passed through her bridge, putting the lower conning tower out of action. Force B was then 100 miles south of Kaso and this was the last attack made by dive bombers.
The Orion had nearly 1100 troops on board and the casualties on the crowded mess decks were very heavy. It is believed that a total of 260 were killed and 280 were wounded. In addition three of the engineer officers were killed. All normal communication between the bridge and the engine room was destroyed, the steering gear was put out of action, and three boiler rooms were damaged. Also there were fires in the foremost 6” and 4” magazines.
Fortunately there was a lull in the air attacks until 1300/29 when a high level bombing attack developed, followed by another one at 1330 hours and a final one at 1500 hours.
Force B arrived at Alexandria at 2000/29. HMS Orion only having 10 tons of fuel and two rounds of 6” HE remaining.
Feasibility of further evacuation considered, 29-30 May 1941.
This disastrous commencement of the evacuation placed the Commander-in-Chief in a most unpleasant predicament. Of the 4000 troops embarked in Force B, no less then 800 had been killed or captured (those on the Hereward) after leaving Crete. If this was to be the scale of the casualties, it appeared that quite apart from prospective naval losses of ships and men, who could be ill spared, our efforts to rescue the army from capture might only lead to destruction of a large portion of the troops.
Particular anxiety was feld for the transport HMS Glengyle (A/Capt.(Retd.) C.H. Petrie, RN) which was already at sea and was due to embark 3000 troops the next night (29-30 May).
It was only after long and anxious consideration, and consultation with the Admiralty, as well as with the military authorities, that the decision to continue the evacuation could be taken.
Once taken this decision was amply justified. The remainder of the evacuation proceeded almost without casualties to personnel. Fighter protection became steadily more effective, and the enemy less enterprising. His failure to interfere with the nightly embarkations at Sphakia was most surprising.
The original intention to send ships to Plaka Bay to take off the Retimo garrison was abandoned, as it was not known whether the troops had received the message ordering them to retire there. Moreover it was doubtful that they would be able to reach the coast, since they had no supplies. 1200 rations were dropped by air at Plaka, in case any should get there, but it was decided to send ships to Sphakia only.
From messages received from Crete during the night of 28-29 May, it was thought that the next night was going to be the last night of the evacuation but in the course of the day it became clear that the situation was not so desperate as it had appeared and the Commander-in-Chief decided to send four destroyers to embark men on the night of 30-31 May.
Evacuation from Sphakia, 2nd night, 29-30 May 1941.
Meanwhile Rear-Admiral King, wearing his flag in HMS Phoebe (Capt. G. Grantham, RN, flying the flag of Rear-Admiral E.L.S. King, CB, MVO, RN) had left Alexandria in the evening of the 28th with the light cruiser HMAS Perth, AA cruisers HMS Calcutta, HMS Coventry, transport HMS Glengyle, destroyers HMS Jervis, HMS Janus and HMS Hasty (Force D). Detination was Sphakia and their passage was uneventful except for one attack by one Ju.88 which dropped a stick of bombs near HMAS Perth but no damage was caused.
The cruisers and the Glengyle anchored off Sphakia at 2330/29 and the destroyers closed in one at a time to embark their quota. The troops were ferried from the beach in the landing craft from Glengyle assisted by two assault craft carried in HMAS Perth. The beach was too small for ships boats to be used in addition.
By 0320/30 a total of 6000 men had been embarked and Force D sailed for Alexandria, leaving three motor landing craft behind for use on subsequent nights. During the passage there were three air attacks on the force which had been joined by the destroyers HMAS Stuart, HMS Defender and HMS Jaguar at 0645 hours.
In the fist of these attacks, at 0930 hours, HMAS Perth was hit and her foremost boiler room was put out of action. The second and third attacks achieved no result although bombs fell close to HMAS Perth and HMS Jaguar. Fighter cover was able to drive off quite a number of enemy aircraft. The force returned to Alexandria during the night of 30 / 31 May.
Evacuation from Sphakia, 3rd night, 30-31 May 1941.
At 0915/30, Force C, consisting of the destroyers HMAS Napier, HMAS Nizam, HMS Kandahar and HMS Kelvin again left Alexandria for Sphakia. After a few hours Kandahar developed a mechanical defect and had to return to Alexandria.
At 1530 hours, three Ju.88’s carried out an unseen dive from astern. Bombs were dropped and HMS Kelvin was near missed. The result was that her speed had to be reduced to 20 knots and she too was detached to Alexandria.
Captain Arliss now continued on with only the two Australian destroyers and arrived at Sphakia at 0030/31. By 0300 hours, each destroyer had embarked over 700 troops, using the three motor landing craft that had been left behind the previous night, supplemented by the ships boats.
On the return passage to Alexandria the two Australian destroyers were attacked by 12 Ju.88’s between 0815 and 0915 hours. Both destroyers were damaged by near misses and HMAS Napier had her speed reduced to 23 knots. One Ju.88 was shot down while three others were seen to be hit.
Fighter cover was able to shoot down three Ju.88’s and one Cant 1007 during the day. The remainder of the passage was without incident and HMAS Napier and HMAS Nizam arrived at Alexandria in the evening with a total of 1510 troop on board.
The final evacuation, Sphakia, 31 May – 1 June 1941.
A final evacuation of about 3000 men was required, which was more then previously was estimated. It was therefore decided to sent over one more Force to evacuate these men during the night of 31 May – 1 June.
So at 0600/31, Vice Admiral King departed Alexandria with the light cruiser HMS Phoebe (Flag), fast minelayer HMS Abdiel, destroyers HMS Hotspur, HMS Jackal and HMS Kimberley to carry out this final evacuation (Force D).
That forenoon the Commander-in-Chief received a signal from Capt. Arliss, who was then on his way back from Sphakia, which indicated that there was then some 6500 men to come off Crete. Vice-Admiral King was then authorized to increase the total number he was allowed to embark to 3500 men. This was later changed to ‘fill up to maximum capacity’.
In the evening of the 31st the force was attacked three times by enemy aircraft. None of the bombs fell very close and one Ju.88 was believed to be damaged by AA fire. Many bombs were seen to be jettisoned on the horizon indicating several successful combats by our fighters.
Force D arrived at 2320/31. Three fully loaded landing craft, the ones left behind, immediately went alongside. The embarkation went so quickly that for a time the beach was empty of troops. This was unfortunate as it led to a last minute rush, which could not be dealt with in the time available and some troops had to be left behind. Some medical stores were landed and finally the three motor landing craft were destroyed or sunk.
The force departed at 0300/1 having embarked nearly 4000 troops and arrived at Alexandria at 1700 hours that day. The return passage was uneventful.
The loss off HMS Calcutta.
Yet one more loss was suffered by the Fleet. In order to provide additional protection for Force D the AA cruisers HMS Calcutta and HMS Coventry were sailed from Alexandria early on the 1st of June. When only about 100 nautical miles out, they were attacked by two Ju.88’s, who dived from the direction of the sun. HMS Coventry was narrowly missed by the first but two bombs from the second hit HMS Calcutta and she sank within a few minutes at 0920/1. HMS Coventry then picked up 23 officers and 232 ratings. She then immediately returned to Alexandria. (15)
26 Jun 1941
The battleships HMS Queen Elizabeth (Capt. C.B. Barry, DSO, RN, flying the flag of Vice-Admiral H.D. Pridham-Whippell, KCB, CVO, RN), HMS Warspite (Capt. D.B. Fisher, CBE, RN), HMS Valiant (Capt. C.E. Morgan, DSO, RN), light cruiser HMS Ajax (Capt. E.D.B. McCarthy, RN), fast minelayer HMS Abdiel (Capt. E. Peydell-Bouverie, MVO, RN) and the destroyers HMS Defender (Lt.Cdr. G.L. Farnfield, RN), HMS Griffin (Lt.Cdr. J. Lee-Barber, DSO, RN), HMS Hasty (Lt.Cdr. L.R.K. Tyrwhitt, DSC, RN), HMS Hero (Cdr. H.W. Biggs, DSO and Bar, RN), HMS Jaguar (Lt.Cdr. J.F.W. Hine, RN), HMS Kandahar (Cdr. W.G.A. Robson, DSO, RN) and HMS Kimberley (Lt.Cdr. J.S.M. Richardson, DSO, RN) departed Alexandria for exercises between Alexandria and Port Said.
HMS Warspite was later detached to Port Said. She was to proceed to the USA for repairs and refit. She was escorted to Port Said by HMS Griffin, HMS Kandahar and HMS Kimberley. After delivering the battleship at Port Said, Griffin and Kandahar proceeded to Haifa, where they arrived on 27 June, to operate off the Syrian coast while Kimberley rejoined the Fleet.
The light cruiser HMS Phoebe (Capt. G. Grantham, RN) and the fast minelayer HMS Latona (Capt. S.L. Bateson, RN) also joined the Fleet for the exercises on the 27th.
The Fleet returned to Alexandria the next day (27th). (16)
18 Jul 1941
The battleships HMS Queen Elizabeth (Capt. C.B. Barry, DSO, RN, flying the flag of Vice-Admiral H.D. Pridham-Whippell, KCB, CVO, RN), HMS Warspite (Capt. D.B. Fisher, CBE, RN), HMS Valiant (Capt. C.E. Morgan, DSO, RN), light cruiser HMS Phoebe (Capt. G. Grantham, RN) and the destroyers HMS Havock (Lt. G.R.G. Watkins, RN) and HMS Kipling (Cdr. A. St. Clair-Ford, RN) departed Alexandria for exercises. At sea they were joined by the fast minelayers HMS Abdiel (Capt. E. Peydell-Bouverie, MVO, RN) and HMS Latona (Capt. S.L. Bateson, RN) which had already departed Alexandria for exercises the previous day. Also at sea joined the destroyers HMS Hasty (Lt.Cdr. L.R.K. Tyrwhitt, DSC, RN), HMS Jackal (Lt.Cdr. R.McC.P. Jonas, DSC, RN) and HMAS Nizam (Lt.Cdr. M.J. Clark, RAN) which came from Haifa. (16)
19 Jul 1941
Having completed their exercises, the battleships HMS Queen Elizabeth (Capt. C.B. Barry, DSO, RN, flying the flag of Vice-Admiral H.D. Pridham-Whippell, KCB, CVO, RN), HMS Warspite (Capt. D.B. Fisher, CBE, RN), HMS Valiant (Capt. C.E. Morgan, DSO, RN), light cruiser HMS Phoebe (Capt. G. Grantham, RN), fast minelayer HMS Latona (Capt. S.L. Bateson, RN) and the destroyers HMS Hasty (Lt.Cdr. L.R.K. Tyrwhitt, DSC, RN), HMS Havock (Lt. G.R.G. Watkins, RN), HMS Jackal (Lt.Cdr. R.McC.P. Jonas, DSC, RN), HMS Kipling (Cdr. A. St. Clair-Ford, RN) and HMAS Nizam (Lt.Cdr. M.J. Clark, RAN) returned to Alexandria around noon. (16)
22 Jul 1941
Around 2100C/22, the Mediterranean Fleet, made up of the battleships HMS Queen Elizabeth (Capt. C.B. Barry, DSO, RN, flying the flag of Vice-Admiral H.D. Pridham-Whippell, KCB, CVO, RN), HMS Valiant (Capt. C.E. Morgan, DSO, RN), light cruisers HMS Naiad (Capt. M.H.A. Kelsey, DSC, RN, flying the flag of Vice-Admiral E.L.S. King, CB, MVO, RN), HMS Phoebe (Capt. G. Grantham, RN), HMS Neptune (Capt. R.C. O'Conor, RN), HMAS Hobart (Capt. H.L. Howden, CBE, RAN), fast minelayers HMS Abdiel (Capt. E. Peydell-Bouverie, MVO, RN), HMS Latona (Capt. S.L. Bateson, RN) and the destroyers HMS Griffin (Cdr. J. Lee-Barber, DSO, RN), HMS Hasty (Lt.Cdr. L.R.K. Tyrwhitt, DSC, RN), HMS Havock (Lt. G.R.G. Watkins, RN), HMS Jackal (Lt.Cdr. R.McC.P. Jonas, DSC, RN), HMS Kimberley (Cdr. J.S.M. Richardson, DSO, RN), HMS Kipling (Cdr. A. St. Clair-Ford, RN) and HMAS Nizam (Lt.Cdr. M.J. Clark, RAN) departed Alexandria to proceed to a position to the west of Crete.
Around 1400C/22, the light cruisers HMS Ajax (Capt. E.D.B. McCarthy, DSO, RN, flying the flag of Rear-Admiral H.B. Rawlings, OBE, RN), HMS Leander (New Zealand Division) (Capt. R.H. Bevan, RN) and the destroyers HMS Jervis (Capt. P.J. Mack, DSO, RN), HMS Jaguar (Lt.Cdr. J.F.W. Hine, RN), HMS Kandahar (Cdr. W.G.A. Robson, DSO, RN) and HMS Kingston (Lt.Cdr. P. Somerville, DSO, DSC, RN) had departed Haifa to rendez-vous with the fleet at 0600C/23.
At daylight on 23 July the AA cruiser HMS Carlisle (A/Cdr. W. Pope, RN) also joined the fleet.
After dark on 23 July the fleet turned eastwards. HMS Neptune, HMS Abdiel and HMS Kimberley were then detached with orders to proceed to Port Said where they arrived on 24 July.
HMS Latona, HMS Jervis, HMS Jaguar and HMS Kandahar were detached on the 24th to make rendezvous off Alexandria with the damaged aircraft carrier HMS Formidable (Capt. A.W.la T. Bisset, RN) and escort her to Port Said. A/Rear-Admiral D.W. Boyd, CBE, DSC, RN had struck his flag in HMS Formidable before departure. HMS Formidable arrived at Port Said on the 25th and immediately entered the Suez Canal for a southbound passage. She arrived at Ismalia early in the evening of the 25th. HMS Formidable is to proceed to the U.S.A. for repairs. HMS Latona and the destroyers then proceeded to Haifa.
On the 24th HMS Leander was also detached with orders to proceed to Port Said where she arrived on 25 July to embark troops together with HMS Latona and HMS Jaguar.
The bulk of the fleet returned to Alexandria around 1800C/24. (16)
5 Aug 1941
The battleship HMS Queen Elizabeth (Capt. C.B. Barry, DSO, RN, flying the flag of Vice-Admiral H.D. Pridham-Whippell, KCB, CVO, RN), light cruiser HMS Naiad (Capt. M.H.A. Kelsey, DSC, RN, flying the flag of Vice-Admiral E.L.S. King, CB, MVO, RN) and the destroyers HMS Jervis (Capt. P.J. Mack, DSO and Bar, RN), HMS Kingston (Lt.Cdr. P. Somerville, DSO, DSC, RN), HMS Hero (Cdr. H.W. Biggs, DSO and Bar, RN) and HMAS Vendetta (Lt.Cdr. R. Rhoades, RAN) departed Alexandria around 1530 hours to conduct exrcises at sea. They returned to Alexandria in the morning of the next day minus HMS Jervis and HMS Kingston which had been detached as an enemy supply vessel was reported near Mersa Matruh which they wre ordered to intercept. Nothing was however sighted and both destroyers returned to Alexandria shortly after noon on the 7th. (16)
1 Sep 1941
Vice-Admiral H.D. Pridham-Whippell, KCB, CVO, RN, struck his flag in HMS Queen Elizabeth (Capt. C.B. Barry, DSO, RN) and the hoisted it in HMS Barham (Capt. G.C. Cooke, RN).
Admiral Sir A.B. Cunningham, GCB, DSO and 2 Bars, RN) then hoisted his flag in HMS Queen Elizabeth. (16)
4 Sep 1941
The battleship HMS Queen Elizabeth (Capt. C.B. Barry, DSO, RN, flying the flag of Admiral Sir A.B. Cunningham, GCB, DSO and 2 Bars, RN), light cruisers HMS Naiad (Capt. M.H.A. Kelsey, DSC, RN, flying the flag of Vice-Admiral E.L.S. King, CB, MVO, RN), HMS Galatea (Capt. E.W.B. Sim, RN), destroyers HMS Decoy (Lt.Cdr. J.M. Alliston, RN), HMS Hotspur (Lt. T.D. Herrick, DSC, RN), HMS Havock (Lt. G.R.G. Watkins, DSC, RN), HMS Hotspur (Lt. T.D. Herrick, DSC, RN), HMS Jaguar (Lt.Cdr. J.F.W. Hine, RN) and HMS Kimberley (Cdr. J.S.M. Richardson, DSO, RN) departed Alexandria between 0945 and 1040 hours to conduct exericses at sea. They returned to Alexandria later the same day. (17)
10 Sep 1941
Around 1215C/10 the battleship HMS Queen Elizabeth (Capt. C.B. Barry, DSO, RN flying the flag of Admiral Sir A.B. Cunningham, GCB, DSO and 2 Bars, RN) and the destroyer HMS Jackal (Lt.Cdr. R.McC.P. Jonas, DSC, RN) departed Alexandria to join the fast minelayers HMS Abdiel (Capt. E. Peydell-Bouverie, MVO, RN), HMS Latona (Capt. S.L. Bateson, RN) and the destroyer HMAS Nizam (Lt.Cdr. M.J. Clark, RAN) at sea for exercises.
They all returned to Alexandria around 1720C/10. (18)
26 Sep 1941
Around 0900B/26, the battleships HMS Queen Elizabeth (Capt. C.B. Barry, DSO, RN, flying the flag of Admiral Sir A.B. Cunningham, GCB, DSO and 2 Bars, RN), HMS Barham (Capt. G.C. Cooke, RN, flying the flag of Vice-Admiral H.D. Pridham-Whippell, KCB, CVO, RN), HMS Valiant (Capt. C.E. Morgan, DSO, RN), light cruisers HMS Ajax (Capt. E.D.B. McCarthy, DSO, RN, flying the flag of Rear-Admiral H.B. Rawlings, OBE, RN), HMS Neptune (Capt. R.C. O'Conor, RN), HMAS Hobart (Capt. H.L. Howden, CBE, RAN) and the destroyers HMS Jervis (Capt. P.J. Mack, DSO and Bar, RN), HMS Jupiter (Lt.Cdr. N.V.J.P. Thew, RN), HMS Kingston (Lt.Cdr. P. Somerville, DSO, DSC, RN), HMS Kipling (Cdr. A. St.Clair-Ford, RN), HMS Hero (Cdr. H.W. Biggs, DSO and Bar, RN), HMS Hotspur (Lt. T.D. Herrick, DSC, RN), HMS Decoy (Lt.Cdr. J.M. Alliston, RN) and HMAS Vendetta (Lt.Cdr. C.J. Stephenson, RAN) departed Alexandria for a diversion in the Eastern Mediterranean during 'Operation Halberd' in the Western Mediterranean.
They returned to Alexandria in the afternoon of the 27th. (16)
2 Oct 1941
The destroyers HMS Kandahar (Cdr. W.G.A. Robson, DSO, RN) and HMS Jaguar (Lt.Cdr. J.F.W. Hine, RN) were sent out from Alexandria at 0615 hours for an A/S search after the A/S whaler HMS Klo had reported being attacked by an enemy submarine.
They sailed together with HMS Kimberley (Cdr. J.S.M. Richardson, DSO, RN) and HMS Kingston (Lt.Cdr. P. Somerville, DSO, DSC, RN) but these two apparently did not go to the assistance of HMS Klo.
At 0947 hours, the destroyers HMS Kipling (Cdr. A. St.Clair-Ford, RN), HMS Jupiter (Lt.Cdr. N.V.J.P. Thew, RN), HMS Hero (Cdr. H.W. Biggs, DSO and Bar, RN), HMS Hotspur (Lt. T.D. Herrick, DSC, RN), HMS Griffin (Cdr. J. Lee-Barber, DSO, RN) and HMS Decoy (Lt.Cdr. J.M. Alliston, RN) also departed Alexandria for exercises followed by the battleships HMS Queen Elizabeth (Capt. C.B. Barry, DSO, RN, flying the flag of Admiral Sir A.B. Cunningham, GCB, DSO and 2 Bars, RN), HMS Barham (Capt. G.C. Cooke, RN, flying the flag of Vice-Admiral H.D. Pridham-Whippell, KCB, CVO, RN) and HMS Valiant (Capt. C.E. Morgan, DSO, RN) at 1015 hours. It had been intedend to sail earlier but the submarine-report from HMS Klo delayed the start of the exercises. Light cruiser HMAS Hobart (Capt. H.L. Howden, CBE, RAN) sailed around noon to join the exercises.
The ships (minus HMAS Hobart) remained out for exercises during the night and they returned to Alexandria as follows;
0820B/3; HMS Kandahar, HMS Hero and HMS Decoy.
0855B/3; HMS Barham, HMS Queen Elizabeth, HMS Valiant, HMS Kipling, HMS Kimberley, HMS Jupiter, HMS Hotspur and HMS Griffin.
0925B/3; HMS Kingston and HMS Jaguar. These last two destroyers entered Alexandria with the submarine HMS Triumph (Cdr. W.J.W. Woods, RN) which returned from patrol.
HMAS Hobart had already returned at 2345B/2. (18)
8 Oct 1941
HMS Queen Elizabeth (Capt. C.B. Barry, DSO, RN, flying the flag of Admiral Sir A.B. Cunningham, GCB, DSO and 2 Bars, RN), HMS Neptune (Capt. R.C. O'Conor, RN), HMS Jaguar (Lt.Cdr. J.F.W. Hine, RN), HMS Jupiter (Lt.Cdr. N.V.J.P. Thew, RN), HMS Kandahar (Cdr. W.G.A. Robson, DSO, RN) and HMS Kipling (Cdr. A. St.Clair-Ford, RN) conducted exercises off Alexandria.
HMS Queen Elizabeth and HMS Neptune returned to Alexandria in the afternoon. The destroyers only returned early in the afternoon of the following day.
12 Oct 1941
Operation 'Cultivate'.
Replacement of Australian troops at Tobruk with 'fresh' troops.
At 0700B/12 the fast minelayer HMS Abdiel (Capt. E. Peydell-Bouverie, MVO, RN) and the destroyers HMS Hero (Cdr. H.W. Biggs, DSO and Bar, RN), HMS Kipling (Cdr. A. St.Clair-Ford, RN) and HMAS Nizam (Lt.Cdr. M.J. Clark, RAN) departed Alexandria with troops and stores for Tobruk. This was 'Serial 1' of 'Operation Cultivate'.
A cover force also sailed from Alexandria. It was made up of the battleships HMS Queen Elizabeth (Capt. C.B. Barry, DSO, RN, flying the flag of Admiral Sir A.B. Cunningham, GCB, DSO and 2 Bars, RN), HMS Barham (Capt. G.C. Cooke, RN, flying the flag of Vice-Admiral H.D. Pridham-Whippell, KCB, CVO, RN), light cruisers HMS Ajax (Capt. E.D.B. McCarthy, DSO, RN, flying the flag of Rear-Admiral H.B. Rawlings, OBE, RN), HMS Galatea (Capt. E.W.B. Sim, RN), HMAS Hobart (Capt. H.L. Howden, CBE, RAN), destroyers HMS Jervis (Capt. P.J. Mack, DSO and Bar, RN), HMS Jaguar (Lt.Cdr. J.F.W. Hine, RN), HMS Jupiter (Lt.Cdr. N.V.J.P. Thew, RN), HMS Kandahar (Cdr. W.G.A. Robson, DSO, RN), HMS Hasty (Lt.Cdr. L.R.K. Tyrwhitt, DSC, RN), HMS Hotspur (Lt. T.D. Herrick, DSC, RN), HMS Griffin (Cdr. J. Lee-Barber, DSO, RN), HMS Decoy (Lt.Cdr. J.M. Alliston, RN) and the escort destroyers HMS Avon Vale (Lt.Cdr. P.A.R. Withers, DSO, RN) and HMS Eridge (Lt.Cdr. W.F.N. Gregory-Smith, RN).
The cruisers with three of the destroyers were detached during the night. They rejoined at daylight when the fleet set course to return to Alexandria.
Meanwhile Abdiel with her destroyers had landed the stores and troops at Tobruk and taken on board troops that were being relieved and set course to return to Alexandria.
Early in the afternoon a report was received of Italian cruisers and destroyers and the fleet was turned westwards again. Shortly afterwards the fleet was attacked by three enemy torpedo bombers but no damage was done. During the night the cruisers and three of the destroyers were again detached.
At daylight on the 14th the detached ships again rejoined and course was set to return to Alexandria. The fleet arrived at Alexandria around 1300B/13. The ships that had been on the transport run to tobruk returned to Alexandria around 1745B/14.
Operation 'Cultivate' continued for a while sending 'fresh' troops to Tobruk. (16)
12 Nov 1941
Around 0830B/12, the battleship HMS Queen Elizabeth (Capt. C.B. Barry, DSO, RN) departed Alexandria for gunnery exercises. She was escorted by the destroyers HMAS Napier (Capt. S.H.T. Arliss, RN), HMAS Nizam (Lt.Cdr. M.J. Clark, RAN), HMS Kandahar (Cdr. W.G.A. Robson, DSO, DSC, RN) and HMS Kingston (Lt.Cdr. P. Somerville, DSO, DSC, RN). They were joined around 1100B/12 by the light cruiser HMAS Hobart (Capt. H.L. Howden, CBE, RAN).
They returned to harbour around 0100B/13. (19)
16 Nov 1941
Operation Chieftan
Dummy convoy to Malta from Gibraltar to create a diversion for the enemy during army operations in Libya.
16 November 1941.
Western Mediterranean.
On 16 November a dummy convoy departed Gibraltar and proceeded eastwards, it was made up of the merchant vessels; Baron Newlands (British, 3386 GRT, built 1928), Blairatholl (British, 3319 GRT, built 1925), Cisneros (British, 1886 GRT, built 1926), Ottinge (British, 2818 GRT, built 1940) and Shuna (British, 1575 GRT, built 1937).
The RFA tanker Brown Ranger (3417 GRT, built 1941) was also part of the convoy.
Escort was provided by the destroyer HMS Wild Swan (Lt.Cdr. C.E.L. Sclater, RN), sloop HMS Deptford (Lt.Cdr. H.R. White, RN), and the corvettes HMS Convolvulus (T/Lt. R.C. Connell, RNR), HMS Marigold (T/Lt. J. Renwick, RNR) and HMS Rhododendron (Lt.Cdr. W.N.H. Faichney, DSO, RNR).
HMS Wild Swan got an A/S contact and was detached to hunt it reinforced by the corvette HMS Samphire (Lt.Cdr. F.T. Renny, DSC, RNR) from Gibraltar.
The corvette Marigold detected and depth charged the German submarine U-433. The submarine surfaced and was sunk at 2155/6 on 16 November 1941 in the Mediterranean east of Gibraltar, in position 36°13'N, 04°42'W.
17 November 1941.
Western Mediterranean.
The dummy convoy turned back to the eastwards again on the 17th.
18 November 1941.
Western Mediterranean.
The dummy convoy arrived back at Gibraltar in the evening of the 18th.
Eastern Mediterranean.
Around 0730/18 the battleships HMS Queen Elizabeth (Capt. C.B. Barry, DSO, RN, flying the flag of Admiral Sir A.B. Cunningham, GCB, DSO and 2 Bars, RN), HMS Barham (Capt. G.C. Cooke, RN, flying the flag of Vice-Admiral H.D. Pridham-Whippell, KCB, CVO, RN), HMS Valiant (Capt. C.E. Morgan, DSO, RN), light cruisers HMS Naiad (Capt. M.H.A. Kelsey, DSC, RN, flying the flag of Rear-Admiral P.L. Vian, DSO and 2 Bars, RN), HMS Euryalus (Capt. E.W. Bush, DSO, DSC, RN), HMS Galatea (Capt. E.W.B. Sim, RN) and the destroyers HMS Jervis (Capt. P.J. Mack, DSO and Bar, RN), HMS Jackal (Lt.Cdr. R.McC.P. Jonas, DSC, RN), HMS Kimberley (Cdr. J.S.M. Richardson, DSO, RN), HMS Kingston (Lt.Cdr. P. Somerville, DSO, DSC, RN), HMS Kipling (Cdr. A. St.Clair Ford, RN), HMAS Napier (Capt. S.H.T. Arliss, RN), HMAS Nizam (Lt.Cdr. M.J. Clark, RAN), HMS Decoy (Lt.Cdr. J.M. Alliston, RN) and the escort destroyers HMS Avon Vale (Lt.Cdr. P.A.R. Withers, DSO, RN) and HMS Eridge (Lt.Cdr. W.F.N. Gregory-Smith, RN) departed Alexandria to be at sea to support several operations in the Mediterranean.
Around 1105B/18, the fleet was joined by the light cruisers HMS Ajax (Capt. E.D.B. McCarthy, DSO, RN, flying the flag of Rear-Admiral H.B. Rawlings, OBE, RN), HMS Neptune (Capt. R.C. O'Conor, RN), and HMAS Hobart (Capt. H.L. Howden, CBE, RAN) and the destroyers HMS Kandahar (Cdr. W.G.A. Robson, DSO, DSC, RN), HMS Hasty (Lt.Cdr. L.R.K. Tyrwhitt, DSC, RN) and HMS Hotspur (Lt. T.D. Herrick, DSC, RN) which had already been at sea.
The fleet turned back towards Alexandria after dark.
On the 18th HMS Naiad and HMS Euryalus split off together with the destroyers HMS Jackal and HMS Kipling for a night bombardment of the Helfaya pass area upon which they also returned to Alexandria. They too arrived before noon on the 19th.
' Force K ', made up of light cruisers HMS Aurora (Capt. W.G. Agnew, RN), HMS Penelope (Capt. A.D. Nicholl, RN) and the destroyers HMS Lance (Lt.Cdr. R.W.F. Northcott, RN) and HMS Lively (Lt.Cdr. W.F.E. Hussey, DSC, RN), departed Malta around 1845/18 to create a diversion during the night.
19 November 1941.
Eastern Mediterranean.
' Force K ' returned to Malta around 0730/19.
The fleet arrived back in harbour before noon on the 19th followed shortly afterwards by HMS Naiad, HMS Euryalus, HMS Jackal and HMS Kipling. (16)
21 Nov 1941
Operations ME 7 and Landmark.
Diversionary attack on Tripoli to divert enemy air strenght away from the Bardia / Halfaya pass area during land operations.
The battleships HMS Queen Elizabeth (Capt. C.B. Barry, DSO, RN, flying the flag of Admiral Sir A.B. Cunningham, GCB, DSO and 2 Bars, RN), HMS Barham (Capt. G.C. Cooke, RN, flying the flag of Vice-Admiral H.D. Pridham-Whippell, KCB, CVO, RN), HMS Valiant (Capt. C.E. Morgan, DSO, RN), light cruisers HMS Naiad (Capt. M.H.A. Kelsey, DSC, RN, flying the flag of Rear-Admiral P.L. Vian, DSO and 2 Bars, RN), HMS Euryalus (Capt. E.W. Bush, DSO, DSC, RN), HMS Galatea (Capt. E.W.B. Sim, RN) and the destroyers HMS Jervis (Capt. P.J. Mack, DSO and Bar, RN), HMS Jackal (Lt.Cdr. R.McC.P. Jonas, DSC, RN), HMS Kandahar (Cdr. W.G.A. Robson, DSO, DSC, RN), HMS Kimberley (Cdr. J.S.M. Richardson, DSO, RN), HMS Kingston (Lt.Cdr. P. Somerville, DSO, DSC, RN), HMS Kipling (Cdr. A. St.Clair Ford, RN), HMAS Napier (Capt. S.H.T. Arliss, RN), HMAS Nizam (Lt.Cdr. M.J. Clark, RAN), HMS Hasty (Lt.Cdr. L.R.K. Tyrwhitt, DSC, RN), HMS Hotspur (Lt. T.D. Herrick, DSC, RN) and HMS Decoy (Lt.Cdr. J.M. Alliston, RN) departed Alexandria for operation ME 7.
At noon, the light cruisers HMS Ajax (Capt. E.D.B. McCarthy, DSO, RN, flying the flag of Rear-Admiral H.B. Rawlings, OBE, RN), HMS Neptune (Capt. R.C. O'Conor, RN), HMAS Hobart (Capt. H.L. Howden, CBE, RAN) and the escort destroyers HMS Avon Vale (Lt.Cdr. P.A.R. Withers, DSO, RN), HMS Eridge (Lt.Cdr. W.F.N. Gregory-Smith, RN), HMS Farndale (Cdr. S.H. Carlill, RN) and HMS Heythrop (Lt.Cdr R.S. Stafford, RN) joined the fleet at sea having completed their bombardment. The four hunt-class destroyers were however detached to return to Alexandria where they arrived around 1500B/21.
After dark HMS Naiad, HMS Euryalus, HMS Galatea were detached after dark to make false W/T reports further to the west. The fleet then turned back towards Alexandria.
The fleet arrived back at Alexandria at daybreak on the 22nd. The detached cruisers arrived back later the same day.
To simulate a fake landing attempt on the coast near Tripoli (Operation Landmark) a convoy made up of the transports HMS Breconshire (9776 GRT, built 1939), Ajax (7540 GRT, built 1931), Clan Ferguson (7347 GRT, built 1938) and Sydney Star (12696 GRT, built 1936) departed Malta. It was escorted by the corvette HMS Gloxinia (Lt.Cdr. A.J.C. Pomeroy, RNVR) and cover was provided by ' Force K ', made up of HMS Aurora (Capt. W.G. Agnew, RN), HMS Penelope (Capt. A.D. Nicholl, RN) and the destroyers HMS Lance (Lt.Cdr. R.W.F. Northcott, RN) and HMS Lively (Lt.Cdr. W.F.E. Hussey, DSC, RN). These ships all departed Malta around 1415/21. [Both destroyers had actually departed around 1235/21, presumably to conduct an A/S sweep before the other ships departed the harbour.]
' Force K ' returned to Malta around 0600/22 followed around 2 hours later by the convoy. It does not appear the convoy had been sighted by the enemy. (16)
23 Nov 1941
Operations against enemy convoy's / Sinking of HMS Barham.
23 November 1941.
'Force K', made up of the light cruisers HMS Aurora (Capt. W.G. Agnew, RN), HMS Penelope (Capt. A.D. Nicholl, RN) and the destroyers HMS Lance (Lt.Cdr. R.W.F. Northcott, RN) and HMS Lively (Lt.Cdr. W.F.E. Hussey, DSC, RN), departed Malta around 2330B/23 to intercept reported enemy convoy's. They were to proceed to position 33°40'N, 21°14'E at first.
24 November 1941.
'Force B', made up of the light cuisers HMS Naiad (Capt. M.H.A. Kelsey, DSC, RN, flying the flag of Rear-Admiral P.L. Vian, DSO and 2 Bars, RN), HMS Euryalus (Capt. E.W. Bush, DSO, DSC, RN), HMS Ajax (Capt. E.D.B. McCarthy, DSO, RN, flying the flag of Rear-Admiral H.B. Rawlings, OBE, RN), HMS Neptune (Capt. R.C. O'Conor, RN), HMS Galatea (Capt. E.W.B. Sim, RN) and the destroyers HMS Kandahar (Cdr. W.G.A. Robson, DSO, DSC, RN), HMS Kimberley (Cdr. J.S.M. Richardson, DSO, RN), HMS Kingston (Lt.Cdr. P. Somerville, DSO, DSC, RN) and HMS Hotspur (Lt. T.D. Herrick, DSC, RN) departed Alexandria around 0500B/24 to also operate directly against the enemy convoy's.
A cover force, made up of the battleships HMS Queen Elizabeth (Capt. C.B. Barry, DSO, RN, flying the flag of Admiral Sir A.B. Cunningham, GCB, DSO and 2 Bars, RN), HMS Barham (Capt. G.C. Cooke, RN, flying the flag of Vice-Admiral H.D. Pridham-Whippell, KCB, CVO, RN), HMS Valiant (Capt. C.E. Morgan, DSO, RN) and the destroyers HMS Jervis (Capt. P.J. Mack, DSO and Bar, RN), HMS Griffin (Capt. H.St.L. Nicolson, DSO and Bar, RN) and HMS Decoy (Lt.Cdr. J.M. Alliston, RN) departed Alexandria around 1700 hours. They were joined at sea by the escort destroyers HMS Avon Vale (Lt.Cdr. P.A.R. Withers, DSO, RN), HMS Eridge (Lt.Cdr. W.F.N. Gregory-Smith, RN) and HMS Farndale (Cdr. S.H. Carlill, RN). Around 2245 hours these escort destroyers were relieved by the destroyers HMAS Napier (Capt. S.H.T. Arliss, RN), HMAS Nizam (Lt.Cdr. M.J. Clark, RAN), HMS Kipling (Cdr. A. St.Clair Ford, RN), HMS Jackal (Lt.Cdr. R.McC.P. Jonas, DSC, RN) and HMS Hasty (Lt.Cdr. L.R.K. Tyrwhitt, DSC, RN) which came from Alexandria but had not completed fuelling at the time the fleet sailed.
In the meantime the Italian submarine Luigi Settembrini had heard the HE of fast moving ships which was thought to be 'Force K'. This was reported shortly after 0500B/24. Enemy convoy's were then ordered to proceed to the nearest ports.
At 1040B/24, ' Force K ' was informed that an enemy convoy was in position 35°40'N, 22°22'E. Enemy course was 239° at 5 knots.
It appeared likely to Capt. Agnew, Senior Officer ' Force K ', that the enemy from the current position of ' Force K ' and its course would think his ships would be on passage from Malta to Alexandria. Therefore this course was held for as long as possible in order to mislead the enemy in order to avoid the possibility that the convoy would be turning back. Capt. Agnew also thought it wise to attack as late as possible in the day so that the convoy would be further away from Crete and that there would be less daylight left for the enemy to deliver dive-bombing attacks.
At 1310B/24, ' Force K ' altered course to 029° and the ships were spread five miles apart in the order, from left to right, HMS Lively, HMS Penelope, HMS Lance and HMS Aurora. For the next three hours enemy aircraft, mostly He-111's, ere seen apparently ferrying between Greece and Benghasi. These were engaged whenever they provided a suitable target.
At 1524B/24, HMS Lively and HMS Penelope sighted smoke bearing 005° and these reports were quickly followed by ' masts in sight '.
All the ships of ' Force K ' at once altered course to intercept. HMS Aurora and HMS Lance increasing to full speed.
During the approach a number of Ju-88's which had apparently been escorting the convoy, attacked with bombs in shallow dives. These attacks were ineffective.
HMS Penelope was now closing the convoy rapidly. HMS Lively was dropping back to clear Penelope's line of fire and to give her AA protection from an up-sun direction. The two enemy escorts were zig-zagging across the front of the merchant ships laying smoke and firing at HMS Penelope.
As ' Force K ' gradually closed, the enemy escorts made off to the northward, leaving the merchant ships to their fate.
Up to this point the merchant ships had been firing their guns, but when the destroyers left them they stopped engines and abandoned ship.
HMS Penelope then engaged the merchant ships which caught fire quickly and after about ten minutes blew up.
There were no casualties in ' Force K ' but HMS Penelope was holed above the waterline by splinters.
The action took place within 100 miles of Crete and there was over two hours of daylight remaining so at 1630B/24 ' Force K ' retired to the westward at 23 knots.
As there was insufficient fuel remaining in the destroyers for upcoming operations Capt. Agnew decided to retire to Malta to refuel.
One of the enemy convoys, which was en-route from the Aegean to Benghazi, however did not receive the order to return and it was this convoy that was attacked by ' Force K '. Both transports in the convoy, the Maritza (German, 2910 GRT, built 1936) and Procida (German, 1842 GRT, built 1927), were sunk but the two escorts, the Italian torpedo boats Cassiopea and Lupo managed to escape although Cassiopea was damaged by splinters.
25 November 1941.
'Force K' returned to Malta around 0745B/25.
'Force B' meanwhile had set course to conduct a sweep alongt the coast of Cyrenaica during the night of 25/26 November but they sighted nothing.
At 1629B/25, the fleet (cover force) was attacked north-north-east of Sidi Barrani, Egypt in position 32°34'N, 26°24'E by the German uboat U-331 and HMS Barham was hit on the port side by three torpedoes. She quickly rolled over and then a magazine exploded. She quickly sank. The destroyers HMS Jervis, HMS Jackal and HMAS Nizam were left behind to pick up survivors while the fleet continued on to the westward.
26 November 1941.
The fleet (cover force) returned to Alexandria around 1000B/26. The three detached destroyers returned at 1400B/26. A total of 449 survivors had been picked up from HMS Barham.
'Force B' returned to Alexandria around 1800B/26. (20)
19 Dec 1941
In the evening of the 18th, the Italian submarine Scirè launched three SLC (Siluro Lenta Corsa = Slow moving torpedo also known as Maiale = pig) near Ras El Tin.
These managed to pass through the gate with ships entering harbour. The boom had been opened several times; Around 2359B/18 the boom was ordered to be closed after the sloop HMS Flamingo (Cdr. R.J.O. Otway-Ruthven, RN) and the tugs HMS Roysterer and HMS St. Monance had just entered.
At 0024B/19, the boom, which had not yet been completely closed was ordered to be opened again. It was open by 0040B/19 after which first the light cuisers HMS Naiad (Capt. M.A.H. Kelsey, DSC, RN flying the flag of Rear-Admiral P.L. Vian, DSO and 2 Bars, RN), HMS Euryalus (Capt. E.W. Bush, DSO, DSC, RN). Followed not long after by the destroyers HMS Sikh (Cdr. G.H. Stokes, DSC, RN), HMS Maori (Cdr R.E. Courage, DSO, DSC and Bar, RN) and HMS Legion (Cdr. R.F. Jessel, RN). The destroyer HrMs Isaac Sweers (Cdr. J. Houtsmuller, RNN) had been with them but was a little behind and entered at 0120B/19 after which the boom was ordered to be closed which was completed at 0150B/19.
At 0225B/19 the boom was ordered to be opened again which was completed at 0242B/19 after which the destroyers HMS Jervis (Capt. P.J. Mack, DSO and Bar, RN), HMS Kimberley (Cdr. J.S.M. Richardson, DSO, RN), HMS Kipling (Cdr. A. St.Clair Ford, RN) and HMAS Nizam (Lt.Cdr. M.J. Clark, RAN) entered and the boom was ordered to be closed at 0300B/19. It was reported shut at 0315B/19.
One of the Maiale crew mentioned in interrogation that they had been able to get in together with three big destroyers, this might therefore have been HMS Sikh, HMS Maori and HMS Legion.
All three crews of the Maiale managed to place the explosive warheads. Warheads were attacked to the main targets, the battleships HMS Queen Elizabeth (Capt. C.B. Barry, DSO, RN, flying the flag of Admiral Sir A.B. Cunningham, GCB, DSO and 2 Bars, RN), HMS Valiant (Capt. C.E. Morgan, DSO, RN) and the tanker Sagona (Norwegian, 7554 GRT, built 1929).
At 0325B/19, two Italians were picked up which were on HMS Valiant's mooring buoy. Interrogation produced no result.
At 0547B/19, an explosion occured under the stern of the Sagona causing massive damage to the tanker. The bow of the destroyer HMS Jervis who was alongside was also damaged by the explosion.
At 0606B/19, an explosion occured under the "A" turret of HMS Valiant. She was heavily flooded forward and was down by the bow.
At 0610B/19, HMS Queen Elizabeth was rocketed by an explosion underneath the boiler rooms and as a result three boiler rooms were flooded. She was unable to raise steam and the submarines HMS Triumph (Lt. J.S. Huddart, RN) and HMS Trusty (Lt.Cdr. W.D.A. King, DSO, DSC, RN) were brought alongside either side to provide electricity. HMS Trusty leaves after a few hours but HMS Triumph remained alongside until 22 December.
Neither battleship could be docked immediately due to their current draught.
All six crew of the Maiale were captured by the British.
5 Apr 1942
HMS Queen Elizabeth (A/Capt. R. Gotto, DSO, RN) is docked in the floating dock (AFD 5) at Alexandria. (21)
27 Jun 1942
The battleship HMS Queen Elizabeth (A/Capt. R. Gotto, DSO, RN) is undocked at Alexandria. She departed for Port Said later the same day escorted by the light cruiser HMS Euryalus (Capt. E.W. Bush, DSO, DSC, RN), destroyers HMS Sikh (Capt. St.J.A. Micklethwait, DSO and Bar, RN), HMS Zulu (Cdr. R.T. White, DSO and Bar, RN), HMS Jervis (Capt. A.L. Poland, CB, DSO and Bar, DSC, RN), HMS Javelin (Lt.Cdr. G.E. Fardell, RN), HMS Hero (Lt. W. Scott, RN) and the escort destroyer HMS Eridge (Lt.Cdr. W.F.N. Gregory-Smith, DSC, RN).
Around 0630C/28, all escorts parted company to return to Alexandria, where they arrived later the same day, except HMS Sikh and HMS Zulu which parted company with the battleship when it was about to enter the Suez Canal around 0730C/28. (22)
29 Jun 1942
HMS Queen Elizabeth (A/Capt. R. Gotto, DSO, RN) departed Suez for Port Sudan. She is escorted by the destroyers HMS Pakenham (Capt. E.B.K. Stevens, DSO, DSC, RN) and HMS Paladin (Cdr. A.F. Pugsley, RN).
HMS Queen Elizabeth arrived at Port Sudan on 1 July. The destroyers returned to Suez arriving on 2 July. (23)
12 Jul 1942
HMS Queen Elizabeth (A/Capt. R. Gotto, DSO, RN) departed Port Sudan for Aden. She is escorted by the destroyer HMAS Napier (Capt. S.H.T. Arliss, DSO, RN). (24)
14 Jul 1942
HMS Queen Elizabeth (A/Capt. R. Gotto, DSO, RN) and HMAS Napier (Capt. S.H.T. Arliss, DSO, RN) arrived at Aden from Port Sudan. (24)
15 Jul 1942
HMS Queen Elizabeth (A/Capt. R. Gotto, DSO, RN) departed Aden for Kilindini / Mombasa. She is escorted by HMAS Napier (Capt. S.H.T. Arliss, DSO, RN) and HMS Foxhound (Cdr. G.H. Peters, DSC, RN). (24)
21 Jul 1942
HMS Queen Elizabeth (A/Capt. R. Gotto, DSO, RN), HMAS Napier (Capt. S.H.T. Arliss, DSO, RN) and HMS Foxhound (Cdr. G.H. Peters, DSC, RN) arrived at Kilindini / Mombasa from Aden. (24)
22 Jul 1942
HMS Queen Elizabeth (A/Capt. R. Gotto, DSO, RN) departed Kilindini / Mombasa for Durban. She is escorted by the destroyers HMS Arrow (Cdr. A.M. McKillop, RN), HMS Duncan (Capt. H.St.L. Nicolson, DSO, RN) and HMS Hotspur (Lt. P. Bekenn, RN). (24)
27 Jul 1942
HMS Queen Elizabeth (A/Capt. R. Gotto, DSO, RN), HMS Arrow (Cdr. A.M. McKillop, RN), HMS Duncan (Capt. H.St.L. Nicolson, DSO, RN) and HMS Hotspur (Lt. P. Bekenn, RN) arrived at Durban from Kilindini / Mombasa. (24)
31 Jul 1942
HMS Queen Elizabeth (A/Capt. R. Gotto, DSO, RN) departed Durban for Capetown. She is escorted by the destroyers HMS Arrow (Cdr. A.M. McKillop, RN), HMS Duncan (Capt. H.St.L. Nicolson, DSO, RN) and HMS Hotspur (Lt. P. Bekenn, RN). (24)
3 Aug 1942
HMS Queen Elizabeth (A/Capt. R. Gotto, DSO, RN), HMS Arrow (Cdr. A.M. McKillop, RN), HMS Duncan (Capt. H.St.L. Nicolson, DSO, RN) and HMS Hotspur (Lt. P. Bekenn, RN) arrived at Capetown from Durban. (25)
4 Aug 1942
Convoy RT 1.
Departed Capetown on 4 August 1942 and arrived at Freetown on 13 August 1942.
This convoy was made up of the troopships Monarch of Bermuda (British, 22424 GRT, built 1931) and Empress of Russia (British, 16810 GRT, built 1913)
They were escorted by the battleships HMS Malaya (Capt. J.W.A. Waller, RN), HMS Queen Elizabeth (A/Capt. R. Gotto, DSO, RN) and the destroyers HMS Duncan (Capt. H.St.L. Nicolson, DSO, RN) and HMS Hotspur (Lt. P. Bekenn, RN).
At 2045/6, HMS Duncan and HMS Hotspur parted company and set course to Simonstown.
At 1135/9, the destroyer HMS Boreas (Lt.Cdr. E.L. Jones, DSC, RN) joined the convoy coming from Freetown.
At 0945/11, the destroyer HMS Vimy (Lt.Cdr. H.G.D. de Chair, RN) joined the convoy coming from Freetown.
The convoy arrived at Freetown in the afternoon of the 13th. (26)
22 Aug 1942
HMS Queen Elizabeth (A/Capt. R. Gotto, DSO, RN) conducted D/G trials off Freetown during which she was escorted by the destroyer HMS Vimy (Lt.Cdr. H.G.D. de Chair, RN). (25)
25 Aug 1942
HMS Queen Elizabeth (A/Capt. R. Gotto, DSO, RN) departed Freetown for Norfolk, Virginia, USA. She is escorted by the destroyers HMS Pathfinder (Cdr. E.A. Gibbs, DSO and Bar, RN), HMS Quentin (Lt.Cdr. A.H.P. Noble, DSC, RN) and HMS Vimy (Lt.Cdr. H.G.D. de Chair, RN).
HMS Caledon (A/Capt. H.J. Haynes, DSO, DSC, RN) was also in company until 0945Z/26, when she parted company to proceed to Gibraltar.
Also with them were the troop transports Mooltan (British, 20952 GRT, built 1923) and Viceroy of India (British, 19627 GRT, built 1929).
At 0830N/28, the Viceroy of India parted company to proceed independently to the U.K.
At 1950N/29, the Mooltan parted company to proceed independently to New York.
On 29 / 30 August, HMS Pathfinder, HMS Quentin and HMS Vimy fuelled from the RFA tanker Abbeydale (8299 GRT, built 1937) which had departed Gibraltar on 25 August 1942 escorted by the corvettes HMS Burdock (Lt.Cdr. E.H. Lynes, RD, RNR) and HMS Armeria (Lt. M. Todd, RNR).
Around 0500O/31, the US destroyers USS Trippe (Lt.Cdr. C.M. Dalton, USN), USS Rhind (T/Cdr. H.T. Read, USN) and USS Wainwright (T/Cdr. R.H. Gibbs, USN) joined and shortly afterwards HMS Pathfinder, HMS Quentin and HMS Vimy parted company to proceed to Trinidad.
HMS Queen Elizabeth, USS Trippe, USS Rhind and USS Wainwright arrived in Hampton Roads on 5 September 1942. (27)
6 Sep 1942
HMS Queen Elizabeth (A/Capt. R. Gotto, DSO, RN) proceeded from Hampton Roads to the Norfolk Navy Yard where she is taken in hand for repairs and refit. (28)
19 Sep 1942
HMS Queen Elizabeth (A/Capt. R. Gotto, DSO, RN) is docked in No.3 Dock at the Norfolk Navy Yard. (28)
24 Nov 1942
HMS Queen Elizabeth (A/Capt. R. Gotto, DSO, RN) is undocked. (29)
4 Mar 1943
HMS Queen Elizabeth (Cdr. R.C. Haskett-Smith, DSO, RN) is docked in No.8 Dock at the Norfolk Navy Yard. (30)
9 Mar 1943
HMS Queen Elizabeth (Cdr. R.C. Haskett-Smith, DSO, RN) is undocked. (30)
20 May 1943
HMS Queen Elizabeth (Cdr. R.C. Haskett-Smith, DSO, RN) is docked in No.4 Dock at the Norfolk Navy Yard. (31)
23 May 1943
HMS Queen Elizabeth (Cdr. R.C. Haskett-Smith, DSO, RN) is undocked. (31)
4 Jun 1943
HMS Queen Elizabeth (Cdr. R.C. Haskett-Smith, DSO, RN) conducted D/G trials at the Wolf Trap D/G station near Norfolk, Virginia. (32)
5 Jun 1943
HMS Queen Elizabeth (Cdr. R.C. Haskett-Smith, DSO, RN) conducted D/G trials at the Wolf Trap D/G station near Norfolk, Virginia. On completion of the trials she anchored in Hampton Roads. (32)
7 Jun 1943
HMS Queen Elizabeth (Cdr. R.C. Haskett-Smith, DSO, RN) conducted trials off Hampton Roads. She is escorted by the destroyers Spence (T/Cdr. H.J. Armstrong, Jr., USN) and Dashiell (T/Cdr. J.B. McLean, USN). (32)
14 Jun 1943
HMS Queen Elizabeth (Cdr. R.C. Haskett-Smith, DSO, RN) conducted gunnery exercises in Chasepeake Bay. (32)
15 Jun 1943
HMS Queen Elizabeth (Cdr. R.C. Haskett-Smith, DSO, RN) conducted gunnery exercises in Chasepeake Bay. (32)
16 Jun 1943
HMS Queen Elizabeth (Cdr. R.C. Haskett-Smith, DSO, RN) conducted gunnery exercises in Chasepeake Bay.
On completion of today's exercises Capt. H.G. Norman, CBE, RN, joined the ship and took command. (32)
17 Jun 1943
HMS Queen Elizabeth (Capt. H.G. Norman, CBE, RN) conducted gunnery exercises in Chasepeake Bay. (32)
18 Jun 1943
HMS Queen Elizabeth (Capt. H.G. Norman, CBE, RN) conducted gunnery exercises in Chasepeake Bay. (32)
21 Jun 1943
HMS Queen Elizabeth (Capt. H.G. Norman, CBE, RN) conducted gunnery exercises in Chasepeake Bay. (32)
22 Jun 1943
HMS Queen Elizabeth (Capt. H.G. Norman, CBE, RN) returned to Norfolk, Virginia after an exercise period. (32)
26 Jun 1943
The battleship HMS Queen Elizabeth (Capt. H.G. Norman, CBE, RN) and light cruiser HMS Phoebe (Capt. C.P. Frend, RN) departed Hampton Roads for Bermuda. They were escorted by the destroyer Harrison (T/Cdr. C.M. Dalton, USN) and the frigates HMS Blackwood (Lt.Cdr. L.T. Sly, RD, RNR) and HMS Drury (Lt.Cdr. N.J. Parker, RN). (33)
28 Jun 1943
HMS Queen Elizabeth (Capt. H.G. Norman, CBE, RN), HMS Phoebe (Capt. C.P. Frend, RN), HMS Blackwood (Lt.Cdr. L.T. Sly, RD, RNR) and HMS Drury (Lt.Cdr. N.J. Parker, RN) arrived at Bermuda from Hampton Roads.
Harrison (T/Cdr. C.M. Dalton, USN) did not enter and set course to proceed to Boston. (34)
30 Jun 1943
Around 1000Q/30, the battleship HMS Queen Elizabeth (Capt. H.G. Norman, CBE, RN) and the light cruiser HMS Phoebe (Capt. C.P. Frend, RN) departed Bermuda for the U.K. They were escorted by the destroyer HMS Oribi (Lt.Cdr. J.C.A. Ingram, DSC, RN) and the frigates HMS Bazely (Lt.Cdr. J.V. Brock, RCNVR), HMS Blackwood (Lt.Cdr. L.T. Sly, RD, RNR) and HMS Drury (Lt.Cdr. N.J. Parker, RN).
At 1240Z/5, HMS Phoebe parted company to proceed to Barrow-in-Furness where she arrived on 7 July to completed her refit there.
The other ships arrived at Plymouth on 8 July. HMS Queen Elizabeth went to the Devonport Dockyard to complete her refit there. (35)
12 Jul 1943
HMS Queen Elizabeth (Capt. H.G. Norman, CBE, RN) is docked in No.10 Dock at the Devonport Dockyard. (36)
10 Aug 1943
No.10 Dock at the Devonport Dockyard, with HMS Queen Elizabeth (Capt. H.G. Norman, CBE, RN) in it is flooded. The ship is however not undocked at this moment. (37)
20 Aug 1943
HMS Queen Elizabeth (Capt. H.G. Norman, CBE, RN) is undocked. (37)
27 Aug 1943
HMS Queen Elizabeth (Capt. H.G. Norman, CBE, RN) conducted D/G trials off Plymouth. (38)
28 Aug 1943
With her refit completed, the battleship HMS Queen Elizabeth (Capt. H.G. Norman, CBE, RN) departed Plymouth around 1615A/28 for Scapa Flow. She is escorted by the escort destroyers HMS Limbourne (Cdr. C.B. Alers-Hankey, DSC, RN), HMS Goathland (Lt.Cdr. E.N. Pumphrey, RN, DSO and 2 Bars, DSC, RN) and HMS Tanatside (Lt.Cdr. F.D. Brown, RN).
Around 1830A/29, the original screen parted company when the destroyers HMS Scorpion (Lt.Cdr. W.S. Clouston, RN) and HMCS Huron (Lt.Cdr. H.S. Rayner, DSC, RCN) joined.
Around 1430A/30, HMS Queen Elizabeth, HMS Scorpion and HMCS Huron arrived at Scapa Flow. (38)
4 Sep 1943
The battleships HMS Duke of York (Capt. B.B. Schofield, CBE, RN, flying the flag of A/Admiral B.A. Fraser, KCB, KBE, RN, C-in-C Home Fleet), HMS Anson (Capt. E.D.B. McCarthy, DSO and Bar, RN, flying the flag of Vice-Admiral H.R. Moore, KCB, DSO, CVO, RN), HMS Queen Elizabeth (Capt. H.G. Norman, CBE, RN), aircraft carrier USS Ranger (Capt. G. Rowe, USN, flying the flag of Rear-Admiral O.M. Hustvedt, USN), heavy cruisers HMS London (Capt. R.V. Symonds-Tayler, DSC, RN, flying the flag of Rear Admiral A.F.E. Palliser, CB, DSC, RN), USS Augusta (Capt. G. Hutchins, USN), USS Tuscaloosa (Capt. J.B.W. Waller, USN), light cruiser HMS Spartan (Capt. P.V. McLaughlin, RN) and the destroyers HMS Scorpion (Lt.Cdr. W.S. Clouston, RN), HMS Scourge (Lt.Cdr. G.I.M. Balfour, RN), HMS Rocket (Lt.Cdr. H.B. Acworth, OBE, RN), HMS Onslow (Capt. J.A. McCoy, DSO, RN), ORP Orkan (Kmdr.por. (Cdr.) S. Hryniewiecki), HMCS Huron (Lt.Cdr. H.S. Rayner, DSC, RCN), HMCS Iroquois (Cdr. J.C. Hibbard, DSC, RCN), USS Corry (T/Cdr. L.B. Ensey, USN), USS Hobson (T/Lt.Cdr. K. Loveland, USN), USS Isherwood (T/Cdr. R.E. Gadrow, USN), USS Bell (T/Cdr. L.C. Petross, USN) conducted large scale tactical exercises off Scapa Flow. (39)
13 Sep 1943
HMS Queen Elizabeth (Capt. H.G. Norman, CBE, RN) conducted gunnery exercises at Scapa Flow. On completion of these D/G trials were carried out. (40)
14 Sep 1943
HMS Queen Elizabeth (Capt. H.G. Norman, CBE, RN) conducted D/F calibration trials at Scapa Flow. (40)
16 Sep 1943
HMS Queen Elizabeth (Capt. H.G. Norman, CBE, RN) conducted gunnery exercises in the Pentland Firth. She was escorted by the destroyers HMCS Iroquois (Cdr. J.C. Hibbard, DSC, RCN) and HMCS Huron (Lt.Cdr. H.S. Rayner, DSC, RCN). (40)
21 Sep 1943
HMS Tuna (Lt. D.S.R. Martin, DSO and Bar, RN) conducted practice attacks off Scapa Flow on HMS Queen Elizabeth (Capt. H.G. Norman, CBE, RN) escorted by the destroyers HMS Musketeer (Cdr. E.N.V. Currey, DSC, RN), ORP Orkan (Cdr. S. Hryniewiecki, ORP) and HMCS Huron (Lt.Cdr. H.S. Rayner, DSC, RCN).
The battleship herself was meanwhile conducting gunnery exercises. In the evening she conducted a night encounter exercises during which the destroyer HMCS Iroquois (Cdr. J.C. Hibbard, DSC, RCN) served as target. (41)
24 Sep 1943
HMS Queen Elizabeth (Capt. H.G. Norman, CBE, RN) conducted H/F D/F calibration trials at Scapa Flow. These were followed by 15" gunnery exercises. (40)
25 Sep 1943
HMS Queen Elizabeth (Capt. H.G. Norman, CBE, RN) conducted H/F D/F calibration trials at Scapa Flow. These were followed by 15" and 4.5" gunnery exercises. (40)
26 Sep 1943
HMS Queen Elizabeth (Capt. H.G. Norman, CBE, RN) conducted H/F D/F calibration trials at Scapa Flow. (40)
28 Sep 1943
HMS Queen Elizabeth (Capt. H.G. Norman, CBE, RN) conducted exercises off Scapa Flow during which she was escorted by the destroyers HMS Onslow (Capt. J.A. McCoy, DSO, RN), HMS Obedient (Lt.Cdr. H. Unwin, DSC and Bar, RN) and HMS Matchless (Lt.Cdr. J. Mowlam, DSO, RN).
On return to Scapa Flow HMS Queen Elizabeth conducted gunnery exercises inside the Flow. (40)
5 Oct 1943
HMS Queen Elizabeth (Capt. H.G. Norman, CBE, RN) conducted gunnery exercises at Scapa Flow. (42)
7 Oct 1943
HMS Queen Elizabeth (Capt. H.G. Norman, CBE, RN) conducted gunnery exercises off Scapa Flow. She was escorted by the destroyers USS Fitch (T/Cdr. K.C. Walpole, USN) and USS Corry (T/Cdr. L.B. Ensey, USN). (42)
13 Oct 1943
HMS Queen Elizabeth (Capt. H.G. Norman, CBE, RN) conducted gunnery exercises off Scapa Flow. She was escorted by the destroyers HMS Milne (Capt. I.M.R. Campbell, DSO, RN) and HMS Janus (Lt.Cdr. W.B.R. Morrison, RN). (42)
15 Oct 1943
HMS Queen Elizabeth (Capt. H.G. Norman, CBE, RN) conducted gunnery and bombardment exercises off Scapa Flow. She was escorted by the destroyer HMS Musketeer (Cdr. E.N.V. Currey, DSC, RN) and the escort destroyer HMS Brissenden (Lt. the Hon. D.D.E. Vivian, RN). (42)
20 Oct 1943
HMS Queen Elizabeth (Capt. H.G. Norman, CBE, RN) conducted exercises at Scapa Flow. (42)
21 Oct 1943
In the morning, HMS Uther (Lt. P.S. Beale, RN), conducted exercises off Scapa Flow with HMS Queen Elizabeth (Capt. H.G. Norman, CBE, RN) that was escorted by the destroyers HMS Urchin (Lt.Cdr. J.T.B. Birch, DSO, DSC, RN) and USS Capps (T/Cdr. B.E.S. Trippensee, USN).
In the afternoon HMS Queen Elizabeth, with her destroyer escort, conducted range and inclination exercises with HMS Birmingham (Capt. H.W. Williams, RN). (43)
29 Oct 1943
HMS Queen Elizabeth (Capt. H.G. Norman, CBE, RN) conducted gunnery exercises off Scapa Flow during which she was escorted by the destroyer HMS Urchin (Lt.Cdr. J.T.B. Birch, DSO, DSC, RN) and the escort destroyer HMS Brissenden (Lt. D.D.E. Vivian, RN).
Also a range and inclination exercise was carried out with HMS Royalist (Capt. M.H. Evelegh, RN). (42)
8 Nov 1943
Around 1230/8, HMS Queen Elizabeth (Capt. H.G. Norman, CBE, RN) and HMS Renown (Capt. W.E. Parry, CB, RN), departed Scapa Flow for Portland and Plymouth respectively. On departure from Scapa Flow they were escorted by the destroyers HMS Oribi (Lt.Cdr. J.C.A. Ingram, DSC and Bar, RN) and HMS Urchin (Lt.Cdr. J.T.B. Birch, DSO, DSC, RN).
At 1730/8, HMS Urchin parted company to return to Scapa Flow.
On 9 November, HMS Rocket (Lt.Cdr. H.B. Acworth, OBE, RN) joined. [time unknown to us for the moment.]
At 0845/10, HMS Melbreak (Lt. G.J. Kirkby, DSC and Bar, RN) joined.
At 1225/10, HMS Renown and HMS Rocket parted company with HMS Queen Elizabeth, HMS Oribi and HMS Melbreak.
Around 1330/10, HMS Renown and HMS Rocket arrived at Plymouth.
Around 1715/10, HMS Queen Elizabeth, HMS Oribi and HMS Melbreak arrived at Portland. (44)
11 Nov 1943
HMS Queen Elizabeth (Capt. H.G. Norman, CBE, RN) proceeded from Portland to Portsmouth where she went to the Portsmouth dockyard for repairs and some modifications. (45)
12 Nov 1943
HMS Queen Elizabeth (Capt. H.G. Norman, CBE, RN) is berthed in D-Lock at the Portsmouth Dockyard. (45)
13 Nov 1943
HMS Queen Elizabeth (Capt. H.G. Norman, CBE, RN) is docked down in D-Lock at the Portsmouth Dockyard. (45)
22 Nov 1943
HMS Queen Elizabeth (Capt. H.G. Norman, CBE, RN) is undocked. (45)
13 Dec 1943
HMS Queen Elizabeth (Capt. H.G. Norman, CBE, RN) proceeded from the Portsmouth Dockyard to Spithead. (45)
14 Dec 1943
Around 1000A/14, HMS Queen Elizabeth (Capt. H.G. Norman, CBE, RN), after having first carried out D/G trials, departed Portsmouth for Scapa Flow. She is escorted by the escort destroyers HMS Stevenstone (T/A/Lt.Cdr. H.M. Duff-Still, DSO, RNVR) and La Combattante (Lt.Cdr. A. Patou).
Around 1515A/14, the original destroyer escort parted company upon them being replaced by the escort destroyers HMS Melbreak (Lt. G.J. Kirkby, DSC and Bar, RN) and HMS Tanatside (Cdr. B.J. de St. Croix, RN). They remained in company until around 2000A/14.
At 0940A/15, the destroyers HMS Tuscan (Lt.Cdr. C.H.de B. Newby, RN) and HMS Tenacious (Lt.Cdr. D.F. Townsend, RN) joined and HMS Queen Elizabeth started a bombardment exercise.
At 1130A/15, HMS Black Prince (Capt. D.M. Lees, DSO, RN) joined and more exercises were carried out.
HMS Queen Elizabeth arrived at Scapa Flow around mid-afternoon. (46)
15 Dec 1943
HMS Queen Elizabeth (Capt. H.G. Norman, CBE, RN) conducted gunnery exercises at Scapa Flow. (46)
20 Dec 1943
HMS Queen Elizabeth (Capt. H.G. Norman, CBE, RN) conducted gunnery exercises at Scapa Flow. (46)
21 Dec 1943
HMS Queen Elizabeth (Capt. H.G. Norman, CBE, RN) and HMS Valiant (Capt. G.E.M. O’Donnell, DSO, RN) conducted gunnery and rangefinding and inclination (RIX) exercises off Scapa Flow. During the exercises they were escorted by HMS Verulam (Lt.Cdr. W.S. Thomas, DSC, RN). (47)
22 Dec 1943
HMS Queen Elizabeth (Capt. H.G. Norman, CBE, RN) conducted gunnery exercises off Scapa Flow. She does not appear to have been escorted. (46)
24 Dec 1943
HMS Queen Elizabeth (Capt. H.G. Norman, CBE, RN) conducted gunnery exercises off Scapa Flow. She was escorted by HMS Swift (Lt.Cdr. J.R. Gower, RN). (46)
30 Dec 1943
Around 1745A/30, the battleships HMS Queen Elizabeth (Capt. H.G. Norman, CBE, RN), HMS Valiant (Capt. G.E.M. O’Donnell, DSO, RN) and the battlecruiser HMS Renown (Capt. B.C.B. Brooke, RN, flying the flag of Vice Admiral A.J. Power, KCB, CVO, RN, second in command of the Eastern Fleet) departed Scapa Flow with the ultimate destination, Trincomalee, Ceylon. On departure from Scapa Flow these ships were escorted by the destroyer HMS Tuscan (Lt.Cdr. C.H.de B. Newby, RN) and the frigates HMS Berry (T/A/Lt.Cdr. C.S. Pirie, RNVR), HMS Blackwood (Lt.Cdr. L.T. Sly, RD, RNR) and HMS Domett (T/A/Lt.Cdr. S. Gordon, RNVR). These ships proceeded through the Minches and were joined around 1100A/31 by the aircraft carriers HMS Illustrious (Capt. R.L.B. Cunliffe, RN, flying the flag of Rear-Admiral C. Moody, CB, RN), HMS Unicorn (Capt. H.L.St.J. Fancourt, DSO, RN) escorted by the destroyers HMS Termagant (Lt.Cdr. J.P. Scatchard, DSC, RN), HMS Tenacious (Lt.Cdr. D.F. Townsend, RN) and HMS Kempenfelt (Lt.Cdr. J.B. Marjoribanks, RN). These ships had departed the Clyde around 2200A/30. The frigates HMS Cooke (Lt.Cdr. L.C. Hill, OBE, RD, RNR), HMS Duckworth (Cdr. R.G. Mills, DSO, DSC and Bar, RN), HMS Essington (A/Lt.Cdr. W. Lambert, RNVR) and HMS Parrett (Lt.Cdr.(Retd.) T. Hood, RNR) also joined. They came from Londonderry, Northern Ireland. HMS Tuscan was now detached to the Clyde to make repairs as she had sustained weather damage during the passage from Scapa Flow. (48)
4 Jan 1944
Around 1630Z/4, HMS Queen Elizabeth (Capt. H.G. Norman, CBE, RN), HMS Valiant (Capt. G.E.M. O’Donnell, DSO, RN), HMS Renown (Capt. B.C.B. Brooke, RN, flying the flag of Vice Admiral A.J. Power, KCB, CVO, RN, second in command of the Eastern Fleet) parted company with the carriers to proceed ahead of them to Gibraltar to fuel. They took the destroyers HMS Termagant (Lt.Cdr. J.P. Scatchard, DSC, RN), HMS Tenacious (Lt.Cdr. D.F. Townsend, RN), HMS Kempenfelt (Lt.Cdr. J.B. Marjoribanks, RN) and the frigates HMS Duckworth (Cdr. R.G. Mills, DSO, DSC and Bar, RN) and HMS Essington (A/Lt.Cdr. W. Lambert, RNVR) with them as escorts.
This left the frigates HMS Berry (T/A/Lt.Cdr. C.S. Pirie, RNVR), HMS Blackwood (Lt.Cdr. L.T. Sly, RD, RNR), HMS Cooke (Lt.Cdr. L.C. Hill, OBE, RD, RNR), HMS Domett (T/A/Lt.Cdr. S. Gordon, RNVR) and HMS Parrett (Lt.Cdr.(Retd.) T. Hood, RNR) to escort the carriers HMS Illustrious (Capt. R.L.B. Cunliffe, RN, flying the flag of Rear-Admiral C. Moody, CB, RN) and HMS Unicorn (Capt. H.L.St.J. Fancourt, DSO, RN).
Also on this day the destroyers HMS Active (Lt.Cdr. P.G. Merriman, DSC, RN), HMS Anthony (Lt.Cdr. J.H. Wallace, DSC, RN), HMS Brilliant (Lt.Cdr. J. Smallwood, RN), HMS Inglefield (Cdr. C.F.H. Churchill, DSC, RN), HMS Isis (Cdr. B. Jones, DSO, DSC, RN) and HMS Urchin (Lt.Cdr. J.T.B. Birch, DSO, DSC, RN) departed Gibraltar to make rendezvous with the carriers and take over the escort from the frigates so that there too could proceed to Gibraltar to fuel. (49)
5 Jan 1944
Around 0900Z/5, the destroyers HMS Active (Lt.Cdr. P.G. Merriman, DSC, RN), HMS Anthony (Lt.Cdr. J.H. Wallace, DSC, RN), HMS Brilliant (Lt.Cdr. J. Smallwood, RN), HMS Inglefield (Cdr. C.F.H. Churchill, DSC, RN), HMS Isis (Cdr. B. Jones, DSO, DSC, RN) and HMS Urchin (Lt.Cdr. J.T.B. Birch, DSO, DSC, RN), joined HMS Illustrious (Capt. R.L.B. Cunliffe, RN, flying the flag of Rear-Admiral C. Moody, CB, RN) and HMS Unicorn (Capt. H.L.St.J. Fancourt, DSO, RN). The carriers escort made up of the frigates HMS Berry (T/A/Lt.Cdr. C.S. Pirie, RNVR), HMS Blackwood (Lt.Cdr. L.T. Sly, RD, RNR), HMS Cooke (Lt.Cdr. L.C. Hill, OBE, RD, RNR), HMS Domett (T/A/Lt.Cdr. S. Gordon, RNVR) and HMS Parrett (Lt.Cdr.(Retd.) T. Hood, RNR) then parted company to proceed ahead of the carriers to fuel at Gibraltar.
The battleship group, made up of HMS Queen Elizabeth (Capt. H.G. Norman, CBE, RN), HMS Valiant (Capt. G.E.M. O’Donnell, DSO, RN), HMS Renown (Capt. B.C.B. Brooke, RN, flying the flag of Vice Admiral A.J. Power, KCB, CVO, RN, second in command of the Eastern Fleet) and escorted by the destoyers HMS Termagant (Lt.Cdr. J.P. Scatchard, DSC, RN), HMS Tenacious (Lt.Cdr. D.F. Townsend, RN), HMS Kempenfelt (Lt.Cdr. J.B. Marjoribanks, RN) and the frigates HMS Duckworth (Cdr. R.G. Mills, DSO, DSC and Bar, RN) and HMS Essington (A/Lt.Cdr. W. Lambert, RNVR) arrived at Gibraltar around 2130A/5 and all ships commenced fuelling. (50)
6 Jan 1944
Around 0430A/6, HMS Queen Elizabeth (Capt. H.G. Norman, CBE, RN), HMS Valiant (Capt. G.E.M. O’Donnell, DSO, RN), HMS Renown (Capt. B.C.B. Brooke, RN, flying the flag of Vice Admiral A.J. Power, KCB, CVO, RN, second in command of the Eastern Fleet), HMS Termagant (Lt.Cdr. J.P. Scatchard, DSC, RN), HMS Tenacious (Lt.Cdr. D.F. Townsend, RN), HMS Kempenfelt (Lt.Cdr. J.B. Marjoribanks, RN), HMS Duckworth (Cdr. R.G. Mills, DSO, DSC and Bar, RN) and HMS Essington (A/Lt.Cdr. W. Lambert, RNVR), departed Gibraltar.
Around 0800A/6, they joined HMS Illustrious (Capt. R.L.B. Cunliffe, RN, flying the flag of Rear-Admiral C. Moody, CB, RN) and HMS Unicorn (Capt. H.L.St.J. Fancourt, DSO, RN), HMS Active (Lt.Cdr. P.G. Merriman, DSC, RN), HMS Anthony (Lt.Cdr. J.H. Wallace, DSC, RN), HMS Brilliant (Lt.Cdr. J. Smallwood, RN), HMS Inglefield (Cdr. C.F.H. Churchill, DSC, RN), HMS Isis (Cdr. B. Jones, DSO, DSC, RN) and HMS Urchin (Lt.Cdr. J.T.B. Birch, DSO, DSC, RN) which had just passed the Straits of Gibraltar eastbound.
After fuelling the frigates HMS Berry (T/A/Lt.Cdr. C.S. Pirie, RNVR), HMS Blackwood (Lt.Cdr. L.T. Sly, RD, RNR), HMS Cooke (Lt.Cdr. L.C. Hill, OBE, RD, RNR), HMS Domett (T/A/Lt.Cdr. S. Gordon, RNVR) departed Gibraltar later in the day to overtake the force. (50)
7 Jan 1944
Around 0900A/7, the frigates HMS Berry (T/A/Lt.Cdr. C.S. Pirie, RNVR), HMS Blackwood (Lt.Cdr. L.T. Sly, RD, RNR), HMS Cooke (Lt.Cdr. L.C. Hill, OBE, RD, RNR), HMS Domett (T/A/Lt.Cdr. S. Gordon, RNVR) joined the force made up of HMS Queen Elizabeth (Capt. H.G. Norman, CBE, RN), HMS Valiant (Capt. G.E.M. O’Donnell, DSO, RN), HMS Renown (Capt. B.C.B. Brooke, RN, flying the flag of Vice Admiral A.J. Power, KCB, CVO, RN, second in command of the Eastern Fleet), HMS Illustrious (Capt. R.L.B. Cunliffe, RN, flying the flag of Rear-Admiral C. Moody, CB, RN) and HMS Unicorn (Capt. H.L.St.J. Fancourt, DSO, RN), HMS Active (Lt.Cdr. P.G. Merriman, DSC, RN), HMS Anthony (Lt.Cdr. J.H. Wallace, DSC, RN), HMS Brilliant (Lt.Cdr. J. Smallwood, RN), HMS Inglefield (Cdr. C.F.H. Churchill, DSC, RN), HMS Isis (Cdr. B. Jones, DSO, DSC, RN), HMS Termagant (Lt.Cdr. J.P. Scatchard, DSC, RN), HMS Tenacious (Lt.Cdr. D.F. Townsend, RN), HMS Kempenfelt (Lt.Cdr. J.B. Marjoribanks, RN), HMS Urchin (Lt.Cdr. J.T.B. Birch, DSO, DSC, RN), HMS Duckworth (Cdr. R.G. Mills, DSO, DSC and Bar, RN) and HMS Essington (A/Lt.Cdr. W. Lambert, RNVR).
HMS Active, HMS Anthony, HMS Brilliant and HMS Isis were then detached. Shortly after doing so they were detached to hunt an enemy submarine [this was U-343].
Late in the evening HMS Termagant, HMS Tenacious and HMS Kempenfelt were detached to fuel at Bizerta. (51)
8 Jan 1944
Around 1500A/8, HMS Termagant (Lt.Cdr. J.P. Scatchard, DSC, RN), HMS Tenacious (Lt.Cdr. D.F. Townsend, RN), HMS Kempenfelt (Lt.Cdr. J.B. Marjoribanks, RN), rejoined HMS Queen Elizabeth (Capt. H.G. Norman, CBE, RN), HMS Valiant (Capt. G.E.M. O’Donnell, DSO, RN), HMS Renown (Capt. B.C.B. Brooke, RN, flying the flag of Vice Admiral A.J. Power, KCB, CVO, RN, second in command of the Eastern Fleet), HMS Illustrious (Capt. R.L.B. Cunliffe, RN, flying the flag of Rear-Admiral C. Moody, CB, RN) and HMS Unicorn (Capt. H.L.St.J. Fancourt, DSO, RN), HMS Inglefield (Cdr. C.F.H. Churchill, DSC, RN), HMS Urchin (Lt.Cdr. J.T.B. Birch, DSO, DSC, RN), HMS Berry (T/A/Lt.Cdr. C.S. Pirie, RNVR), HMS Blackwood (Lt.Cdr. L.T. Sly, RD, RNR), HMS Cooke (Lt.Cdr. L.C. Hill, OBE, RD, RNR), HMS Domett (T/A/Lt.Cdr. S. Gordon, RNVR), HMS Duckworth (Cdr. R.G. Mills, DSO, DSC and Bar, RN) and HMS Essington (A/Lt.Cdr. W. Lambert, RNVR).
Shortly after these three destroyers had rejoined the force, HMS Inglefield was detached to Bizerta.
Late on the day the destroyer HMS Urchin was detached to Malta. (50)
12 Jan 1944
HMS Queen Elizabeth (Capt. H.G. Norman, CBE, RN), HMS Valiant (Capt. G.E.M. O’Donnell, DSO, RN), HMS Renown (Capt. B.C.B. Brooke, RN, flying the flag of Vice Admiral A.J. Power, KCB, CVO, RN, second in command of the Eastern Fleet), HMS Illustrious (Capt. R.L.B. Cunliffe, RN, flying the flag of Rear-Admiral C. Moody, CB, RN) and HMS Unicorn (Capt. H.L.St.J. Fancourt, DSO, RN), HMS Termagant (Lt.Cdr. J.P. Scatchard, DSC, RN), HMS Tenacious (Lt.Cdr. D.F. Townsend, RN), HMS Kempenfelt (Lt.Cdr. J.B. Marjoribanks, RN), HMS Berry (T/A/Lt.Cdr. C.S. Pirie, RNVR), HMS Blackwood (Lt.Cdr. L.T. Sly, RD, RNR), HMS Cooke (Lt.Cdr. L.C. Hill, OBE, RD, RNR), HMS Domett (T/A/Lt.Cdr. S. Gordon, RNVR), HMS Duckworth (Cdr. R.G. Mills, DSO, DSC and Bar, RN) and HMS Essington (A/Lt.Cdr. W. Lambert, RNVR) arrived at Port Said.
All six frigates remained at Port Said. All the other ships entered the Suez Canal, although HMS Queen Elizabeth and HMS Valiant had to discharge fuel first at Port Said. (50)
13 Jan 1944
HMS Queen Elizabeth (Capt. H.G. Norman, CBE, RN), HMS Valiant (Capt. G.E.M. O’Donnell, DSO, RN), HMS Renown (Capt. B.C.B. Brooke, RN, flying the flag of Vice Admiral A.J. Power, KCB, CVO, RN, second in command of the Eastern Fleet), HMS Illustrious (Capt. R.L.B. Cunliffe, RN, flying the flag of Rear-Admiral C. Moody, CB, RN) and HMS Unicorn (Capt. H.L.St.J. Fancourt, DSO, RN) arrived at Suez. Their escorting detroyers, HMS Termagant (Lt.Cdr. J.P. Scatchard, DSC, RN), HMS Tenacious (Lt.Cdr. D.F. Townsend, RN), HMS Kempenfelt (Lt.Cdr. J.B. Marjoribanks, RN), had been ordered to return to Port Said, as they were to join the Mediterranean Fleet. (50)
15 Jan 1944
Around 0800 hours HMS Queen Elizabeth (Capt. H.G. Norman, CBE, RN), HMS Valiant (Capt. G.E.M. O’Donnell, DSO, RN), HMS Renown (Capt. B.C.B. Brooke, RN, flying the flag of Vice Admiral A.J. Power, KCB, CVO, RN, second in command of the Eastern Fleet) departed Suez for exercises. (52)
16 Jan 1944
Around 0200B/16, HMS Queen Elizabeth (Capt. H.G. Norman, CBE, RN), HMS Valiant (Capt. G.E.M. O’Donnell, DSO, RN), HMS Renown (Capt. B.C.B. Brooke, RN, flying the flag of Vice Admiral A.J. Power, KCB, CVO, RN, second in command of the Eastern Fleet), returned to harbour after their exercises.
Around 0900B/16, HMS Illustrious (Capt. R.L.B. Cunliffe, RN, flying the flag of Rear-Admiral C. Moody, CB, RN) and HMS Unicorn (Capt. H.L.St.J. Fancourt, DSO, RN) departed Suez to proceed southwards through the Red Sea. They were escorted by the destroyers HMS Paladin (Lt. E.A.S. Bailey, DSC, MBE, RN), HMS Pathfinder (Lt. T.F. Hallifax, RN), HMS Petard (Lt.Cdr. R.C. Egan, RN) and HMS Rocket (Lt.Cdr. H.B. Acworth, OBE, RN).
Around 1030B/16, HMS Queen Elizabeth, HMS Valiant and HMS Renown departed Suez and headed southwards to rendezvous with the carrier force on the following day. (50)
18 Jan 1944
Around 1700C/18, HMS Renown (Capt. B.C.B. Brooke, RN, flying the flag of Vice Admiral A.J. Power, KCB, CVO, RN, second in command of the Eastern Fleet) and HMS Illustrious (Capt. R.L.B. Cunliffe, RN, flying the flag of Rear-Admiral C. Moody, CB, RN), parted company with HMS Queen Elizabeth (Capt. H.G. Norman, CBE, RN), HMS Valiant (Capt. G.E.M. O’Donnell, DSO, RN), HMS Unicorn (Capt. H.L.St.J. Fancourt, DSO, RN), HMS Paladin (Lt. E.A.S. Bailey, DSC, MBE, RN), HMS Pathfinder (Lt. T.F. Hallifax, RN), HMS Petard (Lt.Cdr. R.C. Egan, RN) and HMS Rocket (Lt.Cdr. H.B. Acworth, OBE, RN).
HMS Renown and HMS Illustrious were to proceed ahead of the other ships to Aden. (50)
19 Jan 1944
Around 1000C/19, HMS Renown (Capt. B.C.B. Brooke, RN, flying the flag of Vice Admiral A.J. Power, KCB, CVO, RN, second in command of the Eastern Fleet) and HMS Illustrious (Capt. R.L.B. Cunliffe, RN, flying the flag of Rear-Admiral C. Moody, CB, RN) were joined by the destroyers HMS Rotherham (Capt. F.S.W. de Winton, RN), HMS Racehorse (Cdr. J.J. Casement, DSC, RN), HMS Rapid (Lt.Cdr. M.W. Tomkinson, DSC and Bar, RN) and HMS Roebuck (Cdr. J.T. Lean, DSO, RN).
Shortly afterwards however, HMS Racehorce, HMS Rapid and HMS Roebuck parted company. Around 1130C/19, HMS Racehorce, HMS Rapid and HMS Roebuck joined HMS Queen Elizabeth (Capt. H.G. Norman, CBE, RN), HMS Valiant (Capt. G.E.M. O’Donnell, DSO, RN), HMS Unicorn (Capt. H.L.St.J. Fancourt, DSO, RN), HMS Paladin (Lt. E.A.S. Bailey, DSC, MBE, RN), HMS Pathfinder (Lt. T.F. Hallifax, RN), HMS Petard (Lt.Cdr. R.C. Egan, RN) and HMS Rocket (Lt.Cdr. H.B. Acworth, OBE, RN).
Around 1200C/19, HMS Unicorn, HMS Paladin, HMS Pathfinder, HMS Petard and HMS Rocket parted company with the other ships of their group to proceed to Aden to refuel.
Around 1515C/19, HMS Renown, HMS Illustrious and HMS Rotherham arrived at Aden to refuel.
Around 1630C/19, HMS Unicorn, HMS Paladin, HMS Pathfinder HMS Petard and HMS Rocket arrived at Aden to refuel.
In the evening HMS Queen Elizabeth and HMS Valiant, HMS Racehorce, HMS Rapid and HMS Roebuck arrived off Aden. As they could not refuel yet they remained out and in the meantime conducted exercises. (50)
20 Jan 1944
HMS Queen Elizabeth (Capt. H.G. Norman, CBE, RN), HMS Valiant (Capt. G.E.M. O’Donnell, DSO, RN) HMS Racehorse (Cdr. J.J. Casement, DSC, RN), HMS Rapid (Lt.Cdr. M.W. Tomkinson, DSC and Bar, RN) and HMS Roebuck (Cdr. J.T. Lean, DSO, RN) were still exercising in the Aden area until around 1700C/20 when the battleships arrived at Aden to refuel. Late in the moring HMS Racehorce embarked some fuel from HMS Valiant. [It is possible the other destroyer fuelled from HMS Queen Elizabeth but there is no mention of this in her logbook].
Around 1330C/20, HMS Illustrious (Capt. R.L.B. Cunliffe, RN, flying the flag of Rear-Admiral C. Moody, CB, RN) departed Aden followed at 1430 hours by HMS Renown (Capt. B.C.B. Brooke, RN, flying the flag of Vice Admiral A.J. Power, KCB, CVO, RN, second in command of the Eastern Fleet) and at 1515 hours by HMS Unicorn (Capt. H.L.St.J. Fancourt, DSO, RN). HMS Rocket (Lt.Cdr. H.B. Acworth, OBE, RN) also departed Aden around this time. At sea they joined HMS Racehorse (Cdr. J.J. Casement, DSC, RN), HMS Rapid (Lt.Cdr. M.W. Tomkinson, DSC and Bar, RN) and HMS Roebuck (Cdr. J.T. Lean, DSO, RN).
The force then proceeded southwards until midnight and then changed course to the north-eastward to rendezvous with the ships which were now fuelling at Aden. (50)
21 Jan 1944
Around 1700C/21, HMS Queen Elizabeth (Capt. H.G. Norman, CBE, RN), HMS Valiant (Capt. G.E.M. O’Donnell, DSO, RN), HMS Rotherham (Capt. F.S.W. de Winton, RN), HMS Paladin (Lt. E.A.S. Bailey, DSC, MBE, RN), HMS Pathfinder (Lt. T.F. Hallifax, RN), HMS Petard (Lt.Cdr. R.C. Egan, RN) and HMAS Norman (Cdr. H.J. Buchanan DSO, RAN) departed Aden.
Around 1930C/21, they joined HMS Renown (Capt. B.C.B. Brooke, RN, flying the flag of Vice Admiral A.J. Power, KCB, CVO, RN, second in command of the Eastern Fleet), HMS Illustrious (Capt. R.L.B. Cunliffe, RN, flying the flag of Rear-Admiral C. Moody, CB, RN), HMS Unicorn (Capt. H.L.St.J. Fancourt, DSO, RN), HMS Racehorse (Cdr. J.J. Casement, DSC, RN), HMS Rapid (Lt.Cdr. M.W. Tomkinson, DSC and Bar, RN), HMS Rocket (Lt.Cdr. H.B. Acworth, OBE, RN) and HMS Roebuck (Cdr. J.T. Lean, DSO, RN) which had been exercising off Aden since the early afternoon of the 20th.
The fleet then proceeded eastwards minus HMS Racehorce, HMS Rapid, HMS Rocket and HMS Roebuck which proceeded to Aden to refuel after which they were to set sail again to overtake the fleet. (50)
22 Jan 1944
Around 1200C/22, HMS Queen Elizabeth (Capt. H.G. Norman, CBE, RN), HMS Valiant (Capt. G.E.M. O’Donnell, DSO, RN), HMS Renown (Capt. B.C.B. Brooke, RN, flying the flag of Vice Admiral A.J. Power, KCB, CVO, RN, second in command of the Eastern Fleet), HMS Illustrious (Capt. R.L.B. Cunliffe, RN, flying the flag of Rear-Admiral C. Moody, CB, RN), HMS Unicorn (Capt. H.L.St.J. Fancourt, DSO, RN), HMS Rotherham (Capt. F.S.W. de Winton, RN), HMS Paladin (Lt. E.A.S. Bailey, DSC, MBE, RN), HMS Pathfinder (Lt. T.F. Hallifax, RN), HMS Petard (Lt.Cdr. R.C. Egan, RN) and HMAS Norman (Cdr. H.J. Buchanan DSO, RAN) were rejoined by HMS Racehorse (Cdr. J.J. Casement, DSC, RN), HMS Rapid (Lt.Cdr. M.W. Tomkinson, DSC and Bar, RN), HMS Rocket (Lt.Cdr. H.B. Acworth, OBE, RN) and HMS Roebuck (Cdr. J.T. Lean, DSO, RN) which had fuelled at Aden. (50)
24 Jan 1944
HMS Queen Elizabeth (Capt. H.G. Norman, CBE, RN), HMS Valiant (Capt. G.E.M. O’Donnell, DSO, RN), HMS Renown (Capt. B.C.B. Brooke, RN, flying the flag of Vice Admiral A.J. Power, KCB, CVO, RN, second in command of the Eastern Fleet), HMS Illustrious (Capt. R.L.B. Cunliffe, RN, flying the flag of Rear-Admiral C. Moody, CB, RN), HMS Unicorn (Capt. H.L.St.J. Fancourt, DSO, RN), HMS Rotherham (Capt. F.S.W. de Winton, RN), HMS Racehorse (Cdr. J.J. Casement, DSC, RN), HMS Rapid (Lt.Cdr. M.W. Tomkinson, DSC and Bar, RN), HMS Rocket (Lt.Cdr. H.B. Acworth, OBE, RN), HMS Roebuck (Cdr. J.T. Lean, DSO, RN), HMS Paladin (Lt. E.A.S. Bailey, DSC, MBE, RN), HMS Pathfinder (Lt. T.F. Hallifax, RN), HMS Petard (Lt.Cdr. R.C. Egan, RN) and HMAS Norman (Cdr. H.J. Buchanan DSO, RAN) were still proceeding eastwards to join the Eastern Fleet.
Some of the destroyers had to be fuelled as these did not had the endurance to reach their destination without doing so. Therefore HMS Queen Elizabeth refuelled HMAS Norman between 0815 and 1135 hours. HMS Valiant fuelled HMS Paladin between 0648 and 0905 hours and HMS Pathfinder between 1001 and 1148 hours. HMS Renown fuelled HMS Petard between 0935 and 1136 hours. (50)
26 Jan 1944
Around 1900FG/26, HMS Unicorn (Capt. H.L.St.J. Fancourt, DSO, RN), HMS Rapid (Lt.Cdr. M.W. Tomkinson, DSC and Bar, RN) and HMS Roebuck (Cdr. J.T. Lean, DSO, RN) parted company with HMS Queen Elizabeth (Capt. H.G. Norman, CBE, RN), HMS Valiant (Capt. G.E.M. O’Donnell, DSO, RN), HMS Renown (Capt. B.C.B. Brooke, RN, flying the flag of Vice Admiral A.J. Power, KCB, CVO, RN, second in command of the Eastern Fleet), HMS Illustrious (Capt. R.L.B. Cunliffe, RN, flying the flag of Rear-Admiral C. Moody, CB, RN), HMS Rotherham (Capt. F.S.W. de Winton, RN), HMS Racehorse (Cdr. J.J. Casement, DSC, RN), HMS Rocket (Lt.Cdr. H.B. Acworth, OBE, RN), HMS Paladin (Lt. E.A.S. Bailey, DSC, MBE, RN), HMS Pathfinder (Lt. T.F. Hallifax, RN), HMS Petard (Lt.Cdr. R.C. Egan, RN) and HMAS Norman (Cdr. H.J. Buchanan DSO, RAN).
HMS Unicorn, HMS Rapid and HMS Roebuck then set course for Cochin, India where they arrived at 0900FG/27. (50)
27 Jan 1944
HMS Queen Elizabeth (Capt. H.G. Norman, CBE, RN), HMS Valiant (Capt. G.E.M. O’Donnell, DSO, RN), HMS Renown (Capt. B.C.B. Brooke, RN, flying the flag of Vice Admiral A.J. Power, KCB, CVO, RN, second in command of the Eastern Fleet), HMS Illustrious (Capt. R.L.B. Cunliffe, RN, flying the flag of Rear-Admiral C. Moody, CB, RN), HMS Rotherham (Capt. F.S.W. de Winton, RN), HMS Racehorse (Cdr. J.J. Casement, DSC, RN), HMS Rocket (Lt.Cdr. H.B. Acworth, OBE, RN), HMS Paladin (Lt. E.A.S. Bailey, DSC, MBE, RN), HMS Pathfinder (Lt. T.F. Hallifax, RN), HMS Petard (Lt.Cdr. R.C. Egan, RN) and HMAS Norman (Cdr. H.J. Buchanan DSO, RAN) were joined at dawn (around 0700FG/27) by HMAS Nizam (Cdr. C.H. Brooks, RAN) and HMAS Napier (Lt.Cdr. A.H. Green, DSC, RAN).
Around 0830FG/27, HMS Renown parted company to proceed to Colombo escorted by HMS Rotherham and HMAS Norman. They arrived at Colombo around 1500FG/27. HMAS Norman was then immediately docked in the Walker's Graving Dock to clear the fouled port propeller. On docking further damage was discovered and repairs were taken in hand. Eventually the port propeller was replaced. [undocking date not known].
Between 2100FG/27 and 2359FG/27, the light cruiser HMS Emerald (Capt. F.J. Wylie, RN), which was on passage from Trincomalee to Colombo, conducted a shadowing exercises with the fleet.
Around 2300FG/27, HMAS Napier parted company to proceed ahead of the fleet to Trincomalee. (53)
28 Jan 1944
HMS Queen Elizabeth (Capt. H.G. Norman, CBE, RN), HMS Valiant (Capt. G.E.M. O’Donnell, DSO, RN), HMS Illustrious (Capt. R.L.B. Cunliffe, RN, flying the flag of Rear-Admiral C. Moody, CB, RN), HMS Racehorse (Cdr. J.J. Casement, DSC, RN), HMS Rocket (Lt.Cdr. H.B. Acworth, OBE, RN), HMS Paladin (Lt. E.A.S. Bailey, DSC, MBE, RN), HMS Pathfinder (Lt. T.F. Hallifax, RN), HMS Petard (Lt.Cdr. R.C. Egan, RN) and HMAS Nizam (Cdr. C.H. Brooks, RAN) arrived at Trincomalee around 1230FG/28.
HMAS Napier (Lt.Cdr. A.H. Green, DSC, RAN) had arrived around dawn to embark the Commodore (D) S.H.T. Arliss, DSO, RN, who was to take charge of the destroyers entering the harbour. (54)
17 Feb 1944
During 17/18 August 1944, the battleships HMS Queen Elizabeth (Capt. H.G. Norman, CBE, RN), HMS Valiant (Capt. G.E.M. O’Donnell, DSO, RN) and the destroyers HMS Rotherham (Capt. F.S.W. de Winton, RN), HMS Pathfinder (Lt.Cdr. T.F. Hallifax, RN), HMS Penn (Lt.Cdr. J.H. Swain, DSO, RN), HMAS Napier (Lt.Cdr. A.H. Green, DSC, RAN), HMAS Norman (Cdr. H.J. Buchanan DSO, RAN) and HrMs Tjerk Hiddes (Lt.Cdr. G.A. Cox, RNethN) conducted exercises off Trincomalee. (55)
1 Mar 1944
HMS Queen Elizabeth (Capt. H.G. Norman, CBE, RN), HMS Renown (Capt. B.C.B. Brooke, RN and flagship of Vice Admiral A.J. Power, KCB, CVO, RN and second in command of the Eastern Fleet), HMS Ceylon (Capt. G.B. Amery-Parkes, RN), HMAS Napier (Lt.Cdr. A.H. Green, DSC, RAN) HMAS Norman (Cdr. H.J. Buchanan DSO, RAN) and HMS Pathfinder (Lt.Cdr. T.F. Hallifax, RN) proceeded to sea for exercises. During the exercises a periscope was reported and the exercise was cancelled.
HMAS Norman and HMAS Pathfinder remained patrolling in the area until 3 March when they set course for Colombo. (56)
6 Mar 1944
At 1230FG/6, the battleship HMS Queen Elizabeth (Capt. H.G. Norman, CBE, RN) departed Trincomalee for Colombo. She is escorted by the destroyers HMAS Napier (Lt.Cdr. A.H. Green, DSC, RAN), HMAS Nizam (Cdr. C.H. Brooks, RAN), HMS Quality (Lt.Cdr. G.L. Farnfield, DSO, RN) and HMAS Quickmatch (Lt.Cdr. O.H. Becher, DSC, RAN).
At 1735FG/6, HMAS Napier, which had acted as target for a gunnery exercises of HMS Queen Elizabeth, parted company.
HMS Queen Elizabeth arrived at Colombo around 1700FG/7.
HMAS Nizam, HMS Quality and HMAS Quickmatch then returned to Trincomalee arriving there around 1000FG/8. (57)
13 Mar 1944
HMS Queen Elizabeth (Capt. H.G. Norman, CBE, RN) departed Colombo for Trincomalee. She was escorted by the destroyers HMAS Norman (Cdr. H.J. Buchanan DSO, RAN), HMAS Nepal (Cdr. F.B. Morris, RAN) and HrMs Tjerk Hiddes (Lt.Cdr. G.A. Cox, RNethN). (57)
14 Mar 1944
HMS Queen Elizabeth (Capt. H.G. Norman, CBE, RN), HMAS Norman (Cdr. H.J. Buchanan DSO, RAN), HMAS Nepal (Cdr. F.B. Morris, RAN) and HrMs Tjerk Hiddes (Lt.Cdr. G.A. Cox, RNethN) arrived at Trincomalee from Colombo. (57)
19 Mar 1944
Operation Diplomat
On 19 March the light cruiser HrMs Tromp (A/Capt. F. Stam, RNethN) departed Trincomalee to escort the Royal Fleet Auxiliary tankers Arndale (8296 GRT, built 1937), Eaglesdale (8032 GRT, built 1942) and Easedale (8032 GRT, built 1942).
These tankers were to refuel the ships from the Eastern Fleet that were to participate in operation Diplomat. During operation Diplomat the Eastern Fleet proceeded to the south-west of Cocos Island where the aircraft carrier USS Saratoga (T/Commodore. J.H. Cassady, USN) and the destroyers USS Cummings (T/Cdr. P.D. Williams, USN), USS Dunlap (T/Cdr. C. Iverson, USN) and USS Fanning (T/Cdr. R.M. MacKinnon, USN).
Ships from the Eastern Fleet departed Trincomalee on 21 March, these were the battleship HMS Queen Elizabeth (Capt. H.G. Norman, CBE, RN), battlecruiser HMS Renown (Capt. B.C.B. Brooke, RN, flying the flag of Vice Admiral A.J. Power, KCB, CVO, RN and second in command of the Eastern Fleet), aircraft carrier HMS Illustrious (Capt. R.L.B. Cunliffe, RN, flying the flag of Rear-Admiral C. Moody, CB, RN), heavy cruisers HMS London (Capt. R.V. Symonds-Tayler, DSC, RN), HMS Cumberland (Capt. W.Y.La R. Beverley, RN), light cruisers HMS Ceylon (Capt. G.B. Amery-Parkes, RN), HMNZS Gambia (Capt. N.J.W. William-Powlett, DSC, RN), destroyers HMS Quilliam (Capt. R.G. Onslow, DSO and 2 Bars, RN), HMS Pathfinder (Lt.Cdr. T.F. Hallifax, RN), HMAS Napier (Lt.Cdr. A.H. Green, DSC, RAN), HMAS Nepal (Cdr. F.B. Morris, RAN), HMAS Norman (Cdr. H.J. Buchanan DSO, RAN), HrMs Van Galen (Lt.Cdr. F.T. Burghard, RNethN) and HrMs Tjerk Hiddes (Lt.Cdr. G.A. Cox, RNethN).
The battleship HMS Valiant (Capt. G.E.M. O’Donnell, DSO, RN) and the destroyers HMS Quality (Lt.Cdr. G.L. Farnfield, DSO, RN), HMS Queenborough (Cdr. E.P. Hinton, DSO and Bar, MVO, RN), HMAS Quiberon (Cdr. G.S. Stewart, RAN) departed Colombo on the same day. They made rendezvous with the other ships the following day.
On 24 March 1944, the Eastern Fleet met HrMs Tromp and the tankers at 0930 hours in position 07°57'S, 82°14'E and during the next three days they experienced good weather. Ships were fuelled as follows;
24 March 1944 Easedale - HMS Renown Arndale - HMS Valiant and HMS Ceylon Eaglesdale - HMS Queen Elizabeth and HMNZS Gambia
25 March 1944 Easedale - HMS Quilliam, HMS Queenborough, HMAS Quiberon, HMS Quality and HMS Pathfinder Arndale - HMS Illustrious and HrMs Tromp Eaglesdale - HMS London, HMS Cumberland, HMAS Napier, HMAS Nepal and HMAS Norman
26 March 1944 Easedale - HMS Pathfinder, HrMs Van Galen, HMAS Quiberon and HMAS Norman Eaglesdale - HMAS Napier, HMS Quilliam, HMS Queensborough, HMS Quality and HMAS Nepal
Tanker Arndale had been detached after fuelling on the 25th escorted by HrMS Tjerk Hiddes which was suffering from defects. The other two oilers were detached after fuelling on the 26th still escorted by HrMs Tromp.
HrMs Ceylon and HMS Napier arrived at Colombo on 31 March. All the other ships arrived at Trincomalee on the same day except HrMs Tromp which arrived at Trincomalee with the tankers on 2 April. (58)
12 Apr 1944
Around 0930/12, HMS Queen Elizabeth (Capt. H.G. Norman, CBE, RN) and HMS Renown (Capt. B.C.B. Brooke, RN and flagship of Vice Admiral A.J. Power, KCB, CVO, RN and second in command of the Eastern Fleet) departed Trincomalee. Off the harbour entrance they joined the destoyers HMS Rotherham (Capt. F.S.W. de Winton, RN), HMAS Nepal (Lt.Cdr. J. Plunkett-Cole, RAN), HMAS Nizam (Cdr. C.H. Brooks, RAN) and HMS Petard (Lt.Cdr. R.C. Egan, DSO, RN) which had departed half an hour before. At sea they joined the heavy cruisers HMS Cumberland (Capt. W.Y.La R. Beverley, RN) and HMS London (Capt. R.V. Symonds-Tayler, DSC, RN) for exercises.
Around 1600/12, HMS Cumberland parted company to return to Trincomalee where she arrived an hour later.
HMS Queen Elizabeth, HMS Renown and HMS London returned to Harbour around 0815/13 followed about an hour later by HMS Rotherham and HMS Petard. HMAS Nepal and HMAS Nizam remained at sea. (59)
16 Apr 1944
Admiral J.F. Somerville, KCB, KBE, DSO, RN, C-in-C Eastern Fleet hoisted his flag in HMS Queen Elizabeth (Capt. H.G. Norman, CBE, RN). (60)
16 Apr 1944
Operation Cockpit
Carrier raid against Sabang by the Eastern Fleet.
On 16 April 1944 the Eastern Fleet put to sea from Trincomalee, Ceylon in two task forces; Task Force 69, which was made up of the battleships HMS Queen Elizabeth (Capt. H.G. Norman, CBE, RN, flying the flag of Admiral J.F. Somerville, KCB, KBE, DSO, RN, C-in-C Eastern Fleet), HMS Valiant (Capt. G.E.M. O’Donnell, DSO, RN), Richelieu (Capt. Lambert), the light cruisers HMS Newcastle (Capt. P.B.R.W. William-Powlett, DSO, RN, flying the flag of Rear-Admiral A.D. Read, CB, RN), HMS Nigeria (Capt. S.H. Paton, RN), HMS Ceylon (Capt. G.B. Amery-Parkes, RN), HMNZS Gambia (Capt. N.J.W. William-Powlett, DSC, RN), HrMs Tromp (A/Capt. F. Stam, RNethN) and the destroyers HMS Rotherham (Capt. F.S.W. de Winton, RN), HMS Racehorse (Cdr. J.J. Casement, DSC, RN), HMS Penn (Lt.Cdr. J.H. Swain, DSO, DSC, RN), HMS Petard (Lt.Cdr. R.C. Egan, DSO, RN), HMAS Quiberon (Cdr. G.S. Stewart, RAN), HMAS Napier (Lt.Cdr. A.H. Green, DSC, RAN, with Commodore S.H.T. Arliss, DSO, RN, on board), HMAS Nepal (Lt.Cdr. J. Plunkett-Cole, RAN), HMAS Nizam (Cdr. C.H. Brooks, RAN), HrMs Van Galen (Lt.Cdr. F.T. Burghard, RNethN).
Task Force 70, which was made up of the battlecruiser HMS Renown (Capt. B.C.B. Brooke, RN, flying the flag of Vice-Admiral A.J. Power, KCB, CVO, RN, second in command of the Eastern Fleet), the British aircraft carriers HMS Illustrious (Capt. R.L.B. Cunliffe, RN, flying the flag of Rear-Admiral C. Moody, CB, RN), USS Saratoga (Capt. J.H. Cassady, USN), heavy cruiser HMS London (Capt. R.V. Symonds-Tayler, DSC, RN) and the destroyers HMS Quilliam (Capt. R.G. Onslow, DSO and 2 Bars, RN), HMS Quadrant (Lt.Cdr. W.H. Farrington, RN), HMS Queenborough (Cdr. E.P. Hinton, DSO and Bar, MVO, RN), USS Cummings (Cdr. P.D. Williams, USN), USS Dunlap (Cdr. C. Iverson, USN) and USS Fanning (Lt.Cdr. J.C. Bentley, USN).
During the forenoon of the 17th the four 'N' class and two 'P' class destroyers of Force 69 were fuelled by HMS Newcastle, HMS Nigeria, HMS Ceylon, HMNZS Gambia. The three 'Q' class destroyers from Force 70 were fuelled by HMS Renown and HMS London.
On the 18th HMS Ceylon and HMNZS Gambia were transferred from Force 69 to Force 70 to bolster the latters AA defence. (On the 19th HMS Nigeria replaced HMS Ceylon in this force as HMS Ceylon had problems with one shaft and could only make 24 knots.) At sunset Force 70 was detached so as to arrive at the flying off position for the aircraft at 0530/19.
At 0530/19 the carriers launched 46 bombers and 37 fighters (17 Barracudas and 13 Corsairs from HMS Illustrious and 11 Avenges, 18 Dauntless and 24 Hellcats from USS Saratoga) to attack Sabang and nearby airfields. Besides that 12 fighters were launched to patrol overhead of both Task forces.
The enemy was taken completely by surprise and 24 Japanese aircraft were destroyed on the ground. Only 1 fighter, a Hellcat from the Saratoga, was lost on the Allied side and it's pilot was rescued out of the water by the British submarine HMS Tactician (Lt.Cdr. A.F. Collett, DSC, RN). All aircraft, except the one lost, had returned to the carriers by 0930 hours after which both task forces retired to the west. The Japanese tried to attack the Allied task force with three torpedo bombers but these were shot down by Allied fighter aircraft at 1010 hours.
At Sabang the Japanese merchants Kunitsu Maru (2722 GRT, built 1937) and Haruno Maru (775 GRT, built 1927, former Dutch Kidoel) were sunk by the Allied aircraft while the Japanese minelayer Hatsutaka was damaged.
At 0800 hours on the 20th the fleet set course to return to Trincomalee. The cruisers and destroyer meanwhile carried out attack exercises.
The fleet returned to Trincomalee on 21 April. (61)
2 May 1944
During 2/3 May, the battleship HMS Queen Elizabeth (Capt. H.G. Norman, CBE, RN, flying the flag of Admiral J.F. Somerville, KCB, KBE, DSO, RN, C-in-C Eastern Fleet) and light cruiser HMNZS Gambia (Capt. N.J.W. William-Powlett, DSC, RN) conducted exercises off Trincomalee. The battleship was possibly escorted by the destroyers HMS Quadrant (Lt.Cdr. W.H. Farrington, RN) and HMAS Napier (Lt.Cdr. A.H. Green, DSC, RAN). On 2 May 1944, HMNZS Gambia also conducted A/S exercises with the submarine HMS Truculent (Lt.Cdr. R.L. Alexander, DSO, RN). (62)
4 May 1944
The battleship HMS Queen Elizabeth (Capt. H.G. Norman, CBE, RN, flying the flag of Admiral J.F. Somerville, KCB, KBE, DSO, RN, C-in-C Eastern Fleet) departed Trincomalee for Colombo. She was escorted by the destroyers HMAS Napier (Lt.Cdr. A.H. Green, DSC, RAN), HMS Quadrant (Lt.Cdr. W.H. Farrington, RN), HMS Queenborough (Cdr. E.P. Hinton, DSO and Bar, MVO, RN) and HMAS Quickmatch (Lt.Cdr. O.H. Becher, DSC, RAN).
HMS Queenborough and HMAS Quickmatch later turned back to Trincomalee. (63)
5 May 1944
HMS Queen Elizabeth (Capt. H.G. Norman, CBE, RN, flying the flag of Admiral J.F. Somerville, KCB, KBE, DSO, RN, C-in-C Eastern Fleet), HMAS Napier (Lt.Cdr. A.H. Green, DSC, RAN) and HMS Quadrant (Lt.Cdr. W.H. Farrington, RN) arrived at Colombo from Trincomalee. (63)
6 May 1944
Operation Transom.
Carrier raid against Surabaya by the Eastern Fleet.
On 6 May 1944 the Eastern Fleet put to sea from Trincomalee or Colombo in two task forces; Task Force 65, which was made up of the battleships HMS Queen Elizabeth (Capt. H.G. Norman, CBE, RN, flying the flag of Admiral J.F. Somerville, KCB, KBE, DSO, RN, C-in-C Eastern Fleet), HMS Valiant (Capt. G.E.M. O’Donnell, DSO, RN), Richelieu (Capt. G.M.J. Merveilleux du Vignaux), the light cruisers HMS Kenya (Capt. C.L. Robertson, RN, flying the flag of Rear-Admiral A.D. Read, CB, RN), HrMs Tromp (A/Capt. F. Stam, RNethN) and the destroyers HMS Rotherham (Capt. F.S.W. de Winton, RN), HMS Racehorse (Cdr. J.J. Casement, DSC, RN), HMS Penn (Lt.Cdr. J.H. Swain, DSO, DSC, RN), HMAS Napier (Lt.Cdr. A.H. Green, DSC, RAN, with Commodore S.H.T. Arliss, DSO, RN, on board), HMAS Nepal (Lt.Cdr. J. Plunkett-Cole, RAN), HMAS Quiberon (Cdr. G.S. Stewart, RAN), HMAS Quickmatch (Lt.Cdr. O.H. Becher, DSC, RAN) and HrMs Van Galen (Lt.Cdr. F.T. Burghard, RNethN).
Task Force 66, which was made up of the battlecruiser HMS Renown (Capt. B.C.B. Brooke, RN, flying the flag of Vice-Admiral A.J. Power, KCB, CVO, RN, second in command of the Eastern Fleet) (went to Task Force 65 the next day), the aircraft carriers HMS Illustrious (Capt. R.L.B. Cunliffe, RN, flying the flag of Rear-Admiral C. Moody, CB, RN), USS Saratoga (T/Commodore J.H. Cassady, USN), light cruisers HMS Ceylon (Capt. G.B. Amery-Parkes, RN), HMNZS Gambia (Capt. N.J.W. William-Powlett, DSC, RN) and the destroyers HMS Quilliam (Capt. R.G. Onslow, DSO and 2 Bars, RN), HMS Quadrant (Lt.Cdr. W.H. Farrington, RN), HMS Queenborough (Cdr. E.P. Hinton, DSO and Bar, MVO, RN), USS Cummings (T/Cdr. P.D. Williams, USN), USS Dunlap (T/Cdr. C. Iverson, USN) and USS Fanning (T/Cdr. J.C. Bentley, USN).
On 10 May 1944, the Dutch light cruiser Tromp and the destroyers were fuelled at sea by the capital ships and the cruisers. During fuelling from HMS Valiant the Dutch destroyer HrMs Van Galen sustained some minor damage (fractured hull plate on her port side) but the crew of the Van Galen was able to effect emergency repairs.
On 15 May 1944, task forces 65 and 66 were fuelled at Exmouth Gulf, Australia by Task Force 67 which was made up of of six Royal Fleet Auxiliary tankers; Eaglesdale (8032 GRT, built 1942), Echodale (8150 GRT, built 1941), Easedale (8032 GRT, built 1942), Arndale (8296 GRT, built 1937), Pearleaf (5911 GRT, built 1917), Appleleaf (5891 GRT, built 1917) and supplyship (used as distilling ship) Bacchus (3154 GRT, built 1936). This force had already left Trincomalee on 30 April and was escorted by the heavy cruisers HMS London (Capt. R.V. Symonds-Tayler, DSC, RN), HMS Suffolk (A/Capt. W.F.H.C. Rutherford, RN). They had also been escorted near Ceylon by a local escort for A/S purposes, this local escort had been made up of the destroyers HMS Rotherham, HrMs Van Galen and the frigate HMS Findhorn (Lt.Cdr. J.C. Dawson, RD, RNR). The local escort returned to Ceylon on 5 May 1944. The two cruisers mentioned above now joined Task Force 66. Later this day Task Forces 65 and 66 went to sea again for the actual attack on Surabaya. On leaving Exmouth Gulf the fleet was spotted by the merchant vessel Aroona. This ship was now instructed to put into Exmouth Gulf and was held there by HMAS Adelaide (A/Capt. J.C.D. Esdale, OBE, RAN) for 24 hours and to impress on the master and crew of this vessel the necessity of not disclosing any information concerning the Fleet on the arrival of their ship at Fremantle (their next port of call).
In the early morning hours of the 17th the carriers launched 45 dive bombers and 40 fighters for an attack on the harbour and oil installations (Wonokromo oil refeniry) of Surabaya, Netherlands East Indies. (USS Saratoga: 12 Avengers (1 had to return with engine trouble shortly after being launched), 18 Dauntless, 24 Hellcats; HMS Illustrious: 18 Avengers (2 of which force landed in the sea shortly after being launched), 16 Corsairs). On the ground they destroyed 12 enemy aircraft (20 were claimed). The damage to the harbour and shipping were over estimated (10 ships were thought to have been hit) as in fact only the small transport ship Shinrei Maru (987 GRT, built 1918) was sunk and patrol vessel P 36, auxiliary submarine chasers CHa-107 and CHa-108, tanker Yosei Maru (2594 GRT, built 1928, former Dutch Josefina) and cargo ships Choka Maru (???? GRT, built ????) and Tencho Maru (2716 GRT, built 1919) were damaged.
On the 18th the US ships were released. The other ships then proceeded to Exmouth Gulf where they arrived to fuel the next day before starting on the return trip to Ceylon less destroyer HMAS Quiberon which was to refit in Australia and was sent to Fremantle.
On 23 May 1944, the Dutch light cruiser Tromp and the destroyers were fuelled at sea by the capital ships and the cruisers.
The ships of Task Force 65 and 66 arrived back at Colombo or Trincomalee on the 26 or 27th.
On 1 June 1944, Task Force 67 arrived at Trincomalee from Exmouth Gulf having been escorted by HMS London and HMS Suffolk until 1700FG/31. On arrival at Trincomalee Task Force 67 had an A/S escort made up of the destroyers HMAS Nizam (Cdr. C.H. Brooks, RAN), HMAS Quickmatch, HMS Raider (Lt.Cdr. K.W. Michell, DSC, RN), HMS Roebuck (Cdr. J.T. Lean, DSO, RN) and corvette HMS Burnet (Lt. D.S. Charles, RNR). These ships had joined at 2300FG/28 (HMAS Nizam, HMS Roebuck and HMS Burnet) and 0630FG/30 (HMAS Quickmatch and HMS Raider).
During this operation several US Submarine guarded the passages to the Indian Ocean to spot a possible Japanese counter attack. The submarines deployed for this purpose were the following; In the Sunda Strait from 12 to 23 May 1944; USS Angler (T/Cdr. R. I. Olsen, USN) and USS Gunnel (T/Cdr. J.S. McCain, Jr., USN). South of Lombok Strait from 13 to 20 May 1944; USS Cabrilla (T/Cdr. W.C. Thompson, Jr., USN) and also the USS Bluefish (T/Cdr. C.M. Henderson, USN) from 13 May until the night of the 16th. South of Bali Strait from 17 to 20 May; USS Bluefish. North of Bali Strait; USS Puffer (Cdr. F.G. Selby, USN) during the night of 16/17 May.
The following US Submarines were deployed in the Surabaya area for air/sea rescue duties; USS Puffer in the Madura Strait about 40 miles to the east of Surabaya. USS Rasher (Cdr. W.R. Laughton, USN) in the Java Sea about 40 miles to the north of Surabaya. (64)
29 May 1944
Around 0745FG/29, the battleships HMS Queen Elizabeth (Capt. H.G. Norman, CBE, RN, flying the flag of Admiral J.F. Somerville, KCB, KBE, DSO, RN, C-in-C Eastern Fleet) and Richelieu (Capt. G.M.J. Merveilleux du Vignaux) departed Trincomalee for Colombo. They were escorted by the destroyers HMS Quilliam (Capt. R.G. Onslow, DSO and 2 Bars, RN), HMS Quadrant (Lt.Cdr. W.H. Farrington, RN), HMS Queenborough (Cdr. E.P. Hinton, DSO and Bar, MVO, RN), HMAS Napier (Lt.Cdr. A.H. Green, DSC, RAN), HMAS Nepal (Lt.Cdr. J. Plunkett-Cole, RAN) and HrMs Van Galen (Lt.Cdr. F.T. Burghard, RNethN). (63)
30 May 1944
Around 0930FG/30, HMS Queen Elizabeth (Capt. H.G. Norman, CBE, RN, flying the flag of Admiral J.F. Somerville, KCB, KBE, DSO, RN, C-in-C Eastern Fleet), Richelieu (Capt. G.M.J. Merveilleux du Vignaux), HMS Quilliam (Capt. R.G. Onslow, DSO and 2 Bars, RN), HMS Quadrant (Lt.Cdr. W.H. Farrington, RN), HMS Queenborough (Cdr. E.P. Hinton, DSO and Bar, MVO, RN), HMAS Napier (Lt.Cdr. A.H. Green, DSC, RAN), HMAS Nepal (Lt.Cdr. J. Plunkett-Cole, RAN) and HrMs Van Galen (Lt.Cdr. F.T. Burghard, RNethN). (63)
9 Jun 1944
The battleships HMS Queen Elizabeth (Capt. H.G. Norman, CBE, RN, flying the flag of Admiral J.F. Somerville, KCB, KBE, DSO, RN, C-in-C Eastern Fleet), Richelieu (Capt. G.M.J. Merveilleux du Vignaux) departed Colombo for Trincomalee. They were escorted by the destroyers HMS Quilliam (Capt. R.G. Onslow, DSO and 2 Bars, RN), HMS Rapid (Lt.Cdr. M.W. Tomkinson, DSC and Bar, RN) and HMS Roebuck (Cdr. J.T. Lean, DSO, RN). Later the destroyer HMS Rotherham (Capt. F.S.W. de Winton, RN) also joined. (65)
10 Jun 1944
HMS Queen Elizabeth (Capt. H.G. Norman, CBE, RN, flying the flag of Admiral J.F. Somerville, KCB, KBE, DSO, RN, C-in-C Eastern Fleet), Richelieu (Capt. G.M.J. Merveilleux du Vignaux), HMS Quilliam (Capt. R.G. Onslow, DSO and 2 Bars, RN), HMS Rotherham (Capt. F.S.W. de Winton, RN), HMS Rapid (Lt.Cdr. M.W. Tomkinson, DSC and Bar, RN) and HMS Roebuck (Cdr. J.T. Lean, DSO, RN) arrived at Trincomalee. (65)
6 Jul 1944
During 6/7 July 1944, HMS Queen Elizabeth (Capt. H.G. Norman, CBE, RN, flying the flag of Admiral J.F. Somerville, KCB, KBE, DSO, RN, C-in-C Eastern Fleet), HMS Valiant (Capt. G.E.M. O’Donnell, DSO, RN), conducted exercises off Trincomalee. They were escorted by HMS Rotherham (Capt. F.S.W. de Winton, RN), HMS Rapid (Lt.Cdr. M.W. Tomkinson, DSC and Bar, RN), HMS Relentless (Lt.Cdr. R.A. Fell, RN) and HMS Quality (Lt.Cdr. the Viscount Jocelyn, RN). These exercises included night exercises. (66)
14 Jul 1944
During 14/15 July, HMS Queen Elizabeth (Capt. H.G. Norman, CBE, RN, flying the flag of Admiral J.F. Somerville, KCB, KBE, DSO, RN, C-in-C Eastern Fleet), HMS Valiant (Capt. G.E.M. O’Donnell, DSO, RN), Richelieu (Capt. Merveilleux du Vignaux), HMS Renown (Capt. B.C.B. Brooke, RN, flying the flag of Vice Admiral A.J. Power, KCB, CVO, RN, second in command of the Eastern Fleet), HMS Cumberland (Capt. W.Y.La R. Beverley, RN), HMS Kenya (Capt. C.L. Robertson, RN), HMS Quilliam (Capt. R.G. Onslow, DSO and 2 Bars, RN), HMS Quality (Lt.Cdr. the Viscount Jocelyn, RN), HMS Racehorse (Cdr. J.J. Casement, DSC, RN), HMS Raider (Lt.Cdr. K.W. Michell, DSC, RN), HMS Rapid (Lt.Cdr. M.W. Tomkinson, DSC and Bar, RN), HMS Relentless (Lt.Cdr. R.A. Fell, RN), HMS Rocket (Lt.Cdr. H.B. Acworth, OBE, RN) and HMAS Napier (Lt.Cdr. A.H. Green, DSC, RAN) conducted exercises off Trincomalee. These included night exercises. (67)
17 Jul 1944
HMS Queen Elizabeth (Capt. H.G. Norman, CBE, RN, flying the flag of Admiral J.F. Somerville, KCB, KBE, DSO, RN, C-in-C Eastern Fleet), HMS Valiant (Capt. G.E.M. O’Donnell, DSO, RN), Richelieu (Capt. Merveilleux du Vignaux), HMS Renown (Capt. B.C.B. Brooke, RN, flying the flag of Vice Admiral A.J. Power, KCB, CVO, RN, second in command of the Eastern Fleet) conducted exercises off Trincomalee. These included a bombardment exercises. During the exercises the capital ships were escorted by HMS Quilliam (Capt. R.G. Onslow, DSO and 2 Bars, RN), HMS Quality (Lt.Cdr. the Viscount Jocelyn, RN), HMS Racehorse (Cdr. J.J. Casement, DSC, RN), HMS Raider (Lt.Cdr. K.W. Michell, DSC, RN), HMS Rapid (Lt.Cdr. M.W. Tomkinson, DSC and Bar, RN), HMS Relentless (Lt.Cdr. R.A. Fell, RN) and HMS Rocket (Lt.Cdr. H.B. Acworth, OBE, RN). (67)
20 Jul 1944
HMS Queen Elizabeth (Capt. H.G. Norman, CBE, RN, flying the flag of Admiral J.F. Somerville, KCB, KBE, DSO, RN, C-in-C Eastern Fleet), HMS Valiant (Capt. G.E.M. O’Donnell, DSO, RN), Richelieu (Capt. Merveilleux du Vignaux), HMS Renown (Capt. B.C.B. Brooke, RN, flying the flag of Vice Admiral A.J. Power, KCB, CVO, RN, second in command of the Eastern Fleet) conducted exercises off Trincomalee. During the exercises the capital ships were escorted by HMS Quilliam (Capt. R.G. Onslow, DSO and 2 Bars, RN), HMS Quality (Lt.Cdr. the Viscount Jocelyn, RN), HMS Racehorse (Cdr. J.J. Casement, DSC, RN), HMS Raider (Lt.Cdr. K.W. Michell, DSC, RN), HMS Rapid (Lt.Cdr. M.W. Tomkinson, DSC and Bar, RN), HMS Relentless (Lt.Cdr. R.A. Fell, RN) and HMS Rocket (Lt.Cdr. H.B. Acworth, OBE, RN). (67)
22 Jul 1944
Operation Crimson.
Carrier raid and surface bombardment against Sabang, Netherlands East Indies by the Eastern Fleet.
On 22 July 1944 the Eastern Fleet put to sea from Trincomalee, Ceylon. The ships that participated in this sortie were the battleships HMS Queen Elizabeth (Capt. H.G. Norman, CBE, RN, flying the flag of Admiral J.F. Somerville, KCB, KBE, DSO, RN, C-in-C Eastern Fleet), HMS Valiant (Capt. G.E.M. O’Donnell, DSO, RN), Richelieu (Capt. G.M.J. Merveilleux du Vignaux), battlecruiser HMS Renown (Capt. B.C.B. Brooke, RN, flying the flag of Vice Admiral A.J. Power, KCB, CVO, RN, second in command of the Eastern Fleet), aircraft carriers HMS Illustrious (Capt. C.E. Lambe, CB, CVO, RN, flying the flag of Rear-Admiral C. Moody, CB, RN), HMS Victorious (Capt. M.M. Denny, CB, CBE, RN), heavy cruiser HMS Cumberland (Capt. W.Y.La R. Beverley, RN), light cruisers HMS Nigeria (Capt. H.A. King, DSO, RN, flying the flag of Rear-Admiral A.D. Read, CB, RN), HMS Kenya (Capt. C.L. Robertson, RN), HMS Ceylon (Capt. G.B. Amery-Parkes, RN), HMS Phoebe (Capt. C.P. Frend, RN), HMNZS Gambia (Capt. N.J.W. William-Powlett, DSC, RN), HrMs Tromp (A/Capt. F. Stam, RNN) and the destroyers HMS Rotherham (Capt. F.S.W. de Winton, RN), HMS Relentless (Lt.Cdr. R.A. Fell, RN), HMS Racehorse (Cdr. J.J. Casement, DSC, RN), HMS Rocket (Lt.Cdr. H.B. Acworth, OBE, RN), HMS Raider (Lt.Cdr. K.W. Michell, DSC, RN), HMS Roebuck (Cdr. J.T. Lean, DSO, RN), HMS Rapid (Lt.Cdr. M.W. Tomkinson, DSC and Bar, RN), HMS Quilliam (Capt. R.G. Onslow, DSO and 2 Bars, RN), HMS Quality (Lt.Cdr. the Viscount Jocelyn, RN), HMAS Quickmatch (Lt.Cdr. O.H. Becher, DSC, RAN).
The British submarines HMS Templar (Lt. T.G. Ridgeway, RN) and HMS Tantalus (Lt.Cdr. H.S. Mackenzie, DSO and Bar, RN) were deployed for air/sea rescue duties.
In the early hours of the 25th the carriers, HMS Illustrious and HMS Victorious, separated from the fleet under the escort of HMS Phoebe, HMS Roebuck and HMS Raider, and launched a total of 34 fighter aircraft to attack airfields in the area (18 Corsairs from HMS Illustrious and 16 Corsairs from HMS Victorious). One Corsair fighter was damaged by AA fire from the enemy and crashed into the sea, the pilot was picked up by HMS Nigeria. Five other Corsairs were damaged by AA fire but managed to return to the carriers. Two of these could be repaired on board, the other three were too badly damaged for effective repairs.
The battleships HMS Queen Elizabeth, HMS Valiant, Richelieu, battlecruiser HMS Renown, heavy cruiser HMS Cumberland, light cruisers HMS Nigeria, HMS Kenya, HMS Ceylon, HMNZS Gambia and the destroyers HMS Rotherham, HMS Relentless, HMS Racehorse, HMS Rocket and HMS Rapid then commenced a bombardment of the Sabang area. They fired a total of 294 - 15", 134 - 8", 324 - 6", ca. 500 - 4.7" and 123 - 4" shells.
Then the Dutch cruiser HrMs Tromp entered Sabang Bay, her rightful waters, with the destroyers HMS Quilliam, HMS Quality and HMAS Quickmatch. In all these four ships fired a total of 8 Torpedos and 208 - 6", 717 - 4.'7" and 668 x 4" shells. Japanese shore batteries obtained 4 hits on the Tromp while Quilliam and Quality were both hit once. The hit by what was thought to be a 3” shell on Quilliam caused minor structural damage but killed one petty officer and wounded four ratings. Quality was hit by what is thought to be a 5” shell which hit the tripod foremast and HA director. One war correspondent was killed and one officer and eight retings were wounded, some of them seriously. Tromp was hit by two 5” and two 3” shells but was lucky that none of these exploded !!!, she suffered only minor structural damage and no deaths or even wounded amongst her crew !
Later that day 13 fighters from the carriers intercepted a Japanese counter attack with 10 aircraft. 7 of these were shot down for no losses of their own.
The fleet arrived back at Trincomalee on 27 July. (68)
28 Jul 1944
Admiral J.F. Somerville, KCB, KBE, DSO, RN, struck his flag on board HMS Queen Elizabeth (Capt. H.G. Norman, CBE, RN). (69)
6 Aug 1944
The battleship HMS Queen Elizabeth (Capt. H.G. Norman, CBE, RN) departed Trincomalee for Colombo. She is escorted by the destroyers HMAS Nizam (Cdr. C.H. Brooks, RAN), HMS Racehorse (Cdr. J.J. Casement, DSC, RN) and HMS Raider (Lt.Cdr. K.W. Michell, DSC, RN). (70)
7 Aug 1944
HMS Queen Elizabeth (Capt. H.G. Norman, CBE, RN), HMAS Nizam (Cdr. C.H. Brooks, RAN), HMS Racehorse (Cdr. J.J. Casement, DSC, RN) and HMS Raider (Lt.Cdr. K.W. Michell, DSC, RN) arrived at Colombo from Trincomalee. (70)
18 Aug 1944
The battleship HMS Queen Elizabeth (Capt. H.G. Norman, CBE, RN) departed Colombo for Trincomalee. She was escorted by the destroyers HMS Queenborough (Cdr. E.P. Hinton, DSO and Bar, MVO, RN), HMAS Quiberon (Cdr. W.H. Harrington, DSO, RAN) and HrMs Van Galen (Cdr. F.T. Burghard, RNethN). At sea they joined submarine tender HMS Wolfe (A/Capt. J.E. Slaughter, DSO, RN) and the destroyers HMAS Norman (Cdr. H.J. Buchanan DSO, RAN) and HMS Penn (Lt.Cdr. J.H. Swain, DSO, DSC, RN) which were en-route from Bombay to Trincomalee. (70)
19 Aug 1944
Around 1800FG/19, HMS Queen Elizabeth (Capt. H.G. Norman, CBE, RN), HMS Wolfe (A/Capt. J.E. Slaughter, DSO, RN), HMS Queenborough (Cdr. E.P. Hinton, DSO and Bar, MVO, RN), HMAS Quiberon (Cdr. W.H. Harrington, DSO, RAN), HMS Penn (Lt.Cdr. J.H. Swain, DSO, DSC, RN), HMAS Norman (Cdr. H.J. Buchanan DSO, RAN) and HrMs Van Galen (Cdr. F.T. Burghard, RNethN) arrived at Trincomalee from Colombo. (71)
8 Sep 1944
During 8/9 September 1944, HMS Howe (Capt. H.W.U. McCall, DSO, RN), HMS Queen Elizabeth (Capt. H.G. Norman, CBE, RN) and HMS Renown (Capt. B.C.B. Brooke, RN, flying the flag of Vice Admiral A.J. Power, KCB, CVO, RN, second in command of the Eastern Fleet), conducted exercises off Trincomalee. These included night exercises. They were escorted by HMS Quilliam (Capt. R.G. Onslow, DSO and 2 Bars, RN), HMAS Quiberon (Cdr. W.H. Harrington, DSO, RAN), HMS Racehorse (Cdr. J.J. Casement, DSC, RN), HMS Raider (Lt.Cdr. K.W. Michell, DSC, RN), HMS Rapid (Lt.Cdr. M.W. Tomkinson, DSC and Bar, RN), HMS Redoubt (Lt.Cdr. N.E.G. Ropner, DSO, RN), HMS Relentless (Lt.Cdr. R.A. Fell, RN) and HMS Rocket (Lt.Cdr. H.B. Acworth, OBE, RN).
HMAS Quiberon only returned to harbour in the morning of 10 September. (72)
21 Sep 1944
HMS Queen Elizabeth (Capt. H.G. Norman, CBE, RN) departed Trincomalee for Diego Suarez. (73)
28 Sep 1944
HMS Queen Elizabeth (Capt. H.G. Norman, CBE, RN) arrived at Diego Suarez. After fuelling she departed for Durban later the same day. (73)
3 Oct 1944
HMS Queen Elizabeth (Capt. H.G. Norman, CBE, RN) arrived at Durban where she was to refit. (74)
6 Oct 1944
Having completed de-ammunitioning, HMS Queen Elizabeth (Capt. H.G. Norman, CBE, RN), is taken in hand for refit at the Durban Dockyard. (74)
20 Oct 1944
HMS Queen Elizabeth (Capt. H.G. Norman, CBE, RN) is docked at the Durban Dockyard. (74)
10 Nov 1944
HMS Queen Elizabeth (Capt. H.G. Norman, CBE, RN) is undocked. (75)
24 Nov 1944
HMS Queen Elizabeth (Capt. H.G. Norman, CBE, RN) conducted basin trials at the Durban Dockyard. (75)
3 Dec 1944
The battleship HMS Queen Elizabeth (Capt. H.G. Norman, CBE, RN) conducted trials off Durban. During these trials she was escorted by the destroyer HMS Rocket (Lt.Cdr. H.B. Acworth, OBE, RN) and the frigate HMS Test (Lt.Cdr.(Retd.) F.B. Collinson, RD, DSC, RNR). (76)
5 Dec 1944
The battleship HMS Queen Elizabeth (Capt. H.G. Norman, CBE, RN) conducted D/F calibration and manoeuvering trials off Durban. During these trials she was escorted by the destroyers HMS Rotherham (Capt. H.W. Biggs, DSO and Bar, RN), HMS Rocket (Lt.Cdr. H.B. Acworth, OBE, RN) and the frigate HMS Test (Lt.Cdr.(Retd.) F.B. Collinson, RD, DSC, RNR).
On completion of these trials, she and her escorts set course for the Seychelles.
At 1200D/7, HMS Test parted company to return to Durban. (76)
13 Dec 1944
HMS Queen Elizabeth (Capt. H.G. Norman, CBE, RN), HMS Rotherham (Capt. H.W. Biggs, DSO and Bar, RN) and HMS Rocket (Lt.Cdr. H.B. Acworth, OBE, RN) arrived at Port Victoria, Seychelles to fuel.
While there were fuelling the corvette HMS Thyme (T/A/Lt.Cdr. F.E. Eastman, SANF(V)) conducted an A/S patrol off the Bay.
After fuelling the battleships and the two destroyers departed for Trincomalee later the same day. (76)
19 Dec 1944
HMS Queen Elizabeth (Capt. H.G. Norman, CBE, RN), HMS Rotherham (Capt. H.W. Biggs, DSO and Bar, RN) and HMS Rocket (Lt.Cdr. H.B. Acworth, OBE, RN) arrived at Trincomalee. (76)
20 Dec 1944
Vice-Admiral H.C.T. Walker, CB, RN hoisted his flag in HMS Queen Elizabeth (Capt. H.G. Norman, CBE, RN). (76)
3 Jan 1945
From 3 to 5 January 1945, the battleship HMS Queen Elizabeth (Capt. H.G. Norman, CBE, RN) conducted exercises and trials off Trincomalee. She was escorted by the destroyers HMS Rotherham (Capt. H.W. Biggs, DSO and Bar, RN) and HMS Rocket (Lt.Cdr. H.B. Acworth, OBE, RN).
Before the start of the exercises Vice Admiral H.C.T. Walker, CB, RN, temporary transferred his flag to Tyne (Capt. S. Boucher, RN). The flag was transferred back upon HMS Queen Elizabeth returning to harbour. (77)
9 Jan 1945
During 9/10 January 1945, the battleship HMS Queen Elizabeth (Capt. H.G. Norman, CBE, RN) conducted exercises off Trincomalee. During these exercises she was escorted by the destroyers HMS Grenville (Capt. H.P. Henderson, RN) and HMS Wessex (Lt.Cdr. R. Horncastle, RN).
Before the start of the exercises Vice Admiral H.C.T. Walker, CB, RN, temporary transferred his flag to HMS Wayland (A/Capt.(Retd.) W.G.A. Shuttleworth, RN). The flag was transferred back upon HMS Queen Elizabeth returning to harbour. (77)
18 Jan 1945
Operation Matador.
Operation Matador was the assault on Ramree Island.
On 18 January 1945, the escort carrier HMS Ameer (A/Capt. J.H. Lewes, OBE, RN) departed Trincomalee for Ramree Island. She was escorted by the destroyer HMS Raider (Lt.Cdr. J.C. Cartwright, DSC, RN).
Later the same day (around 1515FG/18) the battleship HMS Queen Elizabeth (Capt. H.G. Norman, CBE, RN, flying the flag of Vice Admiral H.C.T. Walker, CB, RN) also departed Trincomalee for the operation. She was escorted by the destroyers HMAS Norman (Cdr. J. Plunkett-Cole, RAN) and HMS Pathfinder (Lt.Cdr. T.F. Hallifax, RN). They were first to proceed to Akyab where they arrived on the 20th (around 1530FG/20).
On the 18th the sloop HMS Redpole (Lt.Cdr. E.J. Lee, RN) and frigate HMS Spey (T/Lt.Cdr. A. Harrison, RNR) departed Vizagapatam for the operation.
On 20 January the frigate HMS Teviot (Cdr.(Retd.) T. Taylor, DSC, RN) departed Vizagapatam to relieve HMS Redpole.
The landing took place on 21 January. Naval support was provided by the battleship HMS Queen Elizabeth, escort carrier HMS Ameer, light cruiser HMS Phoebe (Capt. S.M. Raw, CBE, RN), destroyers HMAS Napier (Capt. H.J. Buchanan, DSO, RAN), HMAS Norman, HMS Pathfinder, HMS Raider, HMS Rapid (Lt.Cdr. M.W. Tomkinson, DSC and Bar, RN), sloops HMS Flamingo (Lt.Cdr. T.H.B. Pounds, RN), HMS Redpole, HMIS Kistna (A/Cdr. S.G. Karmarkar, RINR) and the frigates HMS Spey and later also HMS Teviot. Some of these ships had already been operating off the coast of Burma.
During the morning of 21 January, bombardments were carried out by the warships and air strikes were carried out by aircraft of HMS Ameer.
With her job done, HMS Queen Elizabeth departed the area for Trincomalee in the afternoon of the 21st. She was escorted by HMAS Napier and HMS Redpole. The other ships remained in the area to support the army if called upon and also for upcoming operations.
HMS Queen Elizabeth and HMAS Napier arrived at Trincomalee on 24 January. HMS Redpole did not enter and went on to Colombo. HMAS Napier also left Trincomalee for Colombo later on the 24th.
The other ships had returned ot Akyab. (78)
12 Feb 1945
The flag of Vice Admiral H.C.T. Walker, CB, RN, was transferred from HMS Queen Elizabeth (Capt. H.G. Norman, CBE, RN) to HMS Empress (Capt. H.A. Traill, OBE, RN).
HMS Queen Elizabeth then departed Trincomalee around 1530FG/12 for Colombo. She was escorted by HMS Roebuck (Cdr. J.T. Lean, DSO, RN) and HMS Rapid (Lt.Cdr. M.W. Tomkinson, DSC and Bar, RN).
At 1615FG/13, HMS Queen Elizabeth entered Colombo harbour, the destroyers having parted company off the harbour entrance to return to Trincomalee.
(79)
26 Feb 1945
Around 1130FG/26, HMS Queen Elizabeth (Capt. H.G. Norman, CBE, RN) departed Colombo for Trincomalee. She was being escorted by HMAS Nepal (Lt.Cdr. C.J. Stephenson, RAN).
They arrived at Trincomalee around 1030FG/27. (79)
27 Feb 1945
During 27/28 February 1945, HMS Queen Elizabeth (Capt. H.G. Norman, CBE, RN) and HMS Saumarez (Capt. M.L. Power, CBE, DSO, RN) conducted exercises off Trincomalee. (79)
7 Mar 1945
The flag of Vice Admiral H.C.T. Walker, CB, RN, was transferred from HMS Empress (Capt. H.A. Traill, OBE, RN) to HMS Queen Elizabeth (Capt. H.G. Norman, CBE, RN). (80)
15 Mar 1945
During 15/16 March 1945, HMS Queen Elizabeth (Capt. H.G. Norman, CBE, RN, flying the flag of Vice Admiral H.C.T. Walker, CB, RN) and HMS Renown (Capt. B.C.B. Brooke, RN) conducted exercises off Trincomalee. The destroyers HMS Rotherham (Capt. H.W. Biggs, DSO and Bar, RN), HMS Paladin (Lt. R.J.R. Cundall, RN) and HMS Vigilant (Lt.Cdr. L.W.L. Argles, RN) also participated in (part of) these exercises. (81)
27 Mar 1945
HMS Queen Elizabeth (Capt. H.G. Norman, CBE, RN) conducted exercises off Trincomalee. (82)
8 Apr 1945
Operation Sunfish.
Photographic reconnaissance of the west coast of Sumatra and air attacks on northern Sumatra.
On 8 April 1945, ' Force 63 ' made up of the battleships HMS Queen Elizabeth (Capt. R.M. Ellis, DSO, RN, flying the flag of Vice Admiral H.C.T. Walker, CB, RN), Richelieu (Capt. G.M.J. Merveilleux du Vignaux), escort carriers HMS Emperor (A/Capt. C. Madden, RN, flying the flag of Rear-Admiral W.R. Patterson, CB, CVO, RN), HMS Khedive (A/Capt. D.H. Magnay, RN), heavy cruisers HMS Cumberland (Capt. P.K. Enright, RN), HMS London (Capt. S.L. Bateson, RN) and the destroyers HMS Saumarez (Capt. M.L. Power, CBE, DSO and Bar, RN), HMS Venus (Cdr. H.G.D. De Chair, DSC with Bar, RN), HMS Verulam (Lt.Cdr. D.H.R. Bromley, DSC, RN), HMS Vigilant (Lt.Cdr. L.W.L. Argles, DSC, RN) and HMS Virago (Lt.Cdr. A.J.R. White, DSC, RN) departed Trincomalee.
The original intention was to carry out the planned photographic reconnaissance, beginning on 12th April from a flying off position west of Padang. Anti-shipping strikes would follow later.
This programme unfortunately had to be re-cast when HMS Emperor's catapult broke down, necessitating the postponement of the photographic reconnaissance for two days.
Accordingly, on 11 April 1945, HMS Queen Elizabeth, Richelieu and HMS London bombarded Sabang, while HMS Saumarez HMS Verulam and HMS Vigilant bombarded Ulee Lhoe. No shipping was present at Sabang, but the destroyers damaged a small coaster, which was already beached.
' Force 63 ' was subsequently attacked by a force of ten enemy aircraft, two of which were shot down by the Combat Air Patrol.
On 12 April 1945, ships from ' Force 63 ' refuelled from ' Force 70 ' (RFA tanker Easedale (8032 GRT, built 1942) escorted by the frigate HMS Lossie (Lt.Cdr. A.F. MacFie, OBE, RNR)) and HMS London was detached to proceed to Simonstown, South Africa where it had been arranged for her to refit. She was first to return to Trincomalee though.
' Force 63 ' then proceeded to operate off the west coast of Sumatra, and photographic reconnaissance was carried out as planned on 14th and 15th April with almost complete success. One of our aircraft was lost. One enemy aircraft was shot down by the Combat Air Patrol.
An air strike was made on Emmahaven on 16 April, hits being scored on a 4000 ton merchant ship and workshops in the harbour. Our fighters shot down one more enemy aircraft and three were claimed to have been damaged on the ground. Destroyers HMS Venus and HMS Virago, meanwhile made a sweep between the outlying islands and the mainland, from Ayerbangis Bay to Natal Road. A total of six junks were sunk.
' Force 63 ' arrived back in Ceylon, either at Trincomalee or Colombo on 20 April 1945. (83)
27 Apr 1945
Operation Bishop.
Carrier raid and surface bombardment of Car Nicobar and Port Blair and to provide cover for Operation Dracula which are amphibious landings off Rangoon, Burma.
On 27 April 1945 ships from the Eastern Fleet put to sea from Trincomalee, Ceylon for operation Bishop. These ships formed Task ' Force 63 '. This task force was, at that moment, made up of the following ships: battleships HMS Queen Elizabeth (Capt. R.M. Ellis, DSO, RN, flying the flag of Vice Admiral H.C.T. Walker, CB, RN), Richelieu (Capt. G.M.J. Merveilleux du Vignaux), escort carriers HMS Shah (Capt. W.J. Yendell, RN), HMS Empress (Capt. J.R.S. Brown, RN), heavy cruisers HMS Cumberland (Capt. P.K. Enright, RN, flying the flag of Rear-Admiral W.R. Patterson, CB, CVO, RN), HMS Suffolk (Capt. D. Gilmour, RN), light cruisers HMS Ceylon (Capt. G.B. Amery-Parkes, RN), HrMs Tromp (A/Capt. F. Stam, RNN) and the destroyers HMS Rotherham (Capt. H.W. Biggs, DSO and Bar, RN), HMS Tartar (Capt. B. Jones, DSO and Bar, DSC, RN) and HMS Penn (Lt.Cdr. A.H. Diack, DSC and Bar, RN). Two more destroyers were sent out to join this task force later; HMS Nubian (Lt.Cdr. F.C. Brodrick, RN) and HMS Verulam (Lt.Cdr. D.H.R. Bromley, DSC, RN). These two destroyers actually joined on the 29th.
An oiling force (Task Force 69), made up of the Royal Fleet Auxiliary tankers Olwen (6470 GRT, built 1917) and Easedale (8032 GRT, built 1942) escorted by the destroyer HMS Paladin (Lt. H.R. Hewlett, RN) had departed Trinomalee on the 26th. HrMs Tromp and the destroyers were fuelled from this force on the 29th.
At dawn on the 30th air attacks were carried out against Car Nicobar followed by a bombardment of the airfields At 0600/30, HMS Queen Elizabeth and HMS Cumberland opened fire on the southern and northern airfields respectively from a range of 18000 yards Both ships soon found the range and it was not possible for any aircraft to take off after the bombardment. HMS Suffolk and HMS Ceylon then bombarded enemy AA positions. Shortly after sunrise around 0700 hours the destroyers HMS Rotherham, HMS Nubian and HMS Verulam started to bombard the settlement of Malacca. Soon afterwards a large fire, thought to be petrol, was seen near the jetty and another on one the southern airfield. At 0710 hours cease fire was ordered and a fighter strike was then commenced. They dropped bombs on and then strafed the airfields. At 0735 hours, after the fighter strike was over, the battleshios HMS Queen Elizabeth and Richelieu opened fire to crater the runways. They continued to fire on the runways until 0805 and 0809 respectively. Capt. (D) 11th destroyer flotilla on board HMS Rotherham meanwhile reported that the jetty at Malacca had been severly damaged and that two steam coasters and five small vessels had been destroyed.
At 1530/30, Richelieu, HMS Cumberland and HMS Rotherham were sent ahead to bombard Port Blair while on a northerly course. At 1730 hours Richelieu opened fire on the southern airfield and Cumberland on a coastal battery. Both firings were spotted by Hellcat fighters from the escort carriers. Later HMS Rotherham also engaged coastal batteries but from a closer range. Around 1835 hours these ships completed their bombardment but then HMS Queen Elizabeth, HMS Suffolk, HrMs Tromp, HMS Tartar and HMS Penn took over. Queen Elizabeth engaged the airfields while Suffolk worked over the marine yards with the same aircraft that had spotted for Richelieu and Cumberland. The other three ships engaged shore batteries. By the time the bombardment ceased after about 40 minutes the airfields were well cratered and hits were obtained on a lot of other targets. After the bombardment HrMs Tromp reported that she had seven wounded, two seriously (they both died later) from two near misses, at least that was thought at that moment. Later investigation however showed that the explosion was caused by American manufactured defective ammunition and not by enemy fire. Both bombarding forces then retired to the south an re-joined the escort carriers which had provided them with fighter cover during their bombardments.
During the night all ships proceeded southwards so as to bombard Car Nicobar a second time at dawn. At 0720/1 HMS Queen Elizabeth and HMS Suffolk opened fire on their target. After cratering the northern airfield Queen Elizabeth shifted target to the southern airfield at 0741 hours and carried out yet another effective shoot. At 0755 hours both ships ceased fire. HMS Cumberland and HMS Ceylon then took over. The French battleship Richelieu however did not participate in the bombardment this time as she had already expended her ammunition allowance. Cumberland enganged targets at/near the northern airfield and HMS Ceylon did the same working over the southern airfield. HMS Tartar was sent ahead to bombard the jetty at and targets in the village of Malacca. At 0915 hours all ships were again in one force and course was set to the north to conduct another bombardment of Port Blair but this time approaching from the north.
At 0800/2 HMS Queen Elizabeth opened fire on the runways of the airports and HMS Suffolk on coastal batteries. Again considerable damage was done to the airports and also a large petrol fire was started at one of them. At 0845 hours Richelieu (firing 6” from her secondary armament at the marine jetty) and HMS Cumberland took over. HMS Rotherham was ordered to take out an AA battery that was firing at the spotter aircraft and in this she succeded.
In the afternoon a signal was received that the landing off Rangoon had been successful and without opposition. The force now retired to the north-east for her cover position during operation Dracula.
On 4 May rendes-vous was again made with the oiling force and all ships were fueled by the Olwen. HMS Penn then remained with the Olwen while HMS Paladin joined Task Force 64.
On 6 May bombardments and air strikes were again carried out in the Port Blair area. As of 0700/6 HMS Empress started to launch fourteen Hellcats while HMS Shah launched eight Avengers and four Hellcats. At 0800 hours, HMS Queen Elizabeth, HMS Suffolk, HrMs Tromp and HMS Paladin opened fire on AA and coastal batteries in the vicinity of Phoenix Harbour, Hopetown Island and Ross Island in order to neutralise these defences for the air strike. At 0814 hours the air strike leaded ordered cease fire and a few minutes later the aircraft started attacking shipping inside Port Blair harbour. One aircraft was hit by enemy AA fire and failed to return to it’s carrier. HMS Tartar made a search for it but was unable to locate the aircraft or it’s pilot.
At 1730/6 HMS Queen Elizabeth bombarded a 6” gun known to be at Stewart Sound. The bombardment was completed at 1809 hours. HMS Suffolk meanwhile bombarded a pillbox on Sound Island with her 4” armament and appeared to have set the target on fire.
On 7 May another air attack was made on Car Nicobar by the carriers with a total of 10 Hellcats. With this air attack over course was set to return to Trincomalee.
A part of Task Force 63 returned to Trincomalee on 7 May, these were Richelieu, HMS Cumberland, HMS Ceylon, most likely escorted by HMS Rotherham, HMS Verulam and HMS Penn.
The other ships returned on 9 May. (84)
10 May 1945
Operation Dukedom.
Intercepting Japanese surface ships trying to evacuate troops from the Andaman Islands.
On 8 May 1945 a report was received from two British submarines on patrol in the Malacca Strait (HMS Statesman (Lt. R.G.P. Bulkeley, RN) and HMS Subtle (Lt. B.J.B. Andrew, DSC, RN) that they had sighted a Japanese heavy cruiser and a destroyer proceeding to the north-west. The Eastern Fleet was already on alert due to intelligence and ships from the Eastern Fleet immediately (around 0700 hours) put to sea from Trincomalee, Ceylon for operation Dukedom. These ships formed Task Force 61. This task force was, at that moment, made up of the following ships; British battleship HMS Queen Elizabeth (Capt. R.M. Ellis, DSO, RN, flying the flag of Vice Admiral H.C.T. Walker, CB, RN), the French battleship Richelieu (Capt. G.M.J. Merveilleux du Vignaux), the British escort carriers HMS Hunter (Capt. A.D. Torlesse, RN), HMS Khedive (A/Capt. D.H. Magnay, RN), HMS Shah (Capt. W.J. Yendell, RN), HMS Emperor (Capt. Sir C. Madden, RN), the British heavy cruiser HMS Cumberland (Capt. P.K. Enright, RN, flying the flag of Rear-Admiral W.R. Patterson, CB, CVO, RN), the British light cruiser HMS Royalist (Capt. W.G. Brittain, CBE, RN, flying the flag of Commodore G.N. Oliver, CB, DSO and 2 Bars, RN), the Dutch light cruiser HrMs Tromp (A/Capt. F. Stam, RNN) and the British destroyers HMS Saumarez (Capt. M.L. Power, CBE, DSO and Bar, RN), HMS Venus (Cdr. H.G.D. De Chair, DSC with Bar, RN), HMS Vigilant (Lt.Cdr. L.W.L. Argles, DSC, RN), HMS Virago (Lt.Cdr. A.J.R. White, DSC, RN), HMS Rotherham (Capt. H.W. Biggs, DSO and Bar, RN), HMS Nubian (Lt.Cdr. F.C. Brodrick, RN) and HMS Penn (Lt.Cdr. A.H. Diack, DSC and Bar, RN). This latter destroyer however had to return due to defects.
The British destroyer HMS Verulam (Lt.Cdr. D.H.R. Bromley, DSC, RN) sailed at 1700 hours to overtake and then join the Task Force. She was joined by HMS Tartar (Capt. B. Jones, DSO and Bar, DSC, RN) as substitute for HMS Penn whose defects could not be repaired in time. HMS Verulam and HMS Tartar eventually joined the Task Force at 1505FG/11.
Most ships of the Task Force had only returned from the previous operation the day before and for instance HMS Queen Elizabeth had only 50% ammunition for her 15” guns on board. Also HMS Emperor and HMS Khedive were not fully fueled.
The same day the tanker Easedale (8032 GRT, built 1942) departed Trincomalee escorted by the British destroyer HMS Paladin (Lt. H.R. Hewlett, RN) (Force 70) to provide fuel for the smaller ships of Force 61.
At 1940FG/11 a fast attack force, made up of Richelieu, HMS Cumberland and the destroyer of the 26th Destroyer Flotilla; HMS Saumarez, HMS Venus, HMS Verlulam, HMS Viliglant and HMS Virago were ordered to proceed ahead to about 50 miles from the Task Force to be in a better position to intercept the reported Japanese heavy cruiser.
In the early afternoon of the 12th an air strike with four Hellcats was carried out against airfields on Car Nicobar Island. One Japanese aircraft was seen to go up in flames.
Also on the 12th submarine HMS Statesman reported that the Japanese cruiser and it's escort were returning to Singapore most likely to Force 61 being sighted the previous day by a Japanese aircraft.
During the 13th all destroyers of the Task Force fueled from HMS Emperor, HMS Hunter and HMS Shah. Besides that Task Force 62 was sent out from Trincomalee. This Task Force was made up of the British light cruiser HMS Nigeria (Capt. H.A. King, DSO, RN) and the British destroyers HMS Roebuck (Cdr. C.D. Bonham-Carter, RN), HMS Racehorse (Cdr. J.J. Casement, DSC, RN), HMS Redoubt (Lt.Cdr. F.W.M. Carter, DSC, RN) and HMS Rocket (Lt.Cdr. H.B. Acworth, OBE, RN), which was escorting a convoy, was ordered to leave her convoy and then join this Task Force. Also sailed was Task Force 67, made up of Royal Fleet Auxiliary oiler Olwen escorted by HMS Penn, which by now had completed repairs on her defects.
On the 14th HrMs Tromp was sent ahead to fuel from Task Force 70. Late in the evening the remainder of Task Force 61 arrived at the rendez-vous with Task Force 70.
On the 15th the enemy cruiser and destroyer were sighted by an aircraft from HMS Shah. They were again proceeding to the south-east. Shortly afterwards the enemy was also sighted by a patrolling Liberator aircraft which began shadowing the enemy. At 1500 hours three Avenger aircraft attacked the cruiser.
The 26th destroyer flottila, made up of HMS Saumarez, HMS Venus, HMS Verulam, HMS Vigilant and HMS Vigaro were ordered to intercept the enemy after dark. At 1500 hours they were 85 miles from the position of the enemy.
Around midnight the destroyers made radar contact on the cruiser. They then attacked from all directions with torpedoes. About eight hits were scored and the cruiser was sunk. During the attack HMS Saumarez was hit three times with 8" shells. Two ratings were killed on one boiler room was put out of action. The destroyers rejoined the task force at 1000/16. HMS Virago had only 17% fuel left, the other destroyers between that and 30%. HMS Virago and HMS Venus had to fuel from the escort carriers as they could not make it to the oiling force without doing so.
In the evening of the 16th the Task Force was attacked by Japanese aircraft. HMS Virago was near missed and suffered four ratings killed, five ratings severely wounded and thirteen other casualties. She was also listing slightly due to splinter damage.
At 1000/17 the following ships were detached to return to Trincomalee; Richelieu, HMS Nigeria, HMS Royalist, HrMs Tromp, HMS Khedive, HMS Shah and HMS Racehorce. They arrived at Trincomalee on the 18th, minus HMS Khedive and HMS Shah which went on to Colombo where they arrived on the 19th.
1740 hours, the 26th Destroyer Flotilla was also detached to return to Trincomalee where they arrived late in the afternoon on the 18th. By this time all the destroyers of this flotilla had fueled from Force 70.
The remaining ships were ordered to return to Trincomalee at 2130/19. They arrived back at Trincomalee on 21 May. (85)
7 Jun 1945
During 7/8 June 1945, the battleship HMS Queen Elizabeth (Capt. R.M. Ellis, DSO, RN, flying the flag of Vice-Admiral H.C.T. Walker, CB, RN) and the destroyers HMS Racehorse (Cdr. J.J. Casement, DSC, RN), HMS Relentless (Lt.Cdr. G.B. Barstow, RN) and HMS Verulam (Lt.Cdr. D.H.R. Bromley, DSC, RN) conducted exercises off Trincomalee. (86)
20 Jun 1945
During 20/21 June 1945, the battleship HMS Queen Elizabeth (Capt. R.M. Ellis, DSO, RN, flying the flag of Vice-Admiral H.C.T. Walker, CB, RN) conducted exercises off Trincomalee.
During part of the exercises on the 20th the destroyers HMS Tyrian (Cdr. R.H. Mills, RN) and HMS Tuscan (Lt.Cdr. P.B.N. Lewis, DSC, RN) and the escort destroyer HMS Blackmore (Lt. J.S. Kerans, RN) were with her.
During the afternoon of the 20th, HMS Queen Elizabeth conducted a RIX (range and inclination exercise) during which HMS Nigeria (Capt. H.A. King, DSO, RN) served as target. (86)
5 Jul 1945
During 5/6 July 1945, exercises were carried out off Trincomalee by ships of the Eastern Fleet. Ships participating were the battleships HMS Queen Elizabeth (Capt. R.M. Ellis, DSO, RN, flying the flag of Vice-Admiral H.C.T. Walker, CB, RN), Richelieu (Capt. G.M.J. Merveilleux du Vignaux), escort carrier HMS Shah (Capt. W.J. Yendell, RN), heavy cruiser HMS Cumberland (Capt. P.K. Enright, RN), light cruiser HMS Phoebe (Capt. S.M. Raw, CBE, RN), destroyers HMS Rotherham (Capt. H.W. Biggs, DSO and Bar, RN), HMS Racehorse (Cdr. J.J. Casement, DSC, RN), HMS Raider (Lt.Cdr. J.C. Cartwright, DSC, RN), HMS Rocket (Lt.Cdr. H.B. Acworth, OBE, RN), HMS Paladin (Lt. H.R. Hewlett, RN), HMS Penn (Lt.Cdr. A.H. Diack, DSC, RN), HMS Nubian (Lt.Cdr. F.C. Brodrick, RN) and the escort destroyer HMS Blackmore (Lt. J.S. Kerans, RN). (87)
12 Jul 1945
At Trincomalee, Vice-Admiral H.C.T. Walker, CB, RN, struck his flag in HMS Queen Elizabeth (Capt. R.M. Ellis, DSO, RN) and then hoised it in HMS Nelson (Capt. C. Caslon, CBE, RN). (88)
14 Jul 1945
HMS Queen Elizabeth (Capt. R.M. Ellis, DSO, RN) departed Trincomalee for Colombo.
HMS Queen Elizabeth is to return to the U.K. to join the Home Fleet. (89)
17 Jul 1945
HMS Queen Elizabeth (Capt. R.M. Ellis, DSO, RN) departed Colombo for Aden. (90)
23 Jul 1945
HMS Queen Elizabeth (Capt. R.M. Ellis, DSO, RN) made a short stop at Aden to fuel. Having completed doing so she departed for Suez later the same day. (90)
26 Jul 1945
HMS Queen Elizabeth (Capt. R.M. Ellis, DSO, RN) arrived at Suez. (90)
27 Jul 1945
HMS Queen Elizabeth (Capt. R.M. Ellis, DSO, RN) entered the Suez Canal and passed it partly until she anchored in Lake Timsah. (90)
28 Jul 1945
HMS Queen Elizabeth (Capt. R.M. Ellis, DSO, RN) continued her northbound passage of the Suez Canal as she proceed from Lake Timsah to Port Said. (90)
29 Jul 1945
HMS Queen Elizabeth (Capt. R.M. Ellis, DSO, RN) departed Port Said for Malta. (90)
31 Jul 1945
HMS Queen Elizabeth (Capt. R.M. Ellis, DSO, RN) made a short stopover at Malta. She departed for Gibraltar later the same day. (90)
3 Aug 1945
HMS Queen Elizabeth (Capt. R.M. Ellis, DSO, RN) arrived at Gibraltar. (91)
4 Aug 1945
HMS Queen Elizabeth (Capt. R.M. Ellis, DSO, RN) departed Gibraltar for Plymouth. (91)
7 Aug 1945
HMS Queen Elizabeth (Capt. R.M. Ellis, DSO, RN) arrived at Plymouth. She departed for Rosyth, by a route through the Irish sea and around the North of Scotland, later the same day. (91)
10 Aug 1945
HMS Queen Elizabeth (Capt. R.M. Ellis, DSO, RN) arrived at Rosyth. (91)
13 Aug 1945
On board HMS Queen Elizabeth (Capt. R.M. Ellis, DSO, RN) work was started to prepare the ship to be put into reserve ' Category B '. (91)
13 Aug 1945
On board HMS Queen Elizabeth (Capt. R.M. Ellis, DSO, RN) work was started to prepare the ship to be put into reserve ' Category B '.
She remained at Rosyth until 30 November. The time from 9 to 30 November she spent in No.2 Dock at the Rosyth Dockyard. (92)
Media links
|
|
|
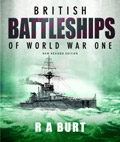
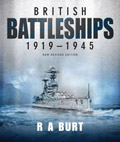


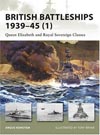

Sources
- ADM 53/113015
- ADM 53/114905
- ADM 53/114906
- ADM 53/114906 + ADM 199/396 + ADM 199/399
- ADM 53/114576 + ADM 53/114906 + Report of proceedings of HMAS Nizam
- ADM 53/114907
- ADM 53/114760 + ADM 53/114907
- ADM 53/114503
- ADM 53/114908 + ADM 199/396 + ADM 199/399
- ADM 53/114908
- ADM 53/114908 + ADM 199/394 + ADM 199/1810
- ADM 199/414 + ADM 199/656
- ADM 53/114823 + ADM 53/114909 + ADM 199/414
- ADM 199/414
- ADM 199/414 + 234/320
- ADM 199/415
- ADM 53/114754 + ADM 53/115214
- ADM 53/115214 + ADM 199/415
- ADM 53/115216 + ADM 199/415
- ADM 1/12257 + ADM 199/415
- ADM 53/116466
- ADM 53/115910 + ADM 53/116468 + ADM 199/650
- ADM 53/115468 + ADM 116469
- ADM 53/116469
- ADM 53/116470
- ADM 199/653
- ADM 53/116470 + ADM 53/116471
- ADM 53/116471
- ADM 53/116473
- ADM 53/118381
- ADM 53/118383
- ADM 53/118384
- ADM 53/118365 + ADM 53/118384
- ADM 53/118365 + ADM 53/118384 + Deck log of USS Harrison for June 1943
- ADM 53/118365 + ADM 53/118366 + ADM 53/118384 + ADM 53/118385
- ADM 53/118385
- ADM 53/118386
- ADM 53/119386
- ADM 199/766 + logbook of USS Augusta for Sep. 1943
- ADM 53/118387
- ADM 53/118387 + ADM 173/18312
- ADM 53/118388
- ADM 53/117056 + ADM 53/118388 + ADM 173/18397
- ADM 53/118389 + ADM 53/118436
- ADM 53/118389
- ADM 53/118390
- ADM 53/118390 + ADM 53/118679
- ADM 53/117663 + ADM 53/118390 + ADM 53/118437 + ADM 53/118667 + ADM 53/118679
- ADM 53/119575 + ADM 53/120303 + ADM 53/120374 + ADM 53/120663 + ADM 53/120675 + ADM 199/2494
- ADM 53/119575 + ADM 53/120303 + ADM 53/120374 + ADM 53/120663 + ADM 53/120675
- ADM 53/119575+ ADM 53/120303 + ADM 53/120374 + ADM 53/120663 + ADM 53/120675
- ADM 53/120303 + ADM 53/120374 + ADM 53/120675
- ADM 53/119328 + ADM 53/119575 + ADM 53/120303 + ADM 53/120374 + ADM 53/120675
- ADM 53/119575 + ADM 53/120303 + ADM 53/120675
- ADM 53/120304 + ADM 53/120676
- ADM 199/1388
- ADM 53/120305 + ADM 199/1388
- Files 2.12.03.6853, 2.12.27.121 (Dutch Archives, The Hague, Netherlands) and ADM 199/1388
- ADM 53/119171 + ADM 53/119801 + ADM 53/120306 + ADM 53/120377
- ADM 53/120306
- Files 2.12.03.6853 and 2.12.27.121 (Dutch Archives, The Hague, Netherlands) and WO 203 / 4621 (British National Archives, Kew, London)
- ADM 53/120307
- ADM 53/120307 + ADM 199/1388
- Files 2.12.03.6853 and 2.12.27.121 (Dutch Archives, The Hague, Netherlands) and WO 203 / 4767 (British National Archives, Kew, London)
- ADM 53/120308 + ADM 199/1388
- ADM 53/120309 + ADM 53/120681
- ADM 53/120380
- Files 2.12.03.6854 and 2.12.27.121 (Dutch Archives, The Hague, Netherlands) and WO 203 / 4622 (British National Archives, Kew, London)
- ADM 53/120309
- ADM 53/120310 + ADM 199/1388
- ADM 53/120310 + ADM 53/120758 + ADM 199/1388
- ADM 53/120382
- ADM 53/120311
- ADM 53/120312
- ADM 53/120313
- ADM 53/120314
- ADM 53/122068
- ADM 53/120821 + ADM 53/121978 + ADM 53/122068 + ADM 199/1457
- ADM 53/122069
- ADM 53/121329 + ADM 53/122070
- ADM 53/122125
- ADM 53/122070
- ADM 199/1457
- Files 2.12.03.6854 and 2.12.27.121 (Dutch Archives, The Hague, Netherlands) and WO 203 / 4778 and ADM 199 / 193 (British National Archives, Kew, London)
- Files 2.12.03.6854 and 2.12.27.121 (Dutch Archives, The Hague, Netherlands) and WO 203 / 4630 (British National Archives, Kew, London)
- ADM 53/122073
- ADM 53/121153 + ADM 53/121984 + ADM 53/122074 + ADM 53/122224
- ADM 53/121887 + ADM 53/122074
- ADM 53/122074 + ADM 199/2567
- ADM 53/122074
- ADM 53/122075
- ADM 53/122075 + ADM 199/2567
ADM numbers indicate documents at the British National Archives at Kew, London.
As an Amazon Associate uboat.net earns a commission from qualifying purchases.